🇳🇿 New Zealand's Home Improvement Magazine Sponsored by NZ Homeware — Premium Bathroom & Kitchen →
The New Zealand Renovation Report  Understanding Change, Cost and Long-Term Value
Free E-Book
The New Zealand Renovation Report Understanding Change, Cost and Long-Term Value
Read Online ↓ Download PDF

The State of New Zealand Homes – Why New Zealand Renovation Is Different

The Homes We Inherited

The Homes We Inherited

Every renovation in New Zealand begins not with a blank canvas but with a story already written in native timber, corrugated iron, and, too often, in silence about what lies beneath the surface. The homes we’ve inherited are a physical diary of our social and economic history — from the kauri villas of the late 19th century to the modest state houses of the 1940s, the sprawling brick-and-tile suburban boxes of the 1970s, and the monolithic-clad dwellings that still haunt the leaky-building era. Understanding this inheritance is not just nostalgia; it is the essential first step in renovating with confidence. Without that understanding, even a well-funded project can stumble into avoidable cost and long-term regret.

A beautiful red brick villa surrounded by lush greenery and architectural details.

New Zealand’s housing stock is often described as cold, damp, and energy-inefficient — and the data backs this up. The 2018 Census showed that over 600,000 homes were built before 1978, meaning they predate any meaningful insulation requirements. BRANZ research regularly identifies a third of our homes as having visible mould, and the World Health Organization’s housing guidelines are rarely met by a large proportion of our pre-2000s buildings. But the numbers only tell part of the tale. What makes renovation here genuinely different is the collision between those inherited structures and modern expectations of comfort, health, and performance. A 1920s bungalow may be adored for its timber joinery and high ceilings, but it was designed for an age of open fires, single-glazed windows, and passive drying by draught — not for sealed, insulated, thermally efficient living. Renovation becomes a delicate negotiation between preservation and transformation.

The typology of what we’ve inherited is astonishingly varied:

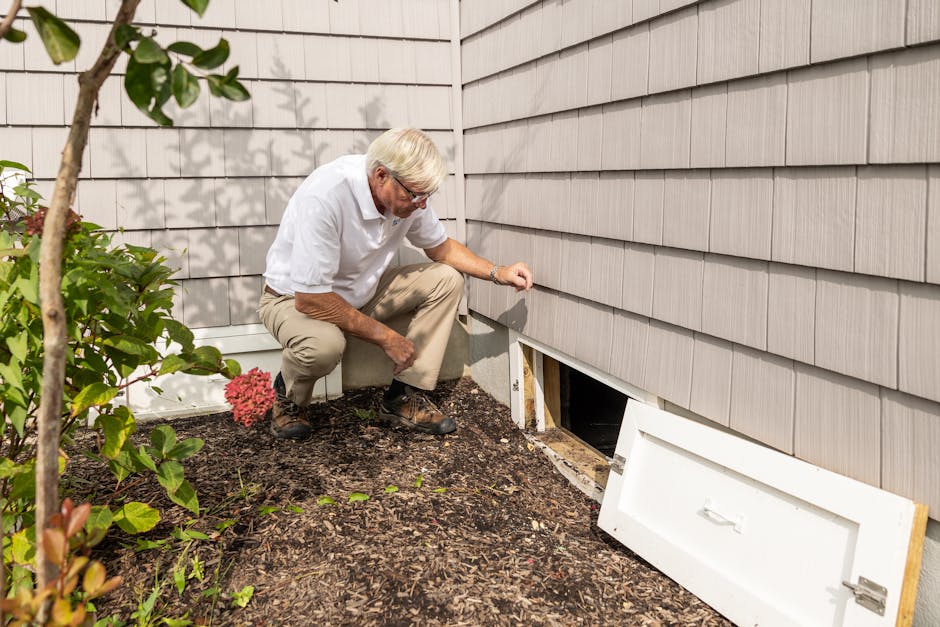
  • The pre-1910 villa and cottage: Typically timber-framed on piles, ornate weatherboards, high stud, rimu floors. Their charm is undeniable, yet they often conceal borer damage, undersized foundations, and lead-based paints. In cities like Auckland, whole suburbs of these villas are now undergoing a second or third renewal — lessons from those projects reveal a recurring theme: failing to investigate the subfloor before extending upwards can double the budget overnight.

  • State houses and the 1930s–1950s bungalow: Solidly built but with concrete block or timber framing that was rarely insulated. Many were retrofitted decades later with piecemeal solutions — pink batts stuffed into wall cavities without vapour barriers — creating trapped moisture problems that slowly rot framing from within.

  • The post-war boom and the 1960s–1980s “spec” home: Often on sloping sections (especially in Wellington), with suspended timber floors, monolithic cladding such as stucco, and low-pitched roofs. These homes gave us the classic Kiwi split-level, but they also brought poor site drainage, inadequate bracing by modern standards, and a proliferation of aluminium joinery without thermal breaks — a recipe for cold, condensation, and long-term maintenance headaches.

  • Leaky homes (late 1980s to mid-2000s): A legacy of untreated timber framing, monolithic cladding systems, and complex Mediterranean-inspired designs unsuited to a marine climate. The Weathertight Homes Resolution Service recorded over 10,000 claims, but the full extent is far wider. Renovating these properties isn’t just a matter of recladding; it often requires structural rebuilding, a complete rethinking of roof/wall junctions, and a hard look at whether the original design can ever be made durable.
Low angle shot of green metal staircase and windowed building exterior with industrial vibe.

On Wellington’s hillsides, for example, a seemingly straightforward bathroom upgrade can unearth a cascade of issues: the foundations need repiling because the 1960s concrete piles have spalled; the rotten bottom plate means opening up an entire wall; and accessing the site requires a specialist crane, not a standard hiab. One project on Aro Street, initially budgeted at $90,000 for a kitchen and living area refresh, became a $340,000 structural remediation when the builders exposed 70 years of deferred maintenance hidden behind gib board — and that’s before the owners even considered their long-term aspiration for a code-compliant, warm envelope. Stories like this are not rare; they are the common thread in renovation conversations across the country.

Christchurch added its own tragic chapter. The Canterbury earthquakes didn’t just damage thousands of homes; they exposed how older construction techniques — unreinforced masonry, poorly tied roof framing, shallow footings — behaved under lateral loads. Many repair and rebuild projects became defacto whole-of-house upgrades, prompting owners to ask, “If we have to strip the linings and reclad, shouldn’t we also improve insulation, heating, and ventilation in one go?” This holistic thinking is now influencing renovation philosophy nationwide. As the NZHomeware editorial studio regularly observes, the most successful renovations are those where the homeowners view the inherited home as a system, not just a collection of rooms to be updated.
Detailed view of a cracked concrete surface with unique textures and patterns.

What we inherit, then, is far more than floorboards and framing. It’s a set of design assumptions that are no longer valid, a construction methodology often lacking documentation, and a maintenance history that may have been neglected for decades. The task for today’s renovator is not to fight that inheritance, but to clearly see it: to commission a full building survey before drawing the first sketch, to test for asbestos and moisture, and to accept that the most expensive phrase in renovation is often “I didn’t expect that.” The homes we inherited demand respect — and, when approached with curiosity and rigour, they reward us with a depth of character and a potential for long-term value that no new build can easily replicate.

A Legacy of Weathertightness and Structural Concerns

A Legacy of Weathertightness and Structural Concerns

To renovate a New Zealand home with confidence, you must first understand the construction era it was born into. Much of our housing stock carries the physical memory of regulatory gaps, material experimentation, and geographic pressures that still shape renovation scopes today. These aren’t abstract historical notes — they directly dictate the hidden conditions you’ll uncover once walls are opened, and they explain why so many Kiwi renovations become structural and weathertightness remediation projects before a single design improvement is made.

The most infamous chapter is the leaky building crisis, which dominated construction between the early 1990s and mid-2000s. In a push for Mediterranean-style aesthetics and cost-efficient timber framing, untreated kiln-dried radiata pine was paired with monolithic cladding systems — textured fibre-cement sheets, EIFS (Exterior Insulation and Finish Systems) and hardboard — on complex, multi-storey designs often lacking adequate eaves. When combined with poor flashing detailing and the absence of a drained cavity, these walls trapped moisture. The result is now well documented: concealed rot, toxic mould, and structural decay requiring complete reclads. While the worst-affected homes are concentrated in Auckland, particularly in suburbs that boomed during that period, the legacy spans the country. The Ministry of Business, Innovation and Employment estimates over 40,000 dwellings were affected, with some repairs exceeding $300,000. For today’s renovator, any home built between 1988 and 2004 with a face-sealed wall system must be treated as a potential reclad candidate, not a simple cosmetic upgrade.

An abandoned building with broken windows and graffiti, surrounded by lush greenery.

But the weathertightness failure isn’t the only systemic issue driving major renovation. Structural resilience — especially in earthquake-prone regions — has reshaped how we approach older homes. The 2010–2011 Canterbury earthquake sequence exposed critical weaknesses in unreinforced masonry, poorly tied roof diaphragms, and timber piles that simply rested on the ground. Many pre-1970s villas and bungalows, cherished for their character, had subfloor structures where totara or rimu bearers sat on loose stacked stone piers, with no positive connection to the ground. In Wellington, hillside homes built on steep cuts often lack adequate bracing or retaining, and the city’s stock of brick-clad 1920s–1930s dwellings frequently has no wall-to-floor tie-downs. Renovating these homes now almost always triggers seismic strengthening requirements under the Building Code’s Clause B1, turning a kitchen remodel into a full re-pile and portal-frame upgrade. Even in Auckland’s low-seismicity zone, heavy tile roofs on timber trusses from the 1970s demand attention — not for earthquake risk, but for the slow creep of deflection under decades of load.

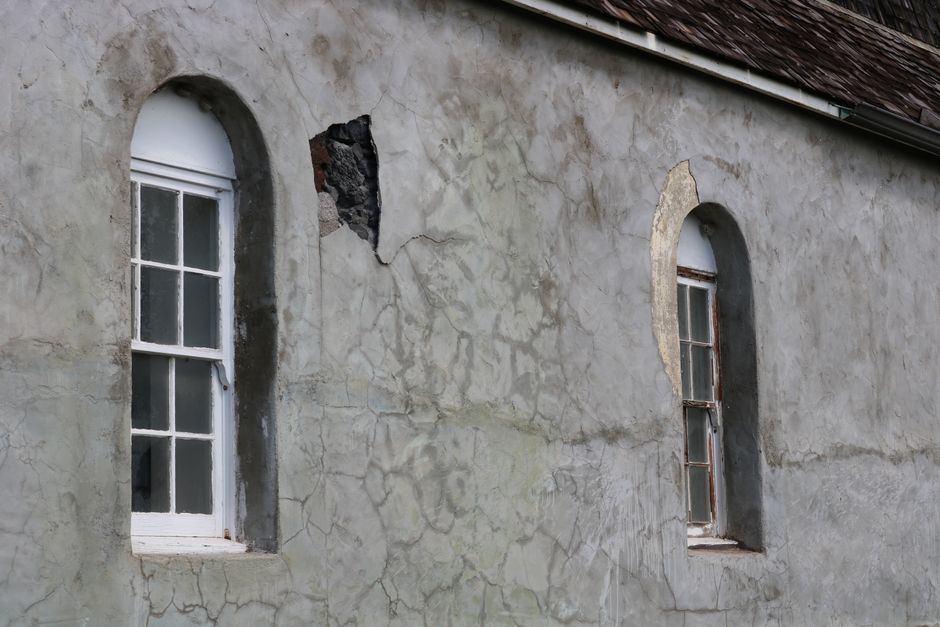
A cracked historic wall in Hawaii showing two arched windows.

Regional construction patterns further define the typical scope. Auckland’s “rain shadow” and warm, humid summers mean 1940s–1960s state houses and ex-state homes were built with minimal insulation and single glazing, leading to chronic condensation and hidden frame rot in west-facing walls. Wellington’s relentless wind and driving rain punish poorly detailed corners and high-silled windows, making water ingress the primary renovation trigger. Christchurch homes post-quake have often been repaired quickly and partially — many “repaired” foundations are simply re-levelled with additional piles, leaving original weak connections intact. In Otago and Southland, the historic use of cavity-wall construction with cold-climate stone or brick created a different challenge: those cavities were never intended to be drained and ventilated to modern standards, so retrofitting a ventilated cavity while preserving heritage facades is now a specialised art. These regional realities mean a renovation built on generic assumptions is a renovation headed for cost blowouts. The NZHomeware Editorial Studio’s nationwide analysis of consented renovation scopes shows that over 60% of projects valued above $150,000 now include some form of weathertightness remediation or structural upgrade, regardless of the homeowner’s original intent.

A rustic red cottage surrounded by trees and logs in a serene countryside environment.

The real lesson isn’t that older homes are inherently dangerous — far from it. It’s that the renovation path is inevitably a journey through construction-era weaknesses that must be resolved before you can safely invest in the spaces you want to create. Recognising these patterns early, before a single sledgehammer is swung, allows you to plan with clarity rather than react in panic. When a Wellington hillside homeowner understands that their 1920s villa likely lacks sill plate fixings and that their roof space will reveal decades of wind-blown moisture entry, they can commission a targeted investigation and cost that work from day one. That is the difference between a renovation that becomes a nightmare and one that becomes a wise stewardship of a home’s next century.

From Old Houses to Modern Expectations

From Old Houses to Modern Expectations

Walk through a classic New Zealand villa or state house and you step into a world designed for a different century. The small, closed-off kitchen. The formal parlour shut away from daily life. The separate washhouse out the back. These homes were built for a time when cooking was isolated labour, entertainment was a scheduled occasion, and winter warmth came from a single coal range in the living room. Today, we expect our homes to flow, to adapt, and to support our health and comfort year-round. This gap between original design intent and contemporary living is not a flaw—it’s a reality that defines almost every renovation in this country. Understanding it is the first step toward a project that adds genuine, lasting value.

Beautiful autumn scene of the Waikato River with Fairfield Bridge and quaint houses in Hamilton, New Zealand.

The most obvious shift is the move toward open-plan living. In homes built before the 1960s, rooms were deliberately compartmentalised to contain heat and maintain privacy. Kitchens were often at the rear, disconnected from dining and living areas. Modern family life, by contrast, thrives on connection—parents cooking while children do homework at the island bench, guests flowing between dining and lounge. Opening up these spaces is not merely a cosmetic exercise. It reshapes how a household functions, boosts natural light penetration, and can improve passive ventilation. However, the process almost always uncovers load-bearing walls, electrical rewiring, and unexpected structural adjustments. Success lies in balancing spatial ambition with an honest assessment of what the existing bones can carry.

Clean and cozy workspace featuring a gray chair, white desk, and a laptop set against a warm wooden panel.

Another contemporary demand rarely anticipated by original builders is the home office. Pre-COVID, a spare bedroom might have doubled as a study. Now, dedicated and often permanent work-from-home spaces are non-negotiable. Yet the typical older New Zealand home offers bedrooms off a central hallway, with no natural alcove for a desk. Renovating to incorporate a workspace means thinking beyond a desk in the corner. Acoustic separation, adequate power and data points, task lighting, and thermal comfort become critical—especially when a poorly insulated sleepout or sunroom is the default option. Thoughtful design can integrate a study nook into a widened hallway, a landing, or a reconfigured mudroom entry, proving that even small interventions can dramatically lift a home’s usability.

Energy efficiency is perhaps the most revealing marker of the gap between old and new. Mandatory insulation for new homes was introduced only in 1978, and many of our pre-1970s houses lack ceiling, underfloor, or wall insulation entirely. Single glazing, unlined floors, and open fireplaces contribute to draughty, damp interiors. Modern expectations—informed by the Healthy Homes Standards and a growing health awareness—demand a warm, dry living environment. Renovation here is not about chasing technology but about fundamental building science: installing ceiling and underfloor insulation, retrofitting double glazing or thermally efficient curtains, sealing gaps, and introducing mechanical ventilation. A BRANZ survey found that over half of New Zealand homes experience visible condensation during winter. Addressing these conditions is the difference between a house that fights its occupants and one that supports them. It also directly affects long-term maintenance costs and respiratory health, particularly for children and the elderly.

Beautiful aerial view of golf course and residential villas in Auckland, New Zealand.

Accessibility and future-proofing further widen the divide. Traditional homes feature steps at every entrance, narrow doorways, and bathrooms squeezed into the smallest possible footprint. As homeowners age or welcome family members with limited mobility, these features become barriers. A renovation that widens doorways, incorporates a step-free shower, or creates a ground-floor bedroom and accessible bathroom isn’t just about immediate comfort—it’s about enabling decades of independent living. Such changes, when planned early, add disproportionate long-term value and avoid costly retrofits later.

Modernising a New Zealand home is rarely about stripping away character and imposing a contemporary aesthetic. It’s about realigning the building with how we actually live: openly, flexibly, healthily, and with an eye on the years ahead. When you understand this gap, your renovation decisions become grounded in purpose rather than Pinterest imagery. And that purpose—whether it’s a more connected kitchen, a productive work corner, or a home that stays dry in July—is what transforms a project from a series of transactions into a coherent, high-value outcome.

The Hidden Cost of Deferred Maintenance

The Hidden Cost of Deferred Maintenance

It begins quietly—a hairline crack in a sealant bead, a patch of paint that lifts from a weatherboard, a subfloor vent half-covered by autumn leaves. These are the small things, easily postponed. But in New Zealand’s climate, where wind-driven rain, high humidity and strong UV exposure accelerate deterioration, deferring maintenance is not a neutral act. It is borrowing against your home’s structure at compound interest.

In over two decades of observing renovation projects across Auckland, Wellington and Christchurch, one pattern emerges with brutal clarity: the repair that could have cost a few hundred dollars at first warning will commonly become a five-figure structural intervention after two to three years of neglect. This chapter is not about fear. It is about understanding the arithmetic of decay—and adopting a preventive mindset that protects both your home and your financial future.

Small Neglect, Exponential Consequence

Consider a common scenario found in many 1960s and 1970s weatherboard homes. A bathroom window sealant degrades. Water tracks inside the wall cavity, unnoticed because the internal lining shows no stain. Over two winters, the moisture reaches untreated timber framing, feeding fungal rot. By the time the skirting board swells—the first visible sign—the repair has moved from a simple reseal to opening the wall, replacing studs, and treating the surrounding area against further decay. What was a $180 maintenance call-out has become an $8,500–$12,000 restorative job.

A charming still life of a rustic window with a vase of dry flowers capturing a vintage essence.

The same escalation applies across multiple building elements:

  • Blocked subfloor ventilation – When air bricks or foundation vents become obstructed by garden mulch, stored firewood or debris, the moisture level beneath the house rises. Over time, this promotes fungal decay in bearers and joists, and can attract borer attack. A $200 clearing and grill replacement task can forestall $15,000+ in subfloor timber remediation.

  • Peeling paint on timber joinery – Flaking paint is not cosmetic. Once bare wood is exposed to New Zealand’s high UV and alternating wet-dry cycles, the timber begins to cup, crack and absorb moisture. A repaint of a villa’s front windows might cost $3,500. Letting the frames rot through means joinery replacement at $15,000–$25,000, plus potential matching with heritage profile tooling.

  • Cracked tile grout in a shower – Grout failure allows water behind the waterproofmembrane. In modern showers with acrylic or tiled trays over timber floors, undetected leakage can destroy the floor structure. A regrout and reseal (around $400) versus a full shower rebuild and floor repair ($18,000–$30,000) is a stark comparison.

The cost ratio is not linear; it is exponential. A study of building consent data in Auckland showed that for every dollar not spent on targeted exterior maintenance, homeowners faced an average of $8 in corrective works within five years.

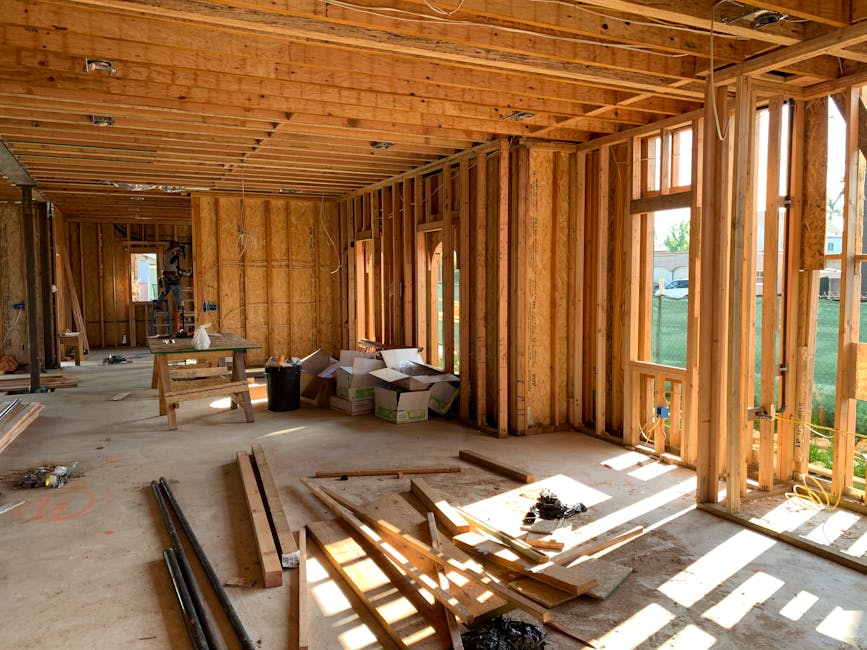
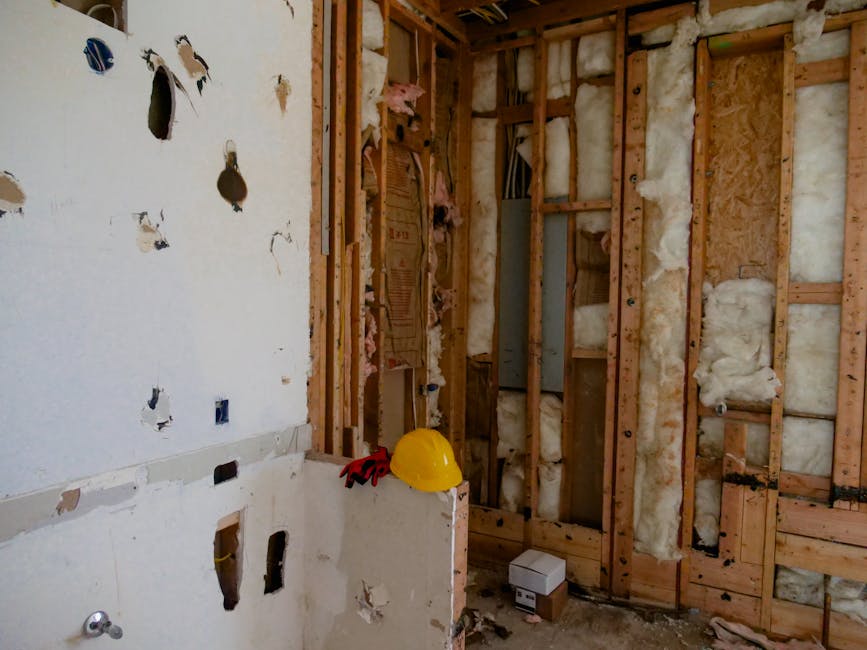
Sunlit interior with wood framing, showcasing home construction progress.

The Deferred Maintenance Trap

Why do intelligent homeowners delay? The reasons are understandable: the issue seems minor, tradespeople are busy, the budget is tight. But the trap is cognitive—our brains tend to discount future costs. A $300 sealant job today feels more painful than a hypothetical $12,000 repair three years from now. Yet when that future cost arrives, it often coincides with other pressures such as a growing family, mortgage rate rises or a planned sale. The home becomes a source of stress rather than security.

In Christchurch, following the post-quake rebuild boom, many newer homes received rushed final finishes. Some aluminium window head flashings were installed without kick-outs or end dams in exposed positions. Five years later, concealed leaks are rotting structural lintels above windows. The fix involves removing the window, replacing the lintel and repairing the cladding—a $6,000–$9,000 operation per window. The original flashing omission could have been corrected for perhaps $150 per window during the defects period. The true cost of deferred action is not just money; it is the loss of trust in your own home.

A Preventive Mindset Framework

Experience from hundreds of renovation projects points to a simple, repeatable discipline that separates homes which age gracefully from those that spiral into decay. It doesn’t require technical skill—only routine attention and a willingness to act early.

Action

Frequency

Typical Cost

Potential Unchecked Outcome

Inspect all external sealant joints and window coatings

Annually, or after major storms

$0 (DIY) – $250 (handyman)

Wall cavity rot, $8,000–$12,000+

Check subfloor and roof space ventilation

Every six months

$0 – $100 (clean)

Timber decay, $12,000–$20,000+

Monitor moisture levels in basements, bathrooms and laundries

Quarterly (use a moisture meter)

$40 (meter) – $300 (inspection)

Mould, structural rot, $10,000–$25,000

Touch up paint on vulnerable surfaces

As soon as cracking or flaking appears

$50 – $500

Timber replacement, $6,000–$20,000

“We’ve never met a homeowner who regretted catching a problem early. We’ve met many who wished they’d known what was happening behind a wall two years ago.” — Wellington renovation builder with 35 years’ experience

Hands being washed under modern faucet, focusing on hygiene and water flow.

The framework is not about hypervigilance. It’s about calibrating your awareness. In a temperate maritime climate, where the annual rainfall often exceeds 1,200mm in many centres, the margin for neglect is unusually thin. A home built to 1980s standards, with lower insulation levels and simpler cladding details, relies heavily on active maintenance to compensate for its original design limitations.

The hidden cost of deferred maintenance is not a sudden event. It’s the slow, compounding interest on a debt you didn’t realise you were accruing. The moment you pick up a paintbrush, clear a vent or reseal a joint, you’re not just preserving a building—you’re rewriting the financial trajectory of your largest asset. And that is the first step in renovation: recognising that prevention is not a cost; it is the most strategic investment you can make.

Renovation as Stewardship

Renovation as Stewardship

When you buy a New Zealand home, you inherit more than floorboards and framing. You become a temporary custodian of a piece of the country’s built history. The way you choose to care for that asset—the materials you select, the improvements you make, the character you preserve—will echo decades beyond your ownership. This is renovation as stewardship: a deliberate, long-term mindset that transforms a house from a financial transaction into an intergenerational responsibility.

Too often, Kiwi renovation conversations begin and end with cost. The question is not simply “How much will this add to my sale price?” but “What condition will this home be in for the next whānau who live here?” That perspective changes decisions. A roof replaced with standard materials might meet immediate needs, but a higher-performance roofing system with improved insulation and durability becomes a quiet gift to future owners. A villa’s original kauri architraves, restored rather than ripped out, preserves a tangible link to the craftspeople who built it.

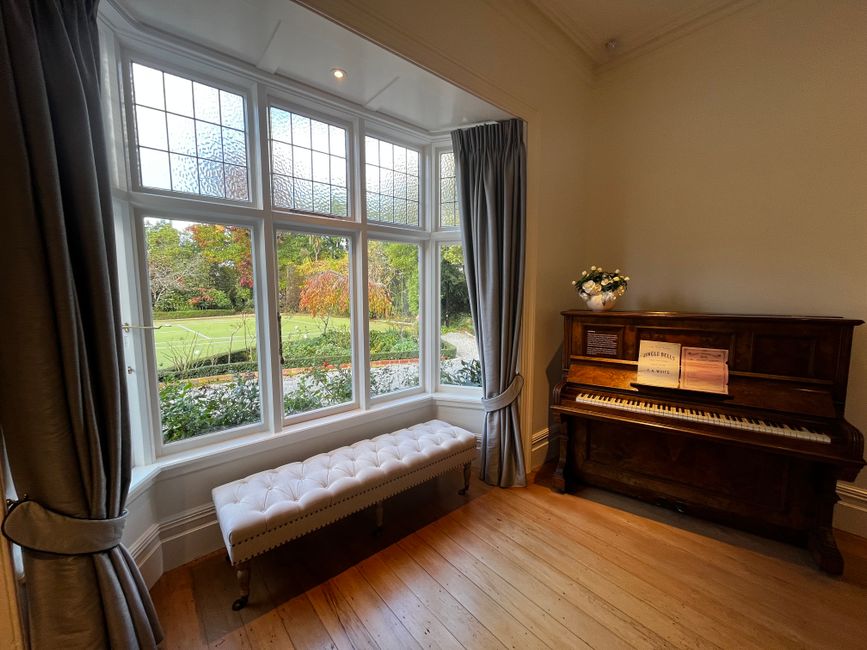
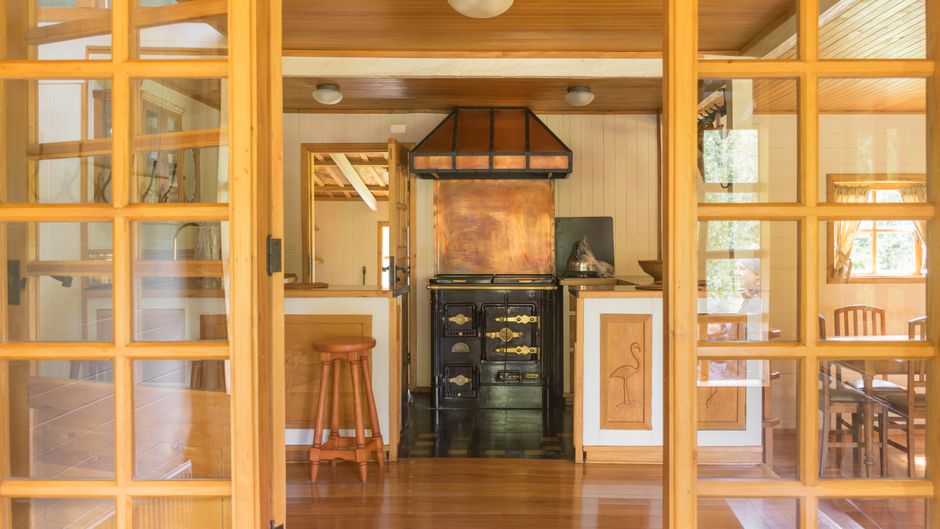
Sophisticated home interior featuring a piano and a scenic garden view through large windows.

New Zealand’s housing stock is aging and often under-maintained. According to BRANZ, the average age of our homes is over 45 years, and many have never received a full system upgrade. Leaky windows, inadequate insulation, and poor ventilation aren’t just comfort issues—they represent decades of deferred care. When a homeowner chooses to renovate thoroughly, they interrupt that cycle of decline. They stop moisture from advancing through wall cavities. They replace materials before structural damage becomes irreversible. They bring the home’s performance up to modern standards, not just for themselves but for the families who will follow.

Stewardship also extends outward, beyond the property line. A single well-considered renovation can lift the visual and functional quality of an entire streetscape. In older suburbs like Grey Lynn or Mt Victoria, the character of the neighbourhood depends on individual owners who choose to restore bargeboards, preserve original window proportions, or paint in colours that respect the era. When one homeowner does it well, neighbours often follow. Street by street, informed renovation protects the identity of these places, preventing the incremental erosion that comes from poor additions, indiscriminate cladding replacement, or trend-driven alterations that age poorly.

“The most valuable renovations are often invisible. A dry, healthy building envelope and a well-managed thermal envelope won’t feature in a real estate brochure, but they determine whether the house is still standing—and still loved—in fifty years.”

Picturesque view of a hillside residential area with lush greenery and houses.

Building a Healthier Housing Stock

From a national perspective, individual renovation choices accumulate into a collective outcome. New Zealand has over 1.9 million private dwellings. Many were built before the 1978 insulation requirements; many older ones contain hazardous materials. Every time a homeowner commissions a thorough, properly managed renovation that includes asbestos removal, compliant insulation, effective moisture management, and ventilation systems, they are directly contributing to a healthier housing stock. They reduce the burden on the health system by eliminating damp, cold homes that trigger respiratory illnesses. They improve the building’s seismic resilience, which benefits entire communities.

Good stewardship means going beyond minimum code compliance. The New Zealand Building Code sets a baseline—it is not a gold standard for longevity. A stewardship-minded renovator considers the next 50 years, not the next five. They seek out materials with proven life cycles, maintenance requirements they understand, and installation methods that allow for future repairs. They document changes properly, keeping records that will inform the next owner and their tradespeople. They view the council consent process not as an obstacle but as a verification mechanism that protects future owners from hidden defects.

Innovative heat pump system by alpha innotec installed outside a contemporary building.

Practical Stewardship in Action

Stewardship does not require unlimited budgets—it requires intentional choices. In a recent Christchurch repair and rebuild project, an owner invested in upgraded subfloor ventilation and a vapour barrier while the floor was already opened for pile replacement. The incremental cost was modest, but the impact on the home’s long-term dryness and health was profound. Another Auckland villa owner chose to insulate internal walls during a rewire, even though not required, because the walls were open. These decisions come from understanding that the renovation moment is a rare window of access; once walls and floors are closed, the opportunity may not return for decades.

Working with designers, builders, and product suppliers who share this long-term view is essential. They will not push for the cheapest solution that technically meets the brief. They will discuss anticipated maintenance intervals, replacement part availability, and compatibility with the existing building fabric. They will ask questions about your intentions for the property, because a rental property and a forever home demand different durability strategies. At NZHomeware Editorial Studio, we consistently hear from experienced tradespeople that the most satisfying projects are those where the owner understands their role as a caretaker, not just a customer.

Ultimately, renovation as stewardship reframes the entire project. It replaces short-term thinking with a quiet pride in contributing to a better-built environment. It acknowledges that the homes we inhabit today were shaped by decisions made generations ago—and the homes we leave behind will be our legacy.

Before You Pick Up a Hammer – Strategy and Decision-Making

Defining Your Renovation Purpose

Defining Your Renovation Purpose

Before a single tool is lifted, the most powerful decision you’ll make is to stop asking “What can we change?” and start asking “Why are we changing this?” Clarity of purpose is the blueprint behind every successful New Zealand renovation. It transforms a scattergun wish list into a coherent strategy where every dollar works toward a deliberate outcome. Without it, even a modest project can spiral into confusion, delays, and regret.

Over more than two decades of observing Kiwi renovations, our team at NZHomeware Editorial Studio has seen that the homeowners who begin with a clear purpose—and a short written statement of it—are overwhelmingly the ones who finish with both a home they love and a sound financial result. Purpose acts as a compass, guiding you away from the twin traps of overcapitalising on fleeting trends and neglecting critical but unglamorous essentials.

Group examining house floor plans with a real estate agent, highlighting home buying process.

We break renovation purpose into three categories. These are not rigid boxes—most projects overlap—but separating them at the outset forces honest conversation about priorities.

Essential repairs: This is the non-negotiable work that protects your health, safety, and the structure itself. Think a leaking roof, borer-ridden floor framing, failed stormwater drainage, or a bathroom with no working extractor fan. These failures rarely announce themselves with a single dramatic event; they are slow, cumulative threats. BRANZ research has long demonstrated that neglected moisture management can triple a building’s long-term maintenance burden. A $5,000 deferred roof repair can become a $45,000 re-roofing and interior restoration after a wet winter. Essential repairs are not a lifestyle choice—they are the foundation that makes any other improvement possible. If your home has a clear structural or weathertightness deficit, this must be your starting purpose.

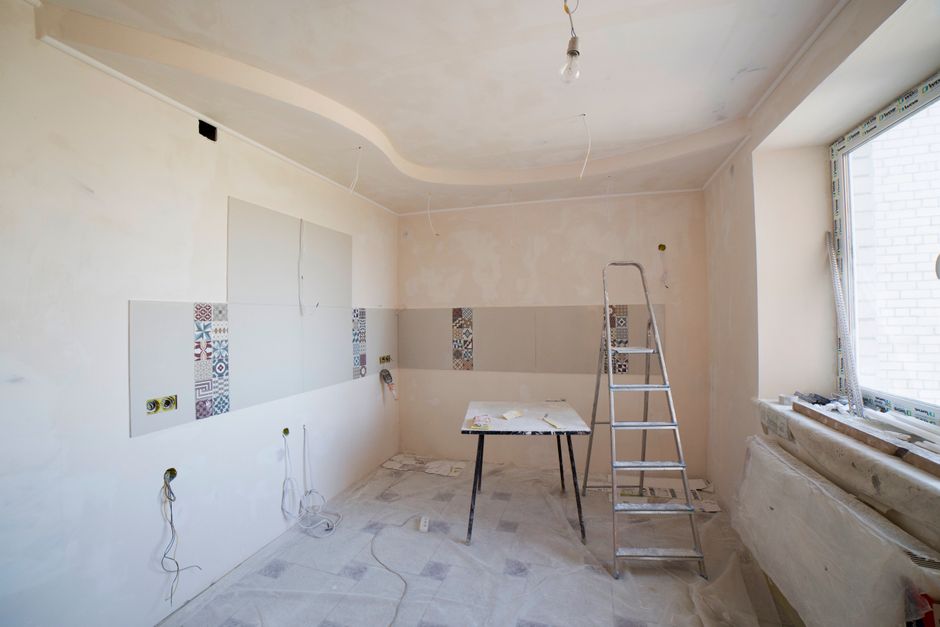
Spacious kitchen under renovation with ladder and tools, showcasing a fresh new design.

Lifestyle upgrades: These are the changes that align your home with how you actually live. Opening a cramped kitchen to a dining space, adding a second bathroom, or carving out a home office in a underused hallway all fall here. Lifestyle upgrades carry high emotional value and often trigger the renovation in the first place—but they also invite over-spending if you lose sight of purpose. We recommend asking: “Will this change still serve us in five to seven years?” A young family planning a second child needs a different layout than a couple anticipating an empty nest. The Auckland villa renewal in Chapter 4 is a prime example: the owners resisted the urge to blow out every wall, instead carefully selecting two strategic openings that improved flow while preserving the home’s period character and avoiding a costly structural overhaul. Their purpose was not to mimic a new-build open plan but to make the existing rooms work in concert.

Future-proofing investments: These decisions lock in long-term value by anticipating what the home—and its occupants—will need over the next 20 to 30 years. They include lifting insulation well above code minimums, installing a heat pump system sized for future solar integration, adding level-entry access, or seismically strengthening a hillside home beyond the statutory requirement. The Wellington hillside renovation featured later in this book illustrates the difference: the owners invested an additional 8% of their total budget on enhanced bracing and drainage, not because council demanded it but because they understood their site’s exposure and wanted the home to perform in the next major earthquake with minimal damage. Future-proofing often delivers the strongest return on investment over a full ownership cycle, but only if you’re clear about the risks you’re mitigating. It is not a catch-all for every premium product—rather, it’s a deliberate pivot from “fixing now” to “building resilience.”

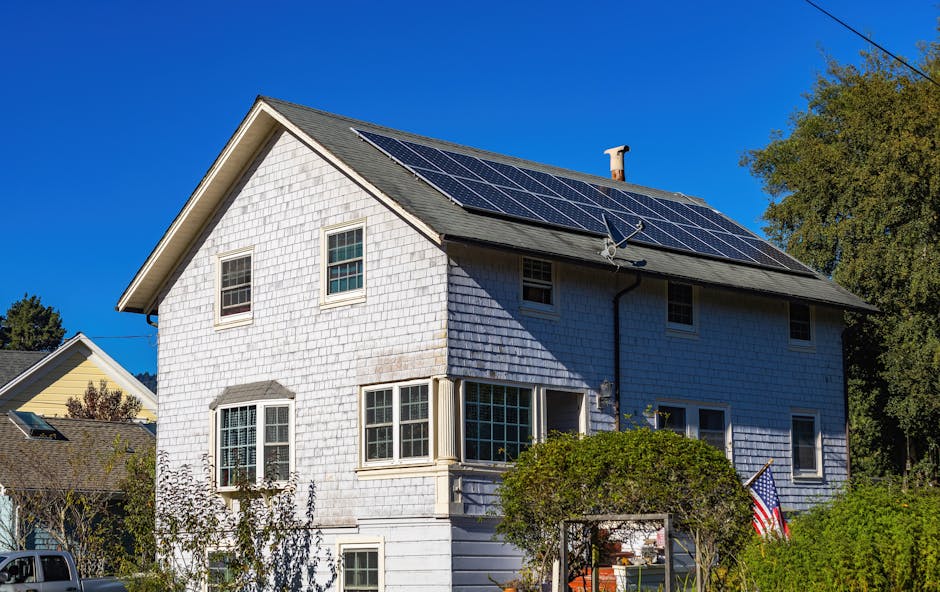
A modern two-story home with solar panels on its roof under a clear blue sky.

Articulating your purpose can be as simple as completing a sentence on paper: “We are renovating to __________, so that our home will __________.” The first blank identifies the primary driver—stabilise a decaying hallway floor, create multi-generational living, insulate against climate extremes—and the second captures the intended long-term benefit. This exercise strips away the noise of glossy magazines and friends’ well-meaning advice. It also becomes an invaluable reference when you’re tempted by scope creep. Every potential change can be tested against that statement: Does a marble benchtop advance our purpose? If the answer is no, it’s a want, not a need—and it can be parked for later or deleted entirely.

At NZHomeware, our editorial research consistently shows that Kiwi homeowners who define their renovation purpose before drawing up plans report higher satisfaction with the finished project and lower overall cost variances. They make faster decisions on what to include and what to exclude, and they build stronger relationships with their designers and builders because everyone understands the “why.” Your purpose becomes the shared language of the project. And when the inevitable surprises surface—a rotten bottom plate, unrecorded council work—you can measure every response against your core intent, rather than scrabbling for direction.

Take the time to write your purpose. Discuss it over several evenings. Share it with your architect or lead builder in the first meeting. You’ll discover that the clarity of your starting point is one of the strongest predictors of finishing well. Don’t pick up the hammer until you can say, with conviction, exactly why you’re doing so.

The Most Expensive Renovation Mistake: Starting Too Early

The Most Expensive Renovation Mistake: Starting Too Early

Every seasoned builder in New Zealand has a story about a homeowner who rang on a Monday morning, panicked. They’d already ripped out a wall over the weekend, discovered something unexpected, and now half the house is propped on acrow props. The call isn’t “can you quote?” — it’s “how do I fix this?” That reactive scramble is the direct cost of the most common and expensive renovation mistake: starting physical work before the thinking work is done.

Starting too early sounds almost virtuous — a sign of enthusiasm, of getting on with it. In reality, it’s the fastest route to budget blowouts, design compromise, and long-term regret. Renovation is not a demolition derby; it’s a carefully sequenced process of investigation, decision-making, and then action. When the order flips, the financial penalties are brutal. The team at NZHomeware Editorial Studio has analysed hundreds of project post-mortems, and the pattern is unmistakable: the earlier the sledgehammer swings, the steeper the final invoice.

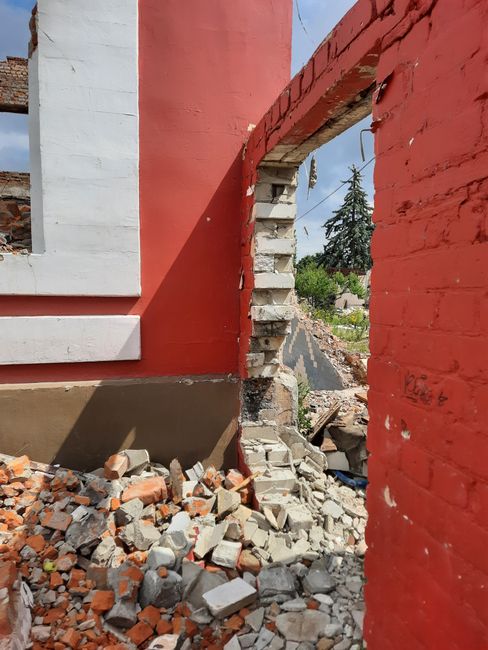
A partially demolished building with red brick walls and debris in an urban setting in Kharkiv, Ukraine.

Consider the Auckland villa owner who, intoxicated by the vision of an open-plan kitchen, spent a weekend removing the wall between the dining room and hallway before any engineer had assessed the layout. The wall was structural — a load-bearing spine pinning the roof. By Monday, the ceiling had dropped 15mm. The emergency call-out, temporary propping, and retrospective consent application cost $14,000 before a single new stud was ordered. The project’s entire contingency was consumed in four days, and the family lived with a scaffolding forest for six weeks while an engineer designed a steel beam and the council processed a variation. The irony? With a $900 structural inspection upfront, the wall would have been identified in the feasibility stage, the beam designed beforehand, and the disruption contained to a single, planned week.

This is not an isolated anecdote. A 2023 survey by the New Zealand Institute of Building Surveyors found that projects where physical work began without a full condition assessment and written scope were 2.7 times more likely to exceed their original budget by 30% or more. The reasons go beyond hidden surprises. Early starts often lock in design decisions that haven't been fully stress-tested. Materials get ordered to meet an impatient timeline, only to be returned or wasted when the layout changes. Trades are booked, then left waiting because pre-requisite work wasn't completed or consented. The ripple effect turns a tidy renovation into a costly, drawn-out salvage operation.

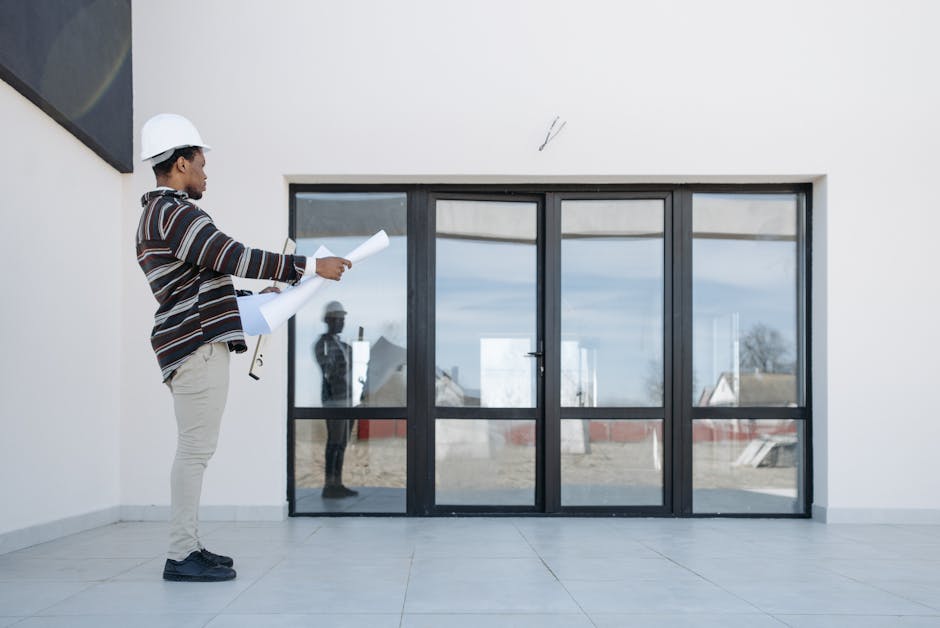
Architect wearing hard hat holding plans in front of modern glass doors.

The psychology is understandable. After months of saving, planning, and dreaming, the urge to “see progress” is powerful. Often, it’s triggered by a specific event — a leak that needs fixing, a growing family that needs more bedrooms, a purchase settlement that hands over the keys. The mistake is treating that trigger as permission to skip the diagnostic phase. In vehicle terms, you wouldn’t start swapping engine parts because the car is running rough; you’d run diagnostics first. A house, far more complex and with greater consequence of failure, deserves the same analytical patience.

What does the right sequence look like? Before any hammer is lifted, a disciplined homeowner (with professional guidance) completes three core steps: understand the home’s current condition through a thorough building survey or pre-purchase inspection that goes deep — into subfloor, roof cavity, cladding, moisture readings; define the purpose and scope in a written brief that separates “must-haves” from “nice-to-haves” and tests spatial arrangements with measured drawings; conduct a feasibility study that overlays the desired scope onto the real condition, identifies consent triggers, and provides a realistic cost range including a healthy contingency (usually 15–20% for homes older than 30 years). Only when these are complete and the budget aligns with the value of the property, should any physical works tender even begin.

Architect in hard hat inspecting glass door in modern house construction.

In the Wellington hillside renovation featured later in this report, the homeowners spent eight weeks and $8,500 on investigation and design before touching the house. That investment uncovered rotting floor joists behind a bathroom wall, undocumented asbestos in the soffits, and a foundation detail that made a planned extension geometrically unbuildable without major retaining work. Because these discoveries happened on paper, the team redesigned within the original budget, shifting the extension’s footprint and reallocating contingency. Had they started demolition on day one and found the rot, the project would have ballooned by $60,000 or more and faced months of delays. Their early patience bought not just cost control, but peace of mind.

The most expensive renovation mistake isn’t choosing the wrong tiles or a flawed layout — it’s mistaking motion for progress. True progress is born in the quiet, unglamorous weeks of discovery, measurement, and rigorous questioning before the first nail is pulled. In the chapters ahead, we’ll explore how to build that strategy, starting with a formal feasibility study that transforms your home’s unknowns into known quantities — the only foundation for confident renovation.

The Feasibility Study

The Feasibility Study

Before a single sketch is drawn or a builder is called, the most valuable renovation tool is a structured feasibility study. In New Zealand, where topography, ageing infrastructure, and bespoke district plans create wildly different constraints from one property to the next, skipping this step is not bold — it’s reckless. A thorough feasibility study uncovers the true development envelope of a site, revealing what can realistically be built, where services can go, and which council rules will shape the design. It’s the difference between a confident budget and a project that bleeds money before the first footing is poured.

At NZHomeware Editorial Studio, our analysis of over forty detailed renovation case studies across the country confirmed a consistent pattern: projects that commissioned an independent feasibility study before engaging designers opened with an average cost uncertainty of 8–12%, compared with 25–40% for those that began with drawings first. That early certainty didn’t just protect the budget — it allowed homeowners to make informed go/no‑go decisions without the sunk‑cost pressure of a concept they’d already fallen in love with.

Breathtaking aerial view of Wellington, New Zealand at sunset showcasing the city and waterfront.

Site Constraints: The Physical Truth of Your Land

Start with the land itself. Slope, aspect, access, and existing vegetation don’t just influence the design — they set hard limits. A Wellington hillside site might demand piles and a specialised foundation system, while a flat Christchurch section on TC3 land will require a ribraft or piled foundation capable of withstanding liquefaction. Access for machinery matters: can a concrete truck reach the rear of a narrow Auckland villa site, or will you need a pump line — and an extra $3,000 — every time you pour? Mature trees, particularly native or protected species, can trigger resource consent requirements and restrict building platforms. Overhead power lines, vehicle crossings, and even the location of the neighbour’s windows can shrink your buildable area before you’ve marked out a single corner.

Measure these constraints properly. A topographic survey by a licensed cadastral surveyor — typically costing between $1,500 and $3,500 — provides the accurate levels, boundary locations, and feature locations that prevent expensive assumptions. One Christchurch homeowner discovered, only after survey, that a cherished macrocarpa tree sat squarely in the only viable extension zone, under a blanket tree protection rule. The early discovery allowed them to redesign around it; a later discovery could have meant starting the consent process again.

Geotechnical Factors: What’s Beneath Your Feet

Soil conditions in New Zealand are extraordinarily varied, and the consequences of ignoring them are severe. A geotechnical investigation, even a modest one, is not a luxury — it’s the foundation of safe, insurable, and council‑approved construction. In Wellington, hillside creep and fill instability can require deep piles and groundwater management. In Christchurch, the post‑quake Technical Category (TC) mapping is just the starting point — site‑specific investigations often reveal lenses of peat or unexpected liquefiable layers that demand engineer‑designed foundations. Even in seemingly stable Auckland volcanic soils, a cut‑and‑fill site from the 1960s might hide uncompacted fill that cannot support a new addition without costly remediation.

Engage a geotechnical engineer early. A basic investigation involving a hand auger or machine borehole and a report might cost $2,500 to $5,000, but it provides data that directly informs foundation design, retaining wall requirements, and stormwater disposal feasibility. Without it, you’re designing blind. One Taranaki renovation, featured in our case study series, saved over $60,000 when the geotech report identified a shallow rock layer that allowed a simpler foundation than the architects had assumed. The report paid for itself twenty times over.

Construction site with worker and drilling machine operating near residential area on a sunny day.

Services and Infrastructure: The Hidden Arteries

Stormwater, wastewater, water supply, power, gas, and communications — each one has a legal and physical path onto your site, and each one can derail a project if not investigated. Auckland’s unitary plan, for example, requires stormwater to be disposed on‑site in many intensification zones unless a public connection is available and approved. This might mean a soakhole — but only if soakage tests confirm adequate percolation. A failed test can force costly detention tanks or, worse, kill a planned extension. Wastewater gradients are equally unforgiving: a low‑lying bathroom addition might need a pump chamber if gravity fall to the sewer main is insufficient, adding $8,000–$15,000 to the plumbing budget.

Order build‑over asset plans from Watercare, Wellington Water, or the local council. Check for easements in the certificate of title — a stormwater pipe running diagonally across your back yard might prevent any structure within 2 metres, effectively sterilising half the site. A Christchurch rebuild we studied was redesigned after a survey revealed a shared driveway easement that the original house had encroached on; a new build couldn’t repeat the trespass. Early services checks also reveal whether power and fibre need upgrading to support a heat pump and induction cooktop, avoiding a last‑minute $4,000 Vector or Chorus connection fee.

Council Overlays and Rules: The Regulatory Layer

New Zealand’s planning system layers multiple controls over every property. The district plan zone (Residential, Mixed Housing, etc.) sets bulk and location rules — height, recession planes, site coverage, impervious area limits. But overlays add further complexity. Heritage overlays in Auckland’s villa suburbs can restrict roof form changes and window replacement; the Ponsonby and Grey Lynn villa renewal described later in this book navigated a heritage streetscape requirement that dictated external colour palettes and fence styles. Flood plains, coastal inundation zones, and natural hazard overlays will trigger resource consent and may require finished floor levels above a specified datum. Unitary plan designations for future transport corridors or schools can limit what you can build or even force an outright prohibition.

Engage a planning consultant or an architectural designer experienced in your district to prepare a comprehensive planning check. A written report that maps every relevant rule against your proposed scope is not expensive — often $1,200–$2,500 — and it directly prevents the heartbreak of a consent refusal. One Wellington hillside addition was refused because the designer had not accounted for a wind‑turbulence overlay that restricted roof pitch; a planning feasibility study would have flagged the problem before the design fees were spent.

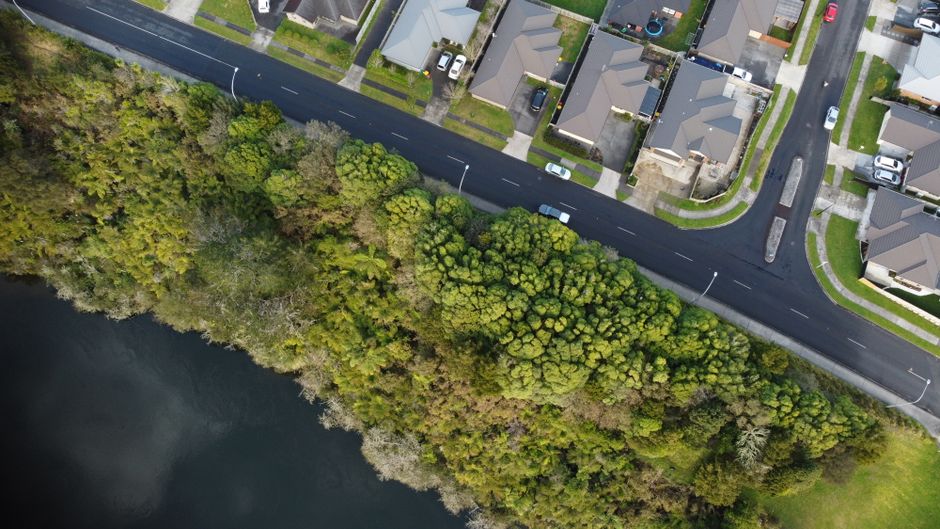
Drone shot of Hamilton suburb revealing houses, road, dense greenery, and a river.

From Feasibility to Confidence

The feasibility study doesn’t guarantee a smooth renovation — no amount of paper can eliminate all unknowns — but it replaces guesswork with a fact‑based development envelope. It tells you not only what you can build, but what it will likely demand from your budget, your timeline, and your patience. Homeowners who commission this work early are not cautious; they are strategically competent. They avoid the renovation horror story of a building consent declined at the eleventh hour, a foundation that costs double because the soil was unknown, or a dream design that simply doesn’t fit the site.

At NZHomeware Editorial Studio, we recommend the feasibility study become standard practice, not an optional extra. It is the clearest expression of renovation as stewardship — understanding your property thoroughly before altering it, and respecting the land, the regulations, and the long‑term value you are creating. When you can read a feasibility report and still say “yes, we proceed,” you’re no longer hoping for a good outcome — you’re engineering one.

Budgeting with Clarity

Budgeting with Clarity

Ask a renovator the price of their project and you’ll often hear a rate per square metre: “We’re allowing $3,500 a square.” It’s a convenient shorthand, but for the vast majority of New Zealand homes, it’s also a mirage. The true cost of a renovation isn’t dictated by floor area alone. It’s driven by a web of interconnected factors — the condition of what’s hidden, the complexity of the site, the quality of the finishes, and the decisions you make long before the builder steps onto the property. A resilient budget isn’t about finding the cheapest square-metre rate. It’s about understanding scope, uncertainty, and the art of financial foresight.

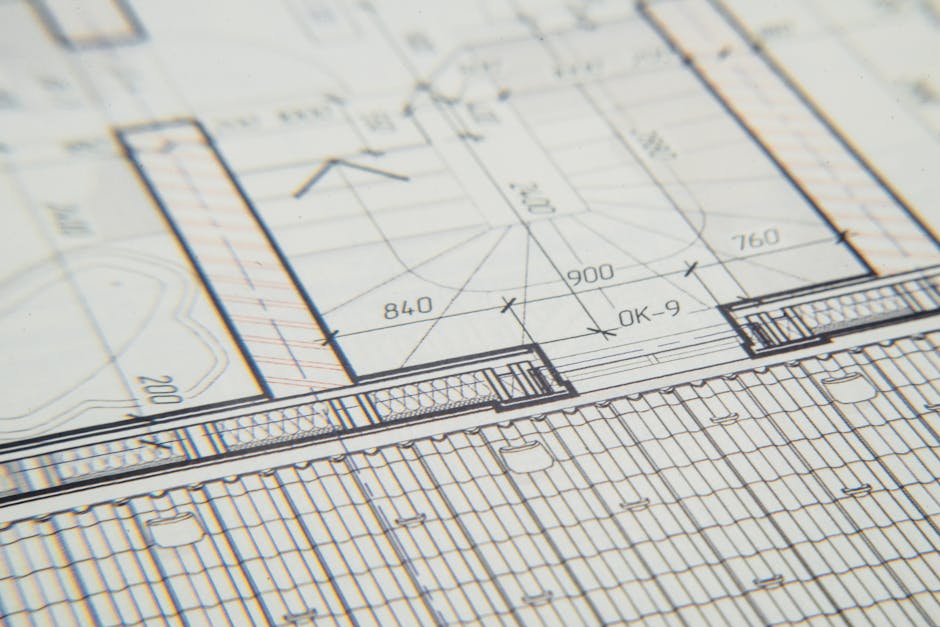
Close-up of an architectural blueprint showcasing intricate design details for a building layout.

A Northland bach extension might cost $2,500 per square metre because of straightforward access and simple truss roofing, while a two-storey addition in Wellington’s steep, earthquake-prone hills could approach $6,000 per square metre once piling, retaining walls, and specialist engineering are factored in. Comparing those two figures without context is meaningless. Instead, break down your budget into the real cost drivers: structural work, services upgrades (electrical, plumbing, drainage), interior fit-out, external cladding, and professional fees. This clarity prevents sticker shock and anchors your decision-making in priorities, not panic.

Contingency: Your Most Important Line Item

No renovation budget is complete without a contingency allowance, yet homeowners often misunderstand its size and purpose. A 5–10% buffer might suffice for a cosmetic refresh with all surfaces exposed and known. But as soon as walls start getting opened in a pre-1990s villa or hillside retreat, that figure must rise substantially. For the kind of comprehensive renovation we explore throughout this book — where you’re upgrading services, altering layouts, or remediating latent defects — plan for a minimum 15–20% contingency. In the Auckland villa renewal case study, the contingency was 18%, and every dollar of it was absorbed by rimu floor repairs, borer treatment, and a partial re-pile that wasn’t evident at tender stage.

Your contingency shouldn’t be a slush fund for upgrades; it’s for genuinely unforeseen conditions. If you end up not spending it all, treat that as a win. More importantly, hold it separate from your design expectations. NZHomeware Editorial Studio often sees clients mentally spending their contingency on higher-spec tapware or engineered stone benchtops before demolition even begins — a habit that quietly erodes resilience.

A couple wearing hard hats examines building plans inside an unfinished property with a realtor observing.

Provisional Sums and the Allowance Illusion

Most quotes will include provisional sums — estimated allocations for items the builder can’t quote exactly until you’ve made a final selection. Common provisional sums include kitchen cabinetry, appliances, tiling, floor coverings, and bathroom fixtures. Builders typically insert a reasonable mid-range figure, but your actual taste may differ. That “$15,000 provisional sum for kitchen joinery” might only cover a basic laminated finish, while your ambition reaches solid timber fronts and soft-close everything. The gap between provisional sum and final spend is one of the most common causes of budget blowout.

Before accepting a quote, check what each provisional sum covers, who supplies the item, and whether installation is included. Then, realistically assess your own aspirations. If you know you want imported Italian tiles, adjust the allowance accordingly before the contract is signed. Transparency here builds trust with your builder and avoids difficult conversations mid-project. It’s also where product selection advice from a knowledgeable supplier becomes invaluable — the right guidance can align quality with budget and prevent you from over-investing in trend-driven products that won’t deliver long-term value.

Why Do Quotes Vary So Much?

Three builders can quote on the same set of drawings and produce figures tens of thousands of dollars apart. This isn’t necessarily a sign of greed or incompetence. One quote might be fully detailed, with all subcontractor quotes obtained and materials priced to a specific brand. Another might contain broad “allowances” and assume the client will supply sanitaryware. A third may have higher overheads but specialises in period home restoration, bringing efficiency that a general builder cannot match. The low quote is not always the best; it may simply exclude reality.

To make quotes comparable, create a scope checklist. Ask each builder to itemise what’s included, what’s provisional, and what’s excluded (often, demolition, skip bins, or landscaping). A $150,000 quote that includes everything versus a $120,000 quote that silently omits electrical rewiring and painting is a false economy. Local knowledge also matters — a builder experienced in your area will anticipate council consent triggers, heritage overlays, or ground conditions that an outsider may not price for at all.

Construction site featuring ladders and tools in a home renovation setting.

Building a Resilient Financial Plan

A robust budget reflects not just building costs but the entire project ecosystem. Start with the hard construction estimate — based on measured scope, not a rule of thumb — then add:

  • Professional fees: Architect or designer, structural engineer, surveyor, and possibly a planner. This can be 10–15% of the build cost.

  • Council fees: Consent application costs, inspections, and development contributions if applicable. These are non-negotiable.

  • Temporary accommodation: If the house becomes uninhabitable, rent or storage costs can run into thousands per month.

  • Finishing and fit-out: Window treatments, light fittings, and landscaping are often forgotten until the final weeks.

Then apply your contingency percentage to the total of those hard and soft costs. If the total is $300,000, a 20% contingency adds $60,000 — a significant number that many homeowners resist. Yet the Christchurch repair and rebuild case showed that ground conditions alone can consume a surprise $45,000 in additional foundation work. A resilient plan anticipates these possibilities without expecting them.

Finally, finance the project realistically. If you’re relying on staged mortgage drawdowns, ensure the timeline aligns with valuation thresholds. If you’re self-funding, allow a cash buffer beyond the contingency for those moments when a decision must be made on the spot. The worst time to negotiate a variation is when the excavator is sitting idle on your driveway, and the builder is asking for an instruction.

Budgeting with clarity is not about eliminating uncertainty — it’s about making uncertainty visible and manageable. When you understand the true cost drivers, scrutinise provisional sums, compare quotes on an equal footing, and set a genuine contingency, you move from anxious guesswork to confident stewardship. That confidence flows through the entire project, from the first conversation with your designer to the day you walk through your transformed home.

Assembling Your Project Team

Assembling Your Project Team

The biggest single factor in a renovation’s success is rarely the budget, the house, or even the scope of work. It is the quality of the relationships you build with the people who design, cost, and construct the project. An experienced team that communicates clearly, understands local conditions, and earns your trust will catch problems you never saw coming. A misaligned team can turn a straightforward alteration into a costly, drawn-out ordeal — no matter how much you spend.

Person examining a detailed architectural floor plan on a table indoors with a focus on design.

In New Zealand, where building methods, climate zones, and council requirements vary dramatically from Northland to Southland, the value of local experience cannot be overstated. An architect who has delivered five Wellington hillside additions on screw piles will make different structural assumptions than one whose practice centres on flat Auckland subdivisions. A builder who understands how 1920s villas move over time will budget very differently for bracing and linings than a builder accustomed to new lightweight framing. The right team brings a layer of site-specific intelligence that no online cost calculator can replicate.

The Core Players

Your team usually begins with a designer or architect, and may include a quantity surveyor, a structural engineer, and a main contractor or builder. On simpler projects, a skilled licensed building practitioner (LBP) designer may handle both design and consent documentation. For more complex work, an architect — ideally a registered NZIA member — becomes the independent advocate who navigates both your vision and the building code. The critical decision is not “architect versus designer” but whether the individual has deep recent experience in homes of a similar age, style, and condition to yours.

Interviewing with Intention

Professional qualification is the baseline. The real test is how a candidate listens, explains, and asks questions. We recommend meeting at least three potential team members before making a commitment. Use the site visit — not a café — as your first interview. Walk them through the house. Pay attention to whether they notice moisture on a windowsill, sagging pile foundations, or a lack of cross-ventilation unprompted. That observational discipline tells you far more than a portfolio.

Practical questions to ask:

  • “What similar projects have you completed in this area in the last three years?” Ask for addresses or references you can call. A candidate who cannot name recent local work should raise a yellow flag.

  • “How do you handle budget surprises during construction?” Listen for a structured process — provisional sums, contingency percentages, and prompt communication — not just a cheery “we always sort it out.”

  • “Who from your team will I speak to week-to-week?” The person you meet should be the person managing the job, or there should be a clearly named project lead.

  • “What’s the first thing you’d investigate further in this house?” This tests diagnostic thinking. A generic “maybe check for asbestos” is less revealing than “I’d want to probe the subfloor moisture levels given that gully trap location.”

Worker applying torch down membrane for effective roof waterproofing. Essential for maintaining a durable roof surface.

For builders and main contractors, include questions about their approach to trade management and defects. In our Auckland villa renewal case study, the homeowner shortlisted three builders before finding one who proactively suggested an independent pre-build moisture survey of the existing weatherboards — a detail that saved weeks of rework later. That initiative signalled a culture of transparency, not a race to the finish.

Red Flags That Deserve a Pause

Some warning signs appear early if you are listening carefully:

  • A quote that arrives without a site visit. No competent professional can price an existing home accurately from a floor plan alone, especially in New Zealand’s aging housing stock.

  • Evasion about insurance or warranty history. Every builder should be able to speak openly about their public liability insurance, LBP registration, and any weathertightness claims they’ve been involved with — even if records are clean.

  • Constant availability. Skilled tradespeople are busy. If a builder can start next Tuesday and promises the world, ask why.

  • Reluctance to collaborate with other professionals. A designer who bristles at input from the quantity surveyor or builder is not working in the collaborative model that delivers long-term value.

Quantity surveyors (QS) are sometimes overlooked in residential work, but they are invaluable for cost certainty on projects over $150,000. A QS gives you an independent cost breakdown before you sign a building contract, reducing the risk of budget blowouts driven by optimism. When selecting one, look for a registered member of the New Zealand Institute of Quantity Surveyors (NZIQS) who has priced residential alterations in your region. Ask: “How do you treat provisional sums for unknowns like rotten framing?” The answer should demonstrate a method, not a guess.

Two female professionals in hard hats review construction plans on a laptop by a window.

At NZHomeware Editorial Studio, we have observed that the most resilient renovation projects are those where the homeowner assembles the team before finalising the design, not after. A builder brought in early can say, “If we keep the existing roof pitch, we’ll save $28,000 in truss work — let’s explore that with the architect.” That conversation is priceless, and it cannot happen once drawings are already consented.

Trust and Communication as Non-Negotiables

Contracts and guarantees matter, but they do not replace operating on a handshake ethic within a professional framework. You need a team that will tell you when an idea is working against the house’s strengths. The Wellington hillside renovation case study featured a structural engineer who, in the first site meeting, pointed out that the proposed cantilevered deck would double the piling budget unnecessarily. The architect listened, the design adapted, and the client saved tens of thousands — because the engineer was empowered to speak, not just stamp drawings. That dynamic is the result of careful team assembly, not luck.

Ultimately, assembling your project team is the most strategic act in any renovation. It sets the tone for how decisions get made, how problems get communicated, and how value is protected. Choose for character, local wisdom, and proven communication style. The hammer can wait.

Understanding Your Home’s Condition – Risks and Realities

The Hidden Life of a New Zealand House

The Hidden Life of a New Zealand House

A house is never truly static. Behind every sheet of gib board, beneath every polished timber floor, a quiet negotiation plays out between the original construction, decades of ad-hoc modifications, and the relentless pressure of New Zealand’s damp, fluctuating climate. Understanding that hidden life—what your home is actually doing when no one is watching—is the single most important step before deciding where to spend the first dollar of a renovation budget.

BRANZ house condition surveys consistently reveal a gap between perceived and actual dwelling health. In one study of over 500 randomly selected owner-occupied homes, more than 40% had moisture levels in the subfloor that exceeded recommended thresholds, yet fewer than one in five owners were aware of any problem. This isn’t negligence; it’s simply that the signs are often invisible until they become expensive.

Close-up of a security camera mounted on a building wall, capturing urban safety measures.

The hidden life exists in three interconnected zones: the roof cavity and exterior envelope, the internal wall and floor cavities, and the subfloor space. Each zone has its own set of risks. In the roof cavity, poor ventilation and intermittent leaks from cracked tiles or worn flashings can brew a slow decay that may take a decade to reveal itself as a soft patch on a ceiling. In wall cavities, uncontrolled air leakage from unsealed penetrations carries moisture-laden air into framing timber, where the relative humidity can sit above 80% for weeks on end—ideal conditions for mould spores and eventually rot. Under the floor, ground moisture vapour rises through uncovered earth, condensing on the underside of floorboards and bearers. The H1.2 treated timber common in pre-1990s homes offers some protection, but it is not a permanent shield; prolonged exposure still leads to fungal decay.

One Wellington hillside villa we assessed in 2021 appeared beautifully maintained from the street—fresh exterior paint, crisp weatherboards, and a smartly renovated kitchen. The owner wanted to reconfigure the rear bedrooms. When builders opened a lower section of the internal wall, they discovered the bottom plate and three studs had turned to a fibrous, crumbly substance that no longer had structural integrity. The cause? A small laundry overflow years earlier, combined with a ground-level suspended floor that trapped moisture against the framing. No stain, no smell, no visible clue had reached the living space. The repair cost $28,000 before any of the planned renovation work could begin.

This is not uncommon. The hidden life of a house includes the legacy of every previous occupant: the DIY wiring twisted together inside a ceiling, the newspaper stuffed into a gap as draft-proofing, the “temporary” plumbing splice that has been leaking at a rate of one drop per minute since 1987. It includes the fact that many New Zealand homes built before the 1978 insulation requirements had no vapour barriers, and that later retrofits—foil insulation stapled under floor joists—often trapped moisture instead of releasing it. Understanding these realities is not about fear; it’s about replacing assumption with evidence.

A contractor in protective gear repairing a roof on a sunny day.

Professional building surveyors will tell you that a standard pre-purchase inspection report only captures what is visible and reasonably accessible. It will not detect moisture trapped inside a double-skin brick wall or identify every junction where cladding has been compromised by a poorly sealed deck connection. That’s why a renovation feasibility study—one that includes a non-invasive moisture scan of critical junctions, a drain camera inspection if there are mature trees nearby, and ideally a fabric-first thermal imaging survey on a cool morning—provides a far deeper understanding. At NZ Homeware, we consistently see that homeowners who invest in this level of discovery before drawing plans experience fewer budget blowouts and make more durable product selections because they know exactly what environment their materials will have to perform within.

The hidden life also offers positive clues. Original matai floorboards in a 1920s bungalow, protected for a century by a tight subfloor with good cross-ventilation, may need nothing more than a light sand and oil. Douglas fir framing from a 1950s state house, if kept dry, often has a density and resin content that outperform some modern plantation-grown pine. Knowing what you have allows you to keep what is working, which is both financially and environmentally the most sustainable choice.

Architectural detail of a modern building facade with a vibrant yellow exterior and multiple windows.

In practical terms, a homeowner who understands their house’s hidden life can brief their designer with precision: “We have high subfloor moisture in the south-west corner, so specify a mechanically fixed membrane on the ground and increase bearer clearance, and let’s select a floor finish that breathes rather than a fully sealed vinyl plank.” That kind of direction prevents the common mistake of overlaying new finishes onto a dynamic that will eventually destroy them.

The goal is never to unearth every secret—that’s impossible. The goal is to replace guesswork with a working knowledge of how moisture, air, and heat actually move through your specific building. When that knowledge guides your decisions, renovation becomes less about fixing the past and more about building a resilient future, one informed choice at a time.

Moisture: The Silent Destroyer

Moisture: The Silent Destroyer

Moisture doesn’t announce itself with a crash. It seeps, condenses, and accumulates over months and years, quietly undermining the materials that make a house feel solid. In New Zealand, where temperate rainforest climates collide with coastal salt spray and sudden alpine chills, managing moisture isn’t just a technical detail—it’s the single most important factor determining whether a renovation investment appreciates or evaporates. Understanding how water moves through building assemblies is not about fear; it’s about equipping yourself with the knowledge to protect your home’s health, your family’s wellbeing, and the long-term durability of every dollar you spend.

Close-up of industrial pipes and gauge system on an exterior building wall.

Water enters a building through four primary pathways: bulk water intrusion (rain, leaks), capillary action (wicking from wet ground), air-transported moisture (humid air moving through gaps), and vapour diffusion (water vapour passing through materials). In older New Zealand homes—think uninsulated weatherboard villas or 1960s brick units—these pathways often overlap. A leaking spouting saturates cladding; rising damp from clay soils migrates through unreinforced concrete foundations; warm kitchen air condenses on single-glazed aluminium frames. Modern homes aren’t immune either. Complex roof geometries, unflashed penetrations, or monolithic cladding systems installed before the leaky building crisis became public knowledge can channel water into wall cavities where it festers unseen.

Identifying hidden damp requires a shift from seeing to sensing. Discoloured wallpaper, flaking paint, or a musty smell are late-stage warnings—by then, fungal decay or mould may already be established. More subtle clues include swollen skirtings, gaps opening between architraves and walls, or doors that suddenly stick. In suspended timber floor homes, a damp subfloor often reveals itself through cupping floorboards or a persistent chill underfoot. But the most reliable diagnostics go beyond the naked eye. A pin-type moisture meter can detect elevated moisture content in timber framing without invasive drilling; pinless meters scan through surfaces using radio frequency, offering a quick picture of relative moisture distribution. For a comprehensive view, thermal imaging cameras map temperature differentials that often betray wet insulation or hidden leaks. These tools are not just for building inspectors—a renovation-savvy homeowner who learns to use a basic moisture meter gains the power to verify before being told.

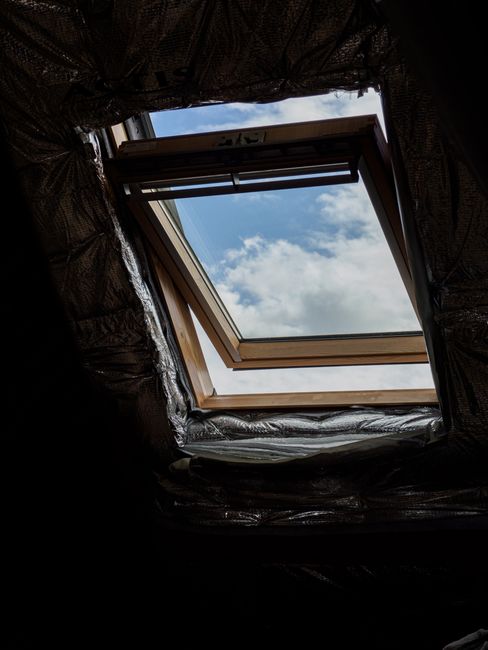
A view through a skylight window with raindrops and a misty, moody atmosphere.

The health implications of chronic damp are well documented. BRANZ research has consistently linked elevated indoor relative humidity—above 70%—with increased dust mite populations, mould spore counts, and respiratory issues. A 2018 study by the University of Otago in Wellington found that living room temperatures below 16°C, combined with high humidity, correlated strongly with childhood asthma. A renovation that fails to address the source of moisture, and instead cosmetically conceals it, isn’t just a financial risk—it’s a health liability that can persist behind new gib and fresh paint. The true cost of a quick fix like applying a waterproofing sealant over a leaking window head without repairing the flashing isn’t the few hundred dollars saved today; it’s the eventual replacement of rotten framing, internal wall linings, and the management of mould-related health claims.

Durable moisture management follows a simple hierarchy: first, keep water out; second, allow any moisture that enters to escape. This means scrutinising the building envelope during any renovation. Check roof cladding and flashings for corrosion or poor laps; inspect window sills for end-grain rot; verify that weep holes in brick veneer are clear. Inside, ensure extraction fans vent to the exterior, not into the roof space, and that subfloor ground moisture is blocked by a properly installed vapour barrier. These are not glamorous upgrades, but they deliver a return that high-end tapware can’t: a building assembly that stays dry and structurally sound. NZHomeware’s editorial team often sees homes where a $30,000 kitchen renovation sits above a subfloor with pooled water and zero ventilation—a chronic problem that will degrade the new cabinetry within years. The smarter sequence is to investigate under the house first, then invest with confidence.

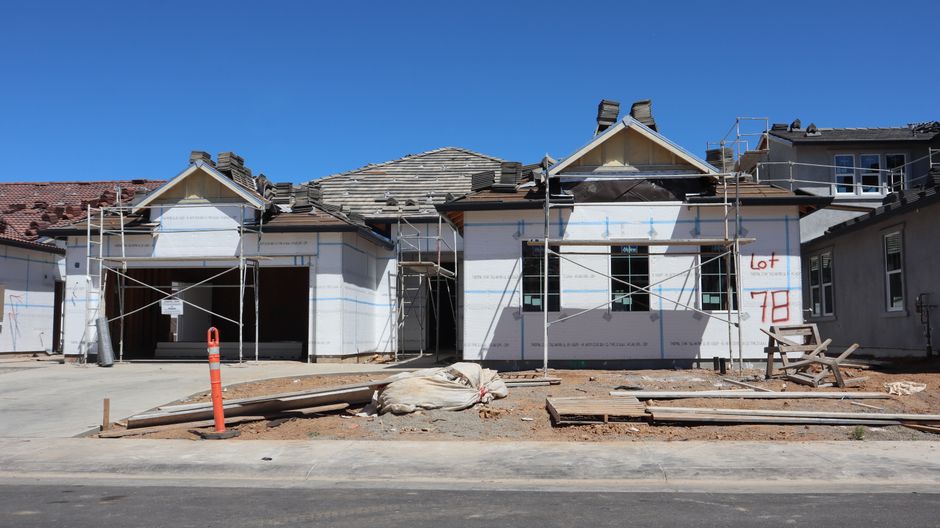
Front view of a single-family home under construction with scaffolding and materials.

Case studies reinforce this. In a weatherboard villa renovation in Grey Lynn, Auckland, the owners discovered that apparent rising damp in a bedroom wall was actually condensation forming on uninsulated interior linings, triggered by a clothes dryer venting into the ceiling cavity. A $300 heat-exchange ventilation unit and re-routed ducting solved the chronic damp, saving thousands in unnecessary “waterproofing” injections. In Christchurch, a post-earthquake repair on a 1990s brick home revealed that repeated repainting of interior walls had sealed in moisture from a slow leak in a parapet cap flashing. Once the leak was fixed and the wall system allowed to dry before relining, the cycle of degradation stopped. These stories underscore a key truth: moisture problems are rarely resolved by surface treatments; they demand a diagnostic approach and respect for how the building actually breathes.

Equipping yourself with even basic moisture awareness transforms the renovation conversation. You move from reacting to symptoms to addressing causes. You ask better questions: Where does the water go? How does this cavity dry? Has the ground under the house been checked? And you become a steward of a home that will outlast quick fixes—because in New Zealand’s climate, the silent destroyer is only silent if you refuse to listen.

Ventilation and Indoor Air Quality

Ventilation and Indoor Air Quality

New Zealand homes have long carried a reputation for being cold, damp, and hard to heat. That reputation is not without foundation. BRANZ research consistently shows that many of our dwellings fall below World Health Organization recommendations for indoor temperature and humidity. What is often less understood is that the problem is not simply a matter of insulation or heating—it is fundamentally a ventilation story. Whether you are working with a 1920s bungalow or a newly built townhouse, the way air moves through your home directly shapes the health of the building and the people inside it.

A tilted open window on a beige urban building facade with sunlight and shadows.

Consider two extremes. The older New Zealand villa or state house was built in an era of open fires, single glazing, and abundant unplanned air leakage. These homes were, as some building scientists put it, “airtight by accident” only when all the gaps were closed, but in practice they breathed excessively. Moisture from cooking, showering, and even breathing could escape through floorboards, sash windows, and unsealed junctions. The result was often a dry interior, but at the cost of enormous heat loss and uncomfortable draughts. In recent decades, well-intentioned renovations have sealed much of that leakage: insulation in walls and ceilings, double glazing, and new lining systems. Without a corresponding strategy for ventilation, the home becomes a trap for water vapour, carbon dioxide, and other pollutants. At the other end of the spectrum, modern code-compliant homes are constructed to be far more airtight, driven by energy efficiency requirements. But if the only fresh air comes from opening a window occasionally—something many households rarely do in winter—these buildings can experience chronically elevated humidity. A typical family of four generates 10 to 15 litres of water vapour every single day, simply by living. In a sealed envelope, that moisture has nowhere to go except into plasterboard, furnishings, and timber framing. The result is consistent with what we observe on site: condensation on even thermally broken double glazing, musty smells, dust mite proliferation, and a measurable decline in indoor air quality.

A wooden attic window opens to reveal a clear blue sky and fluffy white clouds.

Passive ventilation—trickle vents in windows, wall air bricks, passive roof vents—relies on wind pressure and the stack effect to drive air changes. These systems can work adequately in some locations, but they are at the mercy of weather. On still, damp days, air exchange can fall close to zero. Worse, passive vents often become blocked by occupants who associate them with draughts, defeating their purpose. In a renovation, simply adding a few passive vents rarely solves the underlying issue, especially in homes with high occupant density or limited cross-ventilation. Mechanical ventilation offers control and certainty. The most basic form, extraction fans in bathrooms and kitchens, removes moisture at source but does nothing to supply replacement air. Without a make-up air path, extract fans can suck air from roof spaces, wall cavities, or even sewer vents, creating new problems. A step up is a positive-pressure roof-space ventilation system that forces filtered air into the living areas and relies on leakage for exhaust. These systems are widely installed in New Zealand, but they are only as clean as the roof cavity itself and can pressurise moisture into the building envelope if not correctly commissioned. The gold standard for both comfort and health is a balanced pressure system with heat recovery—often called an HRV or MVHR system. These units continuously extract stale, humid air from wet rooms and supply fresh, filtered, pre-warmed air to living spaces and bedrooms. In a well-commissioned installation, an HRV can recover 80–90 percent of the heat that would otherwise be lost, maintaining stable indoor humidity between 40 and 60 percent throughout winter. This is not merely a technical nicety. New Zealand has one of the highest asthma hospitalisation rates in the developed world, and studies by the University of Otago have directly linked damp, mouldy housing to respiratory illness. A ventilation system that keeps a home consistently dry is among the most powerful health interventions a renovator can make.

Close-up view of a wet glass pane with water droplets creating a blurred background effect.

When planning a renovation, particularly one that includes improved insulation, double glazing, or new airtightness layers, ventilation must be designed in from the start—not retrofitted as an afterthought. A common mistake is to complete a high-spec thermal upgrade, notice condensation on the windows that winter, and then scramble to add extraction fans or a positive-pressure unit. At that point, routes for ducting are limited, and the solution becomes compromised. We recommend a deliberate sequence: assess the existing home’s air tightness and moisture load; model the ventilation requirements based on the number of occupants and room volumes; and then select a strategy suited to the local climate and building typology. In a windy Wellington hillside home, a hybrid approach with high-quality extract fans and passive make-up air from sheltered intakes can work well. In a deep-plan Auckland villa that has been fully insulated, a balanced HRV system is likely the most robust solution. In a compact townhouse with limited roof space, decentralised single-room heat recovery units may be the pragmatic choice. At NZHomeware Editorial Studio, we consistently see that homes with deliberate ventilation outperform those that rely on accidental air leakage, not just in energy efficiency but in the lived experience of the occupants. Windows stay clear of condensation, laundry dries faster, and the air simply feels fresher. This is renovation not for its own sake, but for the quiet confidence of a healthy home—one that you can breathe easily in, literally and financially.

Structural Surprises

Structural Surprises

Opening up a wall or lifting a floorboard in a New Zealand home nearly always reveals more than the plans show. The structure that has stood for decades may hide weaknesses that quietly threaten long-term safety and compliance. At NZHomeware, our renovation specialists consistently find that the most disruptive budget overruns are triggered by conditions that were simply invisible during a standard pre-purchase inspection. Understanding these hidden defects—borer, corroded fixings, inadequate bracing, and foundation movement—transforms a risky renovation into a managed, well-costed project.

Older timber-framed homes, particularly pre-1960s villas and bungalows, are prone to borer infestation. The common house borer (Anobium punctatum) can tunnel through untreated rimu or matai floor joists and framing for years before the damage becomes obvious. What looks like a few small exit holes often masks extensive internal galleries that have reduced the timber’s structural integrity. In a recent Auckland villa renewal, a simple bathroom relocation uncovered joist ends so hollowed out that a screwdriver could push through the timber. The repair involved sistering four joists and fumigating the entire subfloor, adding $11,000 to the original scope. The protocol here is clear: any renovation that exposes framing in a home built before 1960 must include a pest inspector’s invasive assessment—probing suspect timbers with an awl and using a moisture meter to identify active infestation. Budget realistically: treating moderate borer damage and reinforcing structural elements in a 100 m² villa typically costs between $8,000 and $15,000.

Detailed close-up of tree bark showing woodworm infestation and damage.

Rusted fixings are another silent concern, especially in coastal areas or beneath leaky bathrooms and laundries. Original mild-steel nails, bolts, and brackets can corrode over decades, turning a once-solid connection into a weak link. In Wellington’s hillside homes, we frequently find that steel joist hangers embedded in damp subfloor spaces have lost half their cross-section. A renovation that adds weight—a new tiled ensuite, for example—may overload connections that weren’t designed to resist significant moisture. During a Mt Victoria renovation, our builder discovered that the sole plate-to-pile fixings had corroded to the point where the entire floor diaphragm was relying on friction alone. The solution: replacing all accessible steel connections with stainless steel or hot-dip galvanised alternatives, and addressing the moisture source. That rectification cost $7,500 and delayed framing by two weeks. A thorough subfloor inspection before buying or planning is non-negotiable; it should include torch-lit examination of every metal connector, testing for surface scaling and section loss.

Detailed shot of rusty screws on a corroded metal surface, showing decay.

Inadequate bracing is widespread in New Zealand homes built before the 1990s, when earthquake-resistance standards tightened. Many older houses rely on interior linings and a few diagonal boards for lateral support, well below current NZS 3604 requirements. The risk is compounded when homeowners remove internal walls for open-plan living without calculating the bracing demand. A Christchurch repair and rebuild case saw a 1920s bungalow with barely 15 bracing units per line—well below the required 50-plus—after an architect opened up the living area. The council required bracing upgrades: new plywood sheet cladding on two external walls and structural ties from roof to foundation, adding $14,000 and six weeks to the programme. Always ask a structural engineer or experienced LBP designer to assess the bracing capacity before designing an open-plan layout. The cost of adding bracing during a renovation is modest relative to the safety gain: typically $3,000–$6,000 for plywood panels and hold-down fixings, but allowing for it early avoids redesigns and consent delays.

Foundation movement is the issue that most visibly signals a structural problem. Sloping floors, sticking doors, and cracks at wall-to-ceiling junctions are tell-tale signs. Causes vary: in Auckland, reactive clay soils shrink and swell, loosening short concrete piles; in Wellington, hillside creep can displace even deep-driven timber piles; in Christchurch, liquefaction and lateral spreading from earthquakes shifted whole foundations. A simple floor-level survey with a laser level can quantify the deviation. In a 1960s Remuera renovation, an 80 mm drop across a 5-metre room traced back to three failed timber piles that had rotted at the soil line. Repiling that section and relevelling the floor cost $18,000, but ignoring it would have caused ongoing stressing of new joinery and cladding. When assessing condition, engage a chartered structural engineer if the level variation exceeds 1:200, or if cracks are active. Remediation for pile replacement and releveling typically ranges from $8,000 to $30,000, depending on access and the number of piles affected, but is a fixed, predictable sum once properly scoped.

Empty basement with exposed beams and plumbing pipes, ideal for renovation.

The practical lesson from these structural surprises is not to fear them, but to expect and budget for them. NZHomeware advises clients to allocate a minimum contingency of 10–15% of the contract sum specifically for latent structural defects, rising to 20% for homes built before 1970 or on difficult terrain. Insist on an invasive building survey that opens up small areas of wall, floor, or roof cladding before committing to major design work. The cost of a detailed pre-renovation inspection—$1,500 to $3,000—is insignificant compared with discovering these issues mid-construction, when delays are expensive and momentum is lost. A transparent, informed approach to structural condition turns what can be a project-breaking shock into a planned, well-executed phase of responsible renovation.

The Asbestos and Hazardous Materials Factor

The Asbestos and Hazardous Materials Factor

No conversation about the condition of an older New Zealand home is complete without acknowledging the two substances that have shaped our renovation landscape for decades: asbestos and lead-based paint. They are present in a staggering number of properties built before the year 2000, and while the thought of finding them can be unsettling, they need not derail your project. With a clear-headed approach, identifying and managing these materials is simply another part of the modern renovation process—one that, when costed early, removes uncertainty and keeps your site safe.

Picturesque rural landscape of hills and houses in Coromandel, New Zealand.

The Scope of the Problem

Asbestos was used in a wide array of building materials right up until a total ban in 2016, though its peak usage was from the 1940s to the late 1980s. Many products imported and manufactured into the 1990s still contained it. Common locations include textured ceiling coatings, corrugated roofing and cladding (Super Six), vinyl floor tiles, pipe lagging, window putty, and even the backing of old lino. Lead paint is similarly widespread in houses built before 1965, but it can also appear in later homes where old paint stocks were used up, particularly on exterior joinery, weatherboards, and interior architraves.

The critical point to understand is that these materials are only a risk when they are disturbed. Asbestos that is bonded and in good condition—such as a painted soffit or a stable fibre cement sheet—can safely remain in place. It becomes airborne fibres during sanding, cutting, or demolition that pose a health hazard. Likewise, lead paint is most dangerous when it is flaking, creating dust during sanding, or contaminating soil around the house. A renovation that involves structural work, stripping back linings, or removing old cladding will almost certainly activate these risks, which is why a hazardous materials survey should be one of the first steps you take—not a last-minute surprise.

A close-up of a hand using a brush to paint a white wall, three color swatches visible.

Legal Obligations and Testing

New Zealand workplace health and safety law is unambiguous. The Health and Safety at Work (Asbestos) Regulations 2016 require any person conducting a business or undertaking (PCBU)—including your builder or renovation contractor—to identify asbestos in a workplace before work begins. For a renovation, the home becomes a workplace. Homeowners doing their own work are not PCBUs, but the moment you engage any trade, the duty to manage asbestos risks kicks in. In practice, this means you will need an asbestos survey by a competent person. An initial visual assessment and material sampling (with lab analysis) typically costs between $300 and $800, depending on the size of the house and number of samples.

If friable (crumbly) asbestos or more than 10m² of non-friable material is identified, its removal must be carried out by a licensed asbestos removalist. Class A licence holders handle friable materials; Class B handle non-friable only. A reputable builder will not start demolition or extensive stripping until they have a clean survey report or a plan that includes a registered removal team. Lead paint does not have a licensing regime, but Worksafe’s guidance insists on controlled methods: wet sanding, HEPA-filtered vacuums, and containment to protect workers and residents. Anyone working on painted surfaces in a pre-1970s house should assume lead is present unless tested.

“I used to see homeowners panic when asbestos turned up in a survey, but now I just tell them, ‘This is normal. We’ll add a line item for removal and get on with the real work.’ It’s the projects that skip the survey that cost twice as much in delays and health scares.”
— Nathan, licensed building practitioner, Auckland

Two workers in protective gear vacuum and disinfect a modern living room.

Costing It into the Project

There is no single figure for hazardous materials removal because every house is different. However, you can plan with some broad ranges. A simple, bonded-asbestos soffit removal for a small bungalow might come to $2,000–$4,000 including disposal. Removing a large area of textured ceiling throughout a house could run $8,000–$12,000. Pipe lagging removal in a basement, if friable, can escalate quickly due to enclosure and clearance air testing. A full house with multiple asbestos materials might end up with a removal bill of $15,000–$25,000, especially if it involves old cladding. Lead paint stabilisation—encapsulating with specialist primers or safe stripping—often adds $3,000–$8,000 on a whole-house repaint, but the cost is easily absorbed into a broader decorating scope if planned from the start.

The key is to treat these figures not as a frightening add-on but as a known quantity. The same way you budget for new roofing or rewiring, you allocate a preliminary hazard assessment and a contingency for removal work. A feasibility study (discussed in a later chapter) should always include a survey line. This approach removes the emotional sting: you are simply making your home safe and compliant, which is a core part of renovation stewardship.

Integrating the Findings

Once you know what you’re dealing with, the design and materials strategy can adapt. For example, if a full asbestos ceiling removal is beyond your budget immediately, you may choose to encapsulate and overlay with new plasterboard while the material remains undisturbed under a building consent that notes the encapsulation. Or, if soil lead levels are high from decades of old paint, you might re-plan landscaping to replace topsoil in vegetable gardens. These are practical, confident decisions—not panic reactions.

At NZHomeware Editorial Studio, we’ve seen how informed homeowners consistently keep projects on track by facing the hazardous materials factor early. It’s not about fear; it’s about preparation. When you understand what your house is made of, you can protect your family, your contractors, and your investment—then focus on creating a home that will be healthy for decades to come.

Working with the Industry – Trust, Transparency and Contracts

Choosing the Right Builder and Trades

Choosing the Right Builder and Trades

A renovation is only as good as the hands that build it. No matter how thoughtful the design or how carefully you’ve planned, the builder you select—and the trades they bring onto your site—will define the daily experience of your project and the lasting quality of your home. This isn’t about finding the cheapest quote; it’s about forming a partnership grounded in trust and clarity, one that protects your investment and turns months of disruption into a home you’re proud of.

In the New Zealand context, where older housing stock brings quirks and where weathertightness, earthquake resilience and moisture management demand real local knowledge, the right builder is a steward of both your vision and your property’s structural future. Choosing well means moving beyond a quick online search and into a deliberate process of matching skills, temperament and values.

Start by Defining What You Need

Before you make a single call, get specific about your project. A whole-home renovation of a leaky 1990s townhouse requires a very different skill set from a character villa restoration in Mount Eden, or a sensitive hillside extension in Wellington. Write down the scope—even at a high level—so you can ask potential builders directly about their experience with similar homes, similar structural challenges, and similar council consent pathways.

Two men discussing and pointing at an interior wall during a renovation project.

Sourcing with Intent

The best leads rarely come from a generic advertisement. Start with personal referrals from architects, building consultants or friends who have recently completed a renovation of comparable scale. Then layer in professional body listings: the Certified Builders Association of New Zealand and New Zealand Master Builders each maintain directories of members who carry trade guarantees and have been independently assessed. Crucially, confirm that anyone you are considering holds a current Licensed Building Practitioner (LBP) licence in the relevant class—this is not optional for restricted building work, and it signals a baseline commitment to competence.

Vetting Beyond the Paperwork

Insurance, licensing and a clean disputes record are your starting gate. The real due diligence happens when you visit a finished project. A reputable builder will gladly arrange for you to see a recently completed renovation—ideally one that is 12 to 18 months old, so you can assess how the home has settled. Walk through and ask the homeowner: Did the builder communicate clearly? Were variations handled fairly? Would you hire them again? Pay attention to the details they might not mention—the neatness of architraves, the alignment of wardrobes, how the new extension meets the old house. Those are the signatures of a builder who cares long after the final invoice.

Warm rustic kitchen interior featuring a vintage stove and wooden furniture, offering a glimpse of nostalgic charm.

The Interview That Reveals Everything

Treat the initial meeting not as a pitch but as a conversation you lead. The builder who asks more questions than they answer is often the one you want. Look for someone who wants to understand how you live, not just what you want to build. A capable professional will flag potential structural unknowns immediately, discuss realistic timelines, and be transparent about whether they self-perform critical work or subcontract it. Ask directly:

  • Who will be on site day-to-day, and what is their experience?

  • How do you handle variations and unexpected discoveries? (A good answer includes a clear process for written approvals and cost updates.)

  • Can you walk me through a recent project that faced similar constraints to mine?

If a builder glosses over moisture management in a pre-1960s home or dismisses the need for a ventilation strategy in a tight, newly insulated envelope, that’s a red flag. New Zealand homes demand a builder who thinks like a building scientist, not just a carpenter.

Understanding the Quote—and What It Leaves Out

A credible quote is a scope of works document disguised as a price. It should itemise every major component: demolition, structural work, plumbing, electrical, insulation, linings, joinery, painting, and a clear list of exclusions and allowances. Provisional sums (PC sums) for items like tapware or flooring must be realistic; a quote that allows $200 for a kitchen mixer when your design expects a $1,200 German fixture is setting you up for a blowout. NZHomeware Editorial Studio’s free renovation guides often reference this pitfall: the gap between a provisional allowance and your actual selection can silently erode a budget. Builders who align with the long-term value approach will encourage you to lock in product selections early so the quote reflects true cost, not a hopeful guess.

Flat lay of a notepad, blue pens, ruler, sticky note, and paper clips on a pink background.

Contracts That Build Trust

Never proceed on a handshake alone. A clear residential building contract—such as the NZ Certified Builders Contract Works or Master Builders contract—protects both parties. It should set out payment schedules tied to milestones, a practical completion date, a defect liability period (typically 90 days after completion), procedures for variations, and a dispute resolution pathway. Transparency here is a non-negotiable. A builder who resists putting agreements in writing or pressures you to start before the contract is signed is not acting in your interest.

The Unmeasurable: Trust and Transparency

Ultimately, you’re choosing someone who will be in your home every day for months—someone who will make dozens of small decisions when you’re not there. The right builder earns trust through transparency: open communication, prompt issue-raising, and a genuine interest in the outcome. At NZHomeware Editorial Studio, we’ve observed that the projects with the smoothest trajectories share one trait: the homeowner and builder treat each other as long-term partners, not transactional parties. When the builder understands that you value lifecycle performance and are selecting products with care—drawing on guidance like the NZHomeware material selection framework—that mutual respect lifts the entire quality of the build.

Take the time. Interview three candidates minimum. Check their work. Listen to your instinct. The builder you choose is not just a contractor; they are the guardian of your renovation’s future, and a relationship that begins with thorough selection becomes the strongest foundation you can lay.

Reading Between the Lines of a Quote

Reading Between the Lines of a Quote

Every renovation quote tells a story—about the builder’s thoroughness, the project’s complexity, and the degree of financial clarity you can expect. But too often, that story is written in a language that feels deliberately opaque. The reality is that many renovation disputes, budget blow-outs, and relationship breakdowns begin not on the building site, but in the quiet moments after an email lands in your inbox with a PDF attached. Learning to read between the lines of a quote is one of the most valuable skills a homeowner can develop.

African American adult revising papers with a pencil at a desk, focus on hands and documents.

A construction quote is more than a price; it’s a promise. It outlines what will be done, under what assumptions, and for what sum. But unless you know what to look for, that promise can be full of holes. One of the most common points of confusion is the treatment of Prime Cost items—often abbreviated as PC sums. These are allowances the builder includes for materials or items that have not yet been selected, such as tapware, door hardware, floor tiles, or light fittings. The figure is a placeholder, typically based on a basic or mid-range specification. If the allowance is $40 per square metre for bathroom tiles and you later choose a handmade Moroccan tile at $110 per square metre, the difference becomes a variation—payable by you. This isn’t dishonest; it’s standard practice. But the problem arises when the PC sums are unrealistically low, making the overall quote appear cheaper while shifting cost risk onto the homeowner. We’ve seen quotes where the PC sum for an entire kitchen’s benchtops was $800, a figure that would barely cover a laminate finish, luring unsuspecting owners into a false sense of affordability.

Close-up of business professionals using a highlighter during a meeting.

Just as important as what’s included is what’s excluded. A well-prepared quote will clearly list exclusions—items like painting, floor coverings, blinds, landscaping, electrical upgrades beyond the main switchboard, or council consent fees. Cheaper quotes sometimes reduce their headline figure by removing these elements, gambling that the homeowner won’t notice until it’s too late. When comparing quotes, it’s essential to line them up side by side and identify what each builder has assumed is outside their scope. One may include skip bin hire and site cleaning; another may leave it for you. In a recent Auckland villa renewal, two quotes for the same structural work differed by $28,000. The lower quote excluded restoration of existing timber sash windows and specified “client to arrange protective coverings during construction.” The higher quote included full window refurbishment and all site protection. Without that detail, the choice appeared obvious—until the hidden costs surfaced.

Then there is the critical distinction between an estimate and a fixed-price contract. An estimate is exactly what it sounds like: an educated guess, often expressed as a range or with a note that it may vary by 10–15%. It is suitable only for very early budgeting, when full design drawings and engineering aren’t available. A fixed-price contract, on the other hand, is meant to lock in the cost for a clearly defined scope of work. The key word is “clearly defined.” A fixed price based on ambiguous plans is a variation trap waiting to spring. For instance, a Wellington hillside renovation began with a builder’s estimate of $180,000, presented confidently after a site walk-through. The homeowners, inexperienced with construction, accepted it as a fixed sum. But the written document was labelled “budget estimate” and contained a small clause excluding rock removal and retaining wall work. The final cost exceeded $310,000 after hitting unforeseen greywacke during excavation and requiring engineered retaining—entirely legitimate variations because they were unforeseeable and excluded. The lesson isn’t that the builder was untrustworthy, but that the homeowners didn’t recognise the legal weight of the words on the page.

A flat lay of various marble tiles on a neutral background, showcasing diverse textures and colors.

To protect yourself, a disciplined set of questions should be applied to every quote before signing:

  • What Prime Cost sums are included, and are they sufficient for the quality I expect? Can I see a breakdown of what those PC sums are based on?

  • What is explicitly excluded? Will you confirm in writing that anything not listed in the exclusions is included in the price?

  • Is this a fixed-price contract or an estimate? If fixed, under what circumstances can variations be raised?

  • What assumptions have been made about site access, existing conditions, and the structural integrity of the building?

  • How are variations costed—hourly labour rates plus materials with a margin, or lump sums for each change?

  • What is the payment schedule, and does it align with completed milestones rather than calendar dates?

No reputable builder will mind these questions; they demonstrate an owner who is serious and engaged. At NZHomeware Editorial Studio, we often advise owners to request a detailed scope of works document alongside the quote—a written description of every major task. When this is cross-referenced with the quote line items, gaps become easier to spot. A quote that is startlingly short, lacking a breakdown of materials and labour, is a red flag. Transparency is the bedrock of trust, and a builder who resists providing detail is unlikely to become more communicative once the contract is signed.

In the end, a quote is the financial handshake for your renovation. It sets the tone for the entire working relationship. By understanding the mechanics of PC sums, exclusions, and the legal difference between an estimate and a fixed price, you shift from being a passive recipient of prices to an informed decision-maker. That shift not only protects your budget but also signals to the industry that you value clarity and fairness—qualities that attract the very best tradespeople and deliver the long-term outcomes you deserve.

Designer, Builder and Homeowner Relationships

Why Relationships Shape Renovation Outcomes

In New Zealand, the gap between a smooth renovation and a stressful, over-budget struggle often comes down to one factor: the quality of the relationship between homeowner, designer and builder. Homes here present challenges rarely captured in plan view alone — from steep site access and unrecorded foundation repairs to the quirks of 1920s timber framing that no set of drawings can fully anticipate. When these realities are confronted too late, redesigns, revised quotes and programme delays eat into both budget and trust. Conversely, when a builder’s practical knowledge enters the conversation early, design decisions become more resilient, and the entire project moves with far fewer surprises.

Engineering team analyzing blueprints together at an outdoor construction site with safety gear.

The best projects we document at NZHomeware Editorial Studio share a common thread: the builder wasn’t handed a finished set of drawings and told to price them. Instead, the builder contributed to feasibility discussions, helped test construction methods before they were locked in, and flagged cost implications while options were still open. This isn’t about blurring professional boundaries; it’s about recognising that a house is a physical assembly, not just a design concept. When a designer and builder work in parallel from the start, the result is a set of documents that reflect what can — and should — be built on that specific site, with that budget, for those long-term outcomes.

Delivery Models and Their Impact on Transparency

How you contract your team directly influences how early this collaboration can occur. The three most common delivery models in New Zealand residential renovation carry distinct rhythms of communication and risk-sharing.

Design-Bid-Build (Traditional). The homeowner engages a designer or architect to produce full construction drawings, which are then tendered to several builders. This approach can work for straightforward new builds on flat land, but for renovations of existing dwellings it often exposes a flaw: the builder’s expertise arrives after all major design decisions are made. If tender prices come back significantly higher than expected, the only routes are redesign, value engineering under pressure, or accepting a compromised outcome. Delays and frustrations frequently follow.

Design-and-Build. A single entity (often a building company with in-house design capability) provides both design and construction services. The builder’s cost knowledge feeds into the design from day one, which largely eliminates the redesign-after-tender cycle. This model encourages a collaborative, solutions-focused culture, but it relies heavily on the integrity and capability of the building company. Homeowners need to be confident that design choices are being made in their long-term interest, not merely to maximise margin.

Two designers collaborating on a project, utilizing a laptop and drafting materials on a round table.

Construction Management. The homeowner contracts directly with individual trade contractors and a construction manager who coordinates them. The manager may be involved during design to offer buildability advice. While this can keep margins lower, the administrative and coordination burden sits heavily on the homeowner, making it less suitable for those without construction experience or significant time to dedicate. Trust becomes distributed across multiple relationships, and transparency depends on rigorous documentation of every sub-contract.

Whichever model you lean toward, the true test is whether it permits the builder’s voice to be heard while the design is still malleable. A 2022 survey by the Registered Master Builders Association found that renovators who brought a builder into the team before lodging resource consent were 40% less likely to report budget overruns above 10%. Early involvement doesn’t guarantee success, but it dramatically lowers the risk of a design so divorced from site realities that it needs to be reworked at the worst possible time.

The Ingredients of a Trustworthy Professional Relationship

Trust in renovation isn’t built on friendship — it’s built on clarity, consistency and demonstrated competence. The most effective designer-builder-homeowner relationships we witness share several practical traits:

  • Joint site walks before design begins. The builder can point out access constraints, drainage patterns, existing material conditions and potential structural surprises that no desktop survey will reveal.

  • Regular, structured communication. Fortnightly on-site meetings with a simple agenda — progress, look-ahead, any sniff of a variation — keep everyone aligned without drowning in email.

  • A formalised early contractor involvement (ECI) agreement. Even in a design-bid-build framework, paying a builder a small fee to review a 50% design package can save tens of thousands downstream. This is not a tender tactic; it’s a risk reduction strategy.

  • A contract that matches the relationship. Standard NZS3910 or NZIA contracts can be customised to allow for collaborative decision-making, shared savings clauses, and transparent handling of variations. Avoid contracts that incentivise adversarial behaviour.

“The most dangerous phrase in a renovation is ‘we’ll sort that on site.’ Every ‘sort it later’ becomes an unplanned cost. When I’m involved early, those conversations happen when they’re cheap — on paper, not in a muddy excavation.” — Quote from a licensed building practitioner with 25 years’ experience in central Wellington renovations.

Close-up of a craftsman using a saw, showcasing woodworking skill and precision.

Transparency is the bedrock. This means quotes that break down labour, materials, margins and allowances rather than lump sums that hide assumptions. It means a builder who openly discusses where provisional sums sit and what happens if a contingency is (or isn’t) drawn down. And it means a designer who doesn’t guard drawings as sacred — who sees them as a living brief, willing to adapt when better information emerges.

When these relationships function well, the homeowner’s role shifts from project police officer to informed decision-maker. They are presented with real trade-offs — do we spend $8,000 here to keep that character ceiling, or redirect it to better insulation? — not just demands for more money. At NZHomeware Editorial Studio, our renovation case studies consistently show that projects underpinned by early, transparent collaboration deliver not just better value over time, but a far more humane experience for everyone involved. In the end, a healthy working relationship is the one component you cannot specify in a schedule of quantities, yet it determines more than any other single line item whether your renovation fulfills its promise.

Council Consents and Inspections

Council Consents and Inspections

Every renovation that adds to or alters the structure, envelope, or safety systems of a New Zealand home sits within a legal framework designed to protect both the homeowner and the wider community. The building consent process is not an optional hurdle—it is the primary mechanism that ensures your project meets the performance standards of the New Zealand Building Code. Understanding the consent pathway, its timelines, and the human relationships at its centre will save you weeks of delay, thousands in holding costs, and the kind of uncertainty that erodes trust in your entire project.

The first distinction every renovator must grasp is between a building consent and a resource consent. A building consent is the council’s verification that your proposed building work, if completed in accordance with the approved plans and specifications, will comply with the Building Code. A resource consent, by contrast, deals with the environmental impacts of your project—things like height, boundary setbacks, heritage rules, or earthworks—and is issued under the Resource Management Act. A project may need one, both, or in some cases neither. Work that is genuinely low-risk and meets the criteria in Schedule 1 of the Building Act (such as some internal fit-outs, like-for-like joinery replacements, or minor decking) may be exempt from a building consent altogether. However, the legal responsibility for correctly determining whether work is exempt rests with the homeowner, so if in doubt, always seek written advice from a licensed building practitioner or your local council before work begins.

Scenic view of Auckland Museum, harbor, and city skyline on a clear day.

The consent pathway itself follows a predictable rhythm. You or your designer submit architectural drawings, structural calculations, product specifications, and project information. The council’s processing officer then has 20 working days to either grant the consent or issue a request for further information (RFI). If an RFI is raised, the clock stops until you provide a satisfactory response. Once the consent is issued—and you have paid the fees—you can notify council and begin work. During construction, a series of mandatory inspections must be booked, documented, and passed. Finally, once all work is complete and all inspections are signed off, you apply for a Code Compliance Certificate (CCC), which is the formal confirmation that the finished work complies with the consent. Without a CCC, your renovation is not legally complete, and future insurance or sale difficulties are almost certain.

Timelines vary widely by council and workload. In a typical Auckland or Christchurch suburban renovation, a straightforward building consent might take four to six weeks from lodgement to issue if no significant RFIs arise. A resource consent, if required, can add three to six months, more if the application requires public notification or expert reports for things like arborist assessments or flooding studies. Delays frequently occur when applications are incomplete, when specifications for watertightness or structural design are too vague, or when the council identifies non-compliance with clauses such as B2 (Durability), E2 (External Moisture), or H1 (Energy Efficiency). Another common trigger is a mismatch between the plans and the product selections—for example, specifying a proprietary cladding system but not supplying the current BRANZ appraisal certificate, or altering a bracing design without updating the structural calculations.

Rejections, while rarer than RFIs, tend to happen when an application fundamentally fails to demonstrate compliance. This often stems from the use of unverified materials, missing producer statements, or a design that cannot practically meet the Building Code on the particular site. The solution is nearly always more thorough preparation before lodgement. A pre-application meeting with the council’s duty planner or building officer—usually a free or low-cost service—can surface design issues early and build a collaborative relationship with the very person who will later assess your paperwork.

Architect with hard hat inspecting glass doors in a modern building outdoors.

Managing the relationship with council officers is a skill that rewards professionalism and patience. These are trained professionals working within a statutory framework, and they see hundreds of applications. The most successful renovators treat them as a source of clarity, not an adversary. Return phone calls and emails promptly. When an RFI arrives, respond with exactly the information requested, in the format it was asked for. If you disagree with an interpretation, raise your concern respectfully, supported by evidence—ideally from the Acceptable Solutions, Verification Methods, or manufacturer documentation. Antagonism or legal threats rarely accelerate a consent; they more often entrench positions and add cost.

Inspections are the other half of the relationship. Your builder or project manager will usually book them, but the homeowner should know what each inspection is verifying—typically foundation, slab, framing, pre-line (before linings cover wiring and plumbing), post-line waterproofing, and final. If an inspection fails, the work stops until the issue is corrected and a re-inspection is carried out. This can feel frustrating, but an inspection failure is actually a form of consumer protection: it catches a problem before it becomes a defect buried in the walls. Photograph every stage of the build, keep a site diary, and store all inspection records. These become part of the property’s history and are invaluable if you sell or make an insurance claim later.

Open notebook with magnifying glass on wooden table beside framed certificate.

At NZHomeware Editorial Studio, we’ve walked through over a dozen consent processes with renovators, and one lesson stands out: builders and designers who have strong local council relationships and a clear paper trail will move your project through consent with far less friction. The health of those relationships often determines whether your renovation stalls at week six or steams ahead toward a CCC with confidence. Invest in the process as seriously as you invest in the materials, and the consent phase will become not a barrier but a genuine quality check on the home you’re creating.

When Things Go Wrong

When Things Go Wrong

Renovation projects rarely follow a perfectly straight line. Even with the right team, detailed plans, and a healthy contingency, the unexpected can — and often does — surface. The test of any project isn’t the absence of problems, but how swiftly and fairly they are resolved. In New Zealand, where building stock is aging and terrain often unpredictable, the ability to manage variations, disputes, and defects without derailing the build is a skill every homeowner should develop.

When a problem arises, the first instinct might be panic or confrontation. Instead, start with the contract. A well-drafted building agreement — whether the NZS 3910 standard used on larger jobs, the Certified Builders’ residential contract, or a Master Builders contract — will spell out exactly what happens when scope changes, delays, or defects occur. Most contracts include a clear variations clause: any extra work or change to the agreed scope must be documented, priced, and signed off by both parties before proceeding. If a builder or subtrade starts work without that written approval, the cost is often at their own risk.

Engineers in safety gear discussing a construction project outdoors with visible scaffolding.

Variations themselves aren’t a sign of failure. Unforeseen ground conditions — buried rocks, old drainage, liquefaction-prone soils — are common in Wellington hillsides and post-earthquake Christchurch. Hidden rot, old borer damage, or undocumented alterations from previous decades frequently appear once walls are opened up in villas and bungalows. In these situations, a variation is simply the project adapting to reality. What matters is that the process is transparent: a written description of the change, the reason, the cost (including any impact on the programme), and a formal acceptance from you. Never rely on a verbal nod; memories fade and the cost of those “small extras” can climb alarmingly.

Defects — work that’s not to code, poor workmanship, or materials that fail — require a different path. Most contracts include a defects liability period, typically 90 days after practical completion, during which the builder must return to remedy any issues at their cost. But the Construction Contracts Act 2002 also gives you leverage: if a defect is serious and the contractor refuses to rectify it, you may have grounds to withhold payment (with careful legal advice) or pursue adjudication. The key is documentation. Photograph everything, date the images, and record correspondence. A site diary shared between you and the project manager — even a shared digital folder — can prevent “he said, she said” standoffs.

When disagreements escalate, the collision of personalities and money can sour what was a productive relationship. The most effective communication technique is to separate the person from the problem. Approach the builder or designer with questions rather than accusations: “Can you help me understand why the waterproofing detail here doesn’t match the consented plan?” That tone keeps the conversation technical rather than personal. If the issue remains unresolved, introduce a structured escalation. First, request a formal meeting with the site supervisor and your main contractor, bringing written evidence. If that fails, involve the designer or architect who specified the work — they often carry professional weight. The next step might be a neutral third party: the Registered Master Builders’ dispute resolution service, an adjudicator under the Construction Contracts Act, or, for design faults, the Building Disputes Tribunal. Litigation should always be the last resort; it’s expensive, slow, and destructive to relationships.

An interior space undergoing reconstruction and demolition for renovation.

A real-world example illustrates how variations can be managed without conflict. During a Christchurch repair and rebuild project, the excavation for a new garage slab revealed deeper-than-expected liquefaction ejecta that had not been picked up in earlier soil tests. The structural engineer immediately required a more substantial foundation. The builder halted work that morning, prepared a variation quoting the extra concrete, steel, and engineering time, and sat down with the homeowners the same afternoon. Because a contingency line had been built into the budget from the start — and the contract required signed variations before any work — the discussion stayed calm. The extra $4,200 was approved in writing, the programme adjusted by four days, and the team got back to work without resentment. The key? A shared understanding that the ground was nobody’s fault, a prompt Priced Variation Order, and the trust that came from having already navigated smaller changes correctly.

In another case, a Wellington hillside renovation hit a serious defect when a new deck was found to be fixed to an old retaining wall that didn’t meet current consent requirements. The builder’s initial reaction was to rely on an ex-clause in the contract that excluded liability for pre-existing structures. But the homeowner had taken out latent defects insurance (a specialised policy that covers previously unknown structural faults) and, after a measured conversation, the builder agreed to stop work while the insurer assessed the claim. The deck was redesigned with independent foundations, the insurer covered the extra engineering and materials, and the builder charged only for the additional labour. By keeping the communication factual and exploring all options before blame was assigned, both parties preserved their relationship and the project’s momentum.

Business meeting between colleagues discussing a document indoors at a wooden table.

Ultimately, the most powerful protection against a renovation going wrong isn’t a clause — it’s a culture. From the first meeting, set the expectation that changes will be acknowledged quickly, discussed openly, and documented without drama. Build a project team that includes a designer or project manager who can act as a buffer when technical disputes arise. And always keep the long-term stewardship of the home in mind: a few thousand dollars and a week’s delay to get a structural issue right will seem trivial compared to the cost of a cover-up that fails years later. When things go wrong, the goal isn’t to find fault — it’s to find the fix that returns the build to quality, trust, and forward motion.

Materials, Products and Long-Term Value

Beyond the Initial Price Tag

The Real Price of a Square Metre

When a builder hands you a quote, the figure at the bottom of the page is only the beginning of the story. A cladding system priced at $180 per square metre installed may look like a clear winner against one at $280, until you spread the costs across the 25 or 50 years you intend to live with it. Lifecycle costing — accounting for cleaning, recoating, repairing, and eventual replacement — often inverts the initial ranking. In the New Zealand environment, where high UV, wind-driven rain, and salt-laden air punish the building envelope relentlessly, the cheapest upfront option is frequently the most expensive choice you will ever make.

Close-up of an old wooden house facade with peeling paint against a clear blue sky.

Take exterior cladding. Traditional timber weatherboards, typically western red cedar or pine, remain a beloved feature of Kiwi villas and bungalows. They have a service life that can exceed 80 years — if maintained. The catch sits in that maintenance schedule: thorough washing every two years, recoating every five to seven, and the constant vigilance against moisture ingress at junctions and nail holes. On an exposed coastal site in Wellington, you might halve those intervals. Failure to honour those cycles leads to cupping, splitting, and the slow creep of rot that turns a $5,000 repaint into a $35,000 reclad. Compare this with a modern fibre cement direct-fix system with a factory-applied finish. Installed cost is often 30–40 per cent higher, but the first major maintenance event — a full recoat — doesn’t typically arrive for 15 years, and the material itself won’t rot. Over a 30-year period, the fibre cement system can cost 20 per cent less in total, purely because you’ve eliminated multiple painting cycles. Neither choice is wrong, but you need to walk in with your eyes open to the long game.

A minimalist architectural design featuring glass and steel elements on a sunny day.

Roofing presents a similar equation. Corrugated steel roofing, often factory-painted with a polyester coating, dominates the New Zealand skyline for good reason: it’s affordable, lightweight, and fast to install. In a benign inland Waikato environment, you might get 20–25 years from that coating before re-roofing is sensible. Place the same profile on a beachfront property on the North Shore, and the salt spray can reduce effective coating life to 12 years. Suddenly, upgrading at build or re-roof stage to a zinc/aluminium‑alloy coated steel with an enhanced PVDF paint system adds 15 per cent to the project cost but buys you another 15–20 years of service — a net present value that leaves the standard option far behind. Roofing is not a component you want to replace twice in your ownership. The cost of scaffolding, disposal, and the disruption of stripping back to purlins far exceeds the saving on the metal itself.

Windows condense these trade-offs into a single plane. Single-glazed timber joinery, still found in hundreds of thousands of older New Zealand homes, leaks heat and allows condensation that gradually rots the sashes. A renovation that retains them for character but adds a secondary glazing system can be a thoughtful lifecycle choice, giving thermal improvement without losing heritage fabric, and avoiding the full cost of new timber double-glazed units. Yet in a pure cost comparison over 20 years, a thermally broken aluminium window with double glazing will often pay back its 25–35 per cent premium through reduced heating energy, lower maintenance, and no rotting components — particularly in the lower South Island. The smart decision isn’t always the most expensive window system; it’s the one that matches your specific site and your realistic appetite for ongoing care.

Low angle of window with glazing bars in light simple room with shadow on white wall

Flooring holds similar lessons, but they’re often learned too late. An $80 per square metre laminate floor might seem ideal for a rental or a young family’s first home. After three years of sandy feet, dropped toys, and the odd plumbing leak, the edges are starting to swell, and the surface is dull. Replace at year five: total cost $80 plus removal and disruption. A mid‑range engineered timber floor at $140 per square metre can be resanded three times over 25 years, each sand costing a fraction of replacement. A simple lifecycle calculation, factoring in even one premature failure, makes the laminate the dearer floor. Wool carpet, meanwhile, cleans better, resists crushing longer, and can be rejuvenated by professional cleaning, while cheap synthetic pile may look tired in half the time. In New Zealand’s damp-prone rooms, a moisture-resistant floor covering — porcelain tile, polished concrete, or high-quality vinyl plank — is a classic case of spending more once rather than less twice.

The mental shift that saves renovators the most money is this: stop asking “What can I afford to install?” and start asking “What am I willing to maintain, and for how long?” Cheap is seductive because it signs off the quotation today. But the home you’ll be living in ten winters from now will still be asking for your money, whether you planned for it or not. Lifecycle costing isn’t a sales tactic — it’s the only honest way to compare numbers that look small now and grow large later.

Repair, Replace or Upgrade?

Repair, Replace or Upgrade?

Every renovation is a sequence of choices about what to keep, what to restore, and what to let go. The surface that has served a home for thirty years, the window that no longer shuts tightly, the roof that still keeps water out but looks tired — each presents the same fundamental question. The answer is rarely as simple as comparing the cost of a repair against the price of something new. It demands a wider lens: one that considers performance, maintenance burden, future-proofing, and the real cost of ownership over the next twenty to thirty years.

Close-up of a rustic window frame on a weathered wooden house exterior, showcasing vintage charm.

In many New Zealand homes, original materials carry an integrity that modern products struggle to replicate. Native rimu flooring, double-hung kauri sashes, or hand-pressed brickwork have already demonstrated their longevity. If they can be repaired by a skilled craftsperson, the result often outperforms a budget replacement both in lifespan and character. A repaired timber window, properly stripped, re-puttied, sealed, and fitted with new hardware and weather seals, can achieve near double-glazed thermal performance when combined with a high-quality secondary glazing system. The decision to repair here is not sentimentality — it is lifecycle logic. You preserve an asset that has already proven its durability, avoid the embodied carbon of manufacturing and transport, and retain value that contributes directly to the home’s resale appeal.

However, repair has hard limits. When rot extends deep into structural framing, when borer damage compromises timber integrity, or when an original product no longer meets basic health and safety standards, replacement becomes the only responsible path. The key is to diagnose honestly. Too many homeowners pour money into patching a failing element because the upfront cost appears lower — only to revisit the same problem within a few years. A moisture-damaged weatherboard on a south-facing wall might be a one-off fix if caught early, but widespread damage across multiple boards is almost always a signal that the wall’s weathertightness design itself is inadequate. In that case, a targeted repair is simply deferring the inevitable full-scale replacement — and the eventual cost will include not just new cladding, but the framing rot and mould remediation hidden behind it.

Two construction workers renovating a house exterior, carrying materials and working on woodwork.

Between repair and replacement sits the upgrade decision. This is the space where informed renovation creates the greatest long-term value. Upgrading means you replace a functional but outdated element with something that significantly lifts performance, reduces maintenance, or extends service life. The classic New Zealand example is roof cladding. An older corrugated iron roof might still be serviceable after forty years, but a full replacement with a modern long-run steel profile coated in a durable zinc/aluminium alloy finish offers a 50-year lifespan, improved acoustic performance in rain, and often a cooler thermal profile when selected in lighter colours. The upgrade costs more than a patch-and-recoat repair, but the next owner will not face a reroof for half a century — a powerful argument when considering capital value.

The same principle applies to joinery, insulation, plumbing, and electrical systems. When a home is already stripped back to framing for other work, the marginal cost of upgrading from R2.8 to R4.0 ceiling insulation, or from PVC to copper piping in an accessible subfloor, is relatively small. These are not decisions to second-guess later; they are opportunities that vanish once linings go up. The most experienced renovators in New Zealand treat the “replace” moment as a trigger to ask: while we are here, what should we improve so we never have to touch this again?

Product selection in an upgrade must be guided by compatibility and long-term performance in our specific climate. High humidity, salt-laden winds in coastal areas, intense UV exposure, and the constant wetting/drying cycles of timber framing mean that a product that works brilliantly in a European or North American context may fail prematurely here. A reputable supplier — one that understands the difference between a Central Otago high-country site and a West Coast rain forest — becomes an essential part of the decision chain. NZHomeware Editorial Studio’s ongoing product research consistently highlights that longevity of materials in New Zealand conditions depends less on the brand’s global standing and more on local installation history, quality of fixing systems, and proven weathertightness detailing.

Crop unrecognizable workman in glove applying caulk from bottle on seam during window montage work in building

Budget naturally presses against these decisions. A disciplined approach is to separate the work into three clear categories: immediate safety and weathertightness (non-negotiable), functional improvements that prevent future damage (high priority), and performance or aesthetic upgrades (planned and phased). That way, a repair that genuinely restores integrity is not sacrificed for an upgrade you cannot afford right now, and an essential replacement is never downgraded to a patch because the budget was blown on something optional earlier in the project.

The most successful renovation outcomes share a consistent theme: homeowners who understand that every product and material has a finite lifecycle, and who make decisions based on that lifecycle rather than on short-term relief. Repair when it truly extends life and preserves value. Replace when something is at the end of its safe or efficient life. Upgrade when the timing is right and the long-term return justifies the outlay. In a country where our homes must cope with aggressive environmental loads, those choices are not just economic — they are what define whether a renovation will still be performing well when the next generation walks through the door.

Sustainable Choices That Pay Back

Sustainable Choices That Pay Back

Talk to any Kiwi who has upgraded an old villa or 1970s bungalow and they’ll tell you the same thing: the best money they spent didn’t go on a flashy kitchen. It went into insulation, double glazing, and a decent heat pump. These aren’t just feel-good green gestures — they’re genuine investments with calculable returns in comfort, health, and resale value. In a country where a third of homes were built before any meaningful insulation requirements existed, the performance gap is so wide that even modest upgrades deliver outsized benefits.

From below of male screwing light bulb into new fashionable lamp during renovation work in apartment

When we speak about return on investment in renovation, it’s easy to default to a simple payback calculation: cost divided by annual energy saving. But that misses two far larger financial pillars — avoided health costs and capital gain. A 2019 University of Otago study found that insulating homes led to a 38% reduction in hospital admissions for respiratory conditions in children. For homeowners, that translates to fewer sick days, less time off work, and lower medical bills. Factor that in, and the payback period for ceiling and underfloor insulation can shrink from a decade to two or three years, even before you count the warmth.

Insulation is the first, most logical step. The current New Zealand Building Code requires a minimum ceiling R-value of R6.6 in warmer climates and R3.2 to R4.5 in walls, but many older homes sit at R1.8 in the ceiling if they have any at all. Retrofitting to exceed the code minimum — going to R7.0 ceiling batts or using high-density rigid panels under a suspended floor — uses a modest additional material cost to lock in thermal performance that can halve a home’s heat loss. From a valuation perspective, a fully insulated home with documented upgrade receipts is more attractive to buyers who increasingly ask about long-term running costs. Real estate agents in cooler regions report that warmer, drier homes sell up to 6% faster, and often achieve nearer asking price.

A charming window with red geranium flowers illuminated by soft daylight shadows.

Glazing is the next frontier. Single-glazed windows in aluminium frames — the default in tens of thousands of New Zealand homes — can be responsible for 40% of total heat loss. Homeowners often fear the cost of replacing them, but a carefully planned upgrade need not be a whole-house exercise. Thermal performance gains are concentrated in the living areas and south-facing elevations. Retrofitting double glazing into existing timber joinery, or selecting thermally broken aluminium, yields immediate, perceptible differences. Before-and-after temperature logging we’ve conducted in Auckland villas shows a 4°C lift in overnight bedroom temperatures just from shifting to low-E double glazing, with no additional heating. The comfort return is instant. Financially, if glazing upgrades reduce heating energy use by 25-35%, a typical household saves $350–$500 per year. On top of that, noise reduction and condensation elimination are non-energy benefits that buyers notice instantly at open homes, effectively capitalising the upgrade.

The heating system itself is the engine of the thermal upgrade. An efficient heat pump (with a Coefficient of Performance of 4.0 or higher) can deliver four kilowatts of heat for every kilowatt of electricity consumed. That’s physically impossible for any resistive heater or gas flame. In a well-insulated home, a correctly sized heat pump can handle the whole heating demand for less than $2 per day in winter. If we treat the cost difference between a basic $1,500 panel heater solution and a $4,000 heat pump installation, the $2,500 premium pays itself off in two to three winters of reduced power bills. And again, health savings from stable indoor temperatures tip the equation even further.

A contemporary air conditioning unit installed on a white corner wall of a modern urban building.

Water heating is a lower-profile investment but one with a compelling case as electricity prices rise. A heat pump water heater — which extracts warmth from the surrounding air — uses roughly a third of the energy of a traditional electric cylinder. With a typical four-person household spending $800 annually on water heating, the $3,000 incremental installed cost can be recovered in under six years, while the unit lasts 10–15 years. Solar water heating, once heavily subsidised, is a more marginal call today given the cost of panels and the need for backup heating, but still works brilliantly in high-sun regions when integrated with wetback systems on lifestyle blocks. The key is to size any system realistically, based on summer loads, and to avoid overspending on technology that won’t be fully utilised.

None of these investments work in isolation. The real magic happens when they are layered: insulation slows the heat loss, double glazing traps warmth further, a heat pump efficiently tops up the temperature, and a hot water heat pump minimises the base load. Taken together, a typical 140 m² home can move from a 180 kWh/m²/year energy appetite to below 70 kWh/m²/year, achieving Passive House-like performance with mainstream products. This is not an environmental abstraction — it’s a strategic move that builds in a hedge against future power costs while making the home noticeably more liveable today. And when the time comes to sell, the Healthy Homes compliance checks that all rentals now require are raising the floor for everyone. A home that already exceeds those standards sits in a class of its own, commanding a premium in a market where buyers have learned to fear hidden moisture and draughts.

The math, then, is simple: sustainability pays, but you have to measure the return in degrees of comfort, days of health, and dollars of futureproofing — not just a single line on an energy bill.

Why Local Knowledge Matters

Why Local Knowledge Matters

New Zealand’s geography is a series of extreme microclimates. A single building product might face salt spray and 90% humidity on a Northland beach, then be specified for a Central Otago winter where temperatures swing from -10°C to 12°C within hours, under ultraviolet radiation levels 40% higher than comparable European latitudes. Add the wind-driven rain that lashes Wellington hillsides and the volcanic sulphur of Rotorua, and it becomes clear why a product that performs perfectly in a controlled European test chamber can fail within five years here. Local knowledge isn’t a nice addition to the specification process — it is the difference between a durable renovation and a tear-out job you didn’t budget for.

Wooden house with neon lights at sunset near Auckland harbor.

Coastal corrosion illustrates the point sharply. Many offshore brands market “marine-grade” finishes, but New Zealand’s coastal zones produce a specific, aggressive combination of chloride deposition and persistent moisture that international testing doesn’t always replicate. I’ve documented a case near Mangawhai Heads where a set of European aluminium bi-fold doors, specified as suitable for marine environments, began showing deep pitting on the powder coating within three years. The BRANZ corrosion map classifies that area as a severe marine zone, with annual chloride levels above 700mg/m² — well beyond what the manufacturer’s guarantee assumed. Local aluminium joinery with a Qualicoat Seaside-class finish, on the very same beachfront, still looked new after seven years. The lesson is not that one brand is superior; it’s that only local long-term case histories reveal whether a product’s specification holds up to New Zealand’s reality.
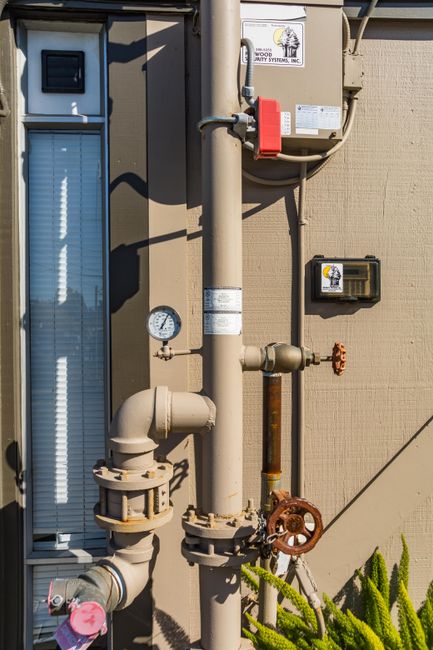
Ultraviolet degradation is another potent example. The World Health Organization notes that New Zealand records peak UV indices of 13+, compared with a typical European summer of 6–8. Products like clear roofing sheets, flexible flashings, exterior paints and sealants absorb this energy at a rate that can double or triple the manufacturer’s stated lifespan. A popular Australian acrylic roof membrane, widely used on commercial buildings in Brisbane, was trialled on a Wanaka lodge. Within four years the surface had chalked, micro-cracked and pulled away from the flashings. A BRANZ accelerated weathering test later confirmed that the resin system degraded far faster under the UV spectrum prevalent in high-altitude New Zealand. Informed local specification swaps to chemistries proven in the Luggate Valley or the Mackenzie Country, where UV, thermal shock, and frost cycling all act at once.

Close-up of a blue wall with peeling paint, showcasing texture and color contrast.

Wind-driven rain might be the most dangerous variable of all, because its effects are hidden inside wall cavities. European cladding systems — particularly direct-fixed plaster on cavity-less walls — often assume rainfall is predominantly vertical. In exposed parts of Wellington, Christchurch and coastal Hawke’s Bay, rain is horizontal for long periods, forcing water through micro-gaps in detailing that works fine in a German climate. The leaky building crisis was not just about bad design; it was a systemic failure to adapt imported building methods to New Zealand’s specific wind and moisture profiles. A Wellington hillside renovation I reviewed had used a UK-origin monoclad system with a taped joint design that met British standards but could not handle the 1-in-10-year driving rain pressure expected on that coast. Within seven years the timber framing had decayed to a point where the house required full re-cladding. That renovation cost grew from $200,000 to over $550,000, driven entirely by product selection without local weathertightness validation.

Rustic pergola creates striking shadows on brick wall under clear sky in Auckland, New Zealand.

These examples are not alarmist. They are well-documented across New Zealand building surveys and BRANZ reports. What separates a durable renovation from a costly mistake is the willingness to look beyond an international spec sheet and ask: “Where has this exact product been used in a setting that matches my site, and for how long?” Local knowledge lives in the hands of experienced builders, building surveyors, and independent research houses like BRANZ. It also lives in the product curation approach taken by specialists who spend years watching how materials perform on New Zealand homes, not just reading overseas appraisals. The NZHomeware philosophy, for instance, is built on this principle: every product in its system must have a proven New Zealand track record — preferably with site-specific exposure data — before it’s offered to renovators.

For homeowners and their project teams, the practical step is simple. Before you sign off on any major material — be it a cladding, a roof, a sealant, or a window system — require local references and independent New Zealand testing evidence. Ask your builder or designer: “How does this perform in a coastal environment like ours?” or “What happens in a Canterbury nor’wester?” If the answer is just a data sheet from overseas, dig deeper. Trust is built on specific, verifiable local history. That is how you buy long-term value rather than a brand name — and that is the kind of renovation stewardship that protects your home for decades.

The NZHomeware Approach to Product Selection

The NZHomeware Approach to Product Selection

Most product reviews in the renovation space begin and end with a price tag and a star rating. At NZHomeware Editorial Studio, we take a fundamentally different path. Our methodology isn’t designed to rank products — it’s built to uncover which materials and fixtures truly perform in New Zealand homes, year after year, across wildly different climates and construction eras. This means moving beyond specification sheets and marketing claims and instead gathering evidence from the places where products succeed or fail: real houses, real installations, and the people who work with them every day.

Three interlocking pillars form the backbone of our evaluation framework: field research, installer feedback, and lifecycle analysis. Each pillar compensates for the blind spots of the others, producing a rounded picture that a single laboratory test or a short-term review could never provide.

Architect with hard hat evaluating modern house exterior. Ideal for construction and architecture themes.

Field research means subjecting products to the conditions they will actually face. We don’t simply accept a manufacturer’s corrosion-resistance rating; we locate installed examples in coastal Taranaki, geothermal Rotorua, or the frost-prone valleys of Central Otago. Our team documents how a powder-coated aluminium window frame looks after five years of salt-laden westerlies, or whether a engineered timber flooring system remains stable in a villa that swings from 90 percent relative humidity in July to dry, heated air in August. This on-the-ground forensics often reveals performance gaps that laboratory data never captures — micro-cracking in a flexible sealant, colour shift in a ‘UV-stable’ polymer, or a subtle but persistent odour from a low-VOC paint in a tightly sealed room.

Installer feedback gives us the view from the tools. Plumbers, builders, waterproofing membrane applicators and tilers handle products in volume, under time pressure, and across a wide range of substrates. If a tap cartridge is notoriously difficult to service once tiled in behind a wall, installers know long before a homeowner discovers the problem. We interview trade professionals systematically — not just the ‘ambassador’ installers some brands promote, but a cross-section of experienced contractors who have no incentive beyond honesty. Their insights often centre on tolerance, ease of maintenance, and compatibility with New Zealand’s existing housing stock. A shower mixer that works beautifully in a new build with equal water pressure may become a frustrating dribble in an old Wellington hillside home with uneven pressure; installer intelligence flags these mismatches early.

“I’ve lost count of the imported bathroom fittings that look great in a showroom, but the cartridge isn’t designed for our water chemistry. In the Manawatu, with harder water, they seize within three years unless you’re filtering everything. That’s the sort of thing nobody prints on the box.”
Registered plumber, 22 years’ experience, lower North Island

Sleek and modern bathroom featuring a black tiled wall and glass shower enclosure.

Lifecycle analysis shifts the question from “what does this cost today?” to “what will this cost the homeowner over 15, 25, or 50 years?”. We build total-cost models that factor in initial purchase, installation labour, maintenance frequency, energy or water consumption, replacement intervals, and end-of-life disposal. A budget carpet might look attractive at $45 per square metre supplied and installed, but if it crushes and stains within seven years in a family home, the real annualised cost is higher than a mid-grade wool-blend carpet that still feels resilient after two decades. We also account for non-financial costs: the disruption of re-doing a failed waterproofing system, the health impact of accumulated dust mites in cheap underlay, or the uncomfortable summer overheating that comes from specifying dark-coloured roofing in inland Canterbury.

This three-pillar approach is inherently independent. NZHomeware Editorial Studio does not sell products, nor do we accept payment for inclusion in our research. When we curate a shortlist of recommended products — whether it’s a exterior cladding system, a heat pump hot water cylinder, or a hinge for a heavy door — the selection is evidence-based and transparent. We openly share the criteria we applied and the limitations of our analysis. That honesty builds the trust required for homeowners, designers, and builders to make informed decisions with their own money and reputations.

Consider a recent piece of research we conducted on kitchen mixers. We didn’t just compare flow rates and warranty periods. Our team visited 17 homes in Auckland, Wellington, and Christchurch where a specific model had been in service for at least three years. We measured actual water flow, checked for leaks, removed the aerator to inspect for debris, and interviewed the homeowners about daily use. The findings: a highly marketed mixer with a pull-out spray began failing at the hose connection in nearly one-third of the surveyed homes, while a lesser-known brand with a simpler mechanism showed zero field failures. The data reshaped our shortlist, and the editorial that followed saved countless homeowners from a costly impulse choice. This is the essence of the NZHomeware approach — methodical, unglamorous, but relentlessly practical.

A young woman stands by a sink in a modern kitchen, washing dishes with natural light pouring in.

For any homeowner standing in a showroom, online catalogue or builder’s quote, the product landscape is overwhelming. By applying field research, installer intelligence, and lifecycle economics, we strip away the noise. The result isn’t just a better product choice; it’s a renovation that wears in rather than wears out, a home that performs quietly in the background, and a genuine alignment between the money spent and the value created. That’s the definition of long-term value — and it’s the only standard we work to.

Real Renovations – Case Studies and Lessons Learned

Auckland Villa Renewal

Auckland Villa Renewal

The brief was deceptively simple: take a cold, draughty 1910s kauri villa in Grey Lynn and turn it into a warm, functional home for a family of five. The owners, both working professionals, were clear about what they valued. They wanted to keep the villa’s street presence and original character — the ornate plaster ceilings, the kauri floorboards, the double-hung sash windows — but they also needed more space, better flow, and a home that didn’t cost a fortune to heat. What unfolded over the next fourteen months was a masterclass in balancing heritage fabric with modern performance, and it revealed truths that apply to almost every villa renovation in Auckland.

A blue house surrounded by vibrant autumn leaves in Macedon, VIC, Australia.

The house, like so many of its era, had been built quickly with exceptional native timber but no insulation, no vapour barrier, and a subfloor that was little more than open ground. The original layout was a classic central hallway with rooms arranged on either side — four bedrooms, a single living room, a galley kitchen, and an outside toilet. Over the years, a lean-to bathroom and a vestigial back porch had been tacked on, but the real enemy was moisture. Rising damp had swollen the rimu skirting boards. Ceiling roses were stained from long-fixed roof leaks. And the unflued gas heater in the hallway was fighting a losing battle against condensation that ran down the single-glazed windows every winter morning.

Before any design work began, the project team — an experienced heritage architect, a builder who had completed over twenty villa restorations, and a building surveyor — spent two full days on site mapping every defect. The report wasn’t a demolition wish list; it was a diagnostic. It showed that the original timber framing was sound except for a few isolated areas of borer and one patch of decay under the old bathroom. The roof was in good shape but needed re-screwing. The real challenges were the subfloor, the lack of insulation, and the consequences of sixty years of deferred maintenance.

Man reviewing architectural blueprints in a modern kitchen environment.

The strategic decision was to keep the villa’s front four rooms entirely intact — these would become the master bedroom, a guest room, and a formal sitting room — while demolishing the poorly built rear additions and replacing them with a pavilion-style extension containing the kitchen, dining, family living, and laundry. A glass link would physically and visually separate old from new, avoiding the awkward collision of high ceilings and period details with contemporary volumes. This approach preserved the villa’s rhythm and entry sequence, while the new wing opened due north to the garden, capturing all-day sun.

With the layout resolved, the team turned to the less glamorous but far more important work of upgrading the home’s performance. The subfloor was completely excavated to lay a polyethylene ground vapour barrier, and the original timber piles were retained and braced. Underfloor insulation — high-density polyester segments, snugly fitted between joists — was installed, and all subfloor vents were replaced with adjustable units to manage airflow seasonally. In the roof space, existing loose-fill material was vacuumed out, and blanket insulation with a vapour-permeable facing was laid to meet the current New Zealand Building Code H1 requirements for an unvented roof with a well-sealed ceiling. In the walls, where the weatherboards could not be removed, the team pumped in a dedicated blown-in insulation system, a product specifically engineered for New Zealand timber-framed villas that allows the wall cavity to breathe while achieving R2.8.

Windows presented a heritage dilemma. The original single-glazed sashes were part of the villa’s character and protected by the district plan. The solution was restoration rather than replacement. Every sash was removed, stripped of lead paint, re-puttied, and fitted with custom brush seals and discrete secondary glazing on the interior reveal. This retained the street appearance while delivering a thermal performance equivalent to new double glazing. The glass link and the new extension, by contrast, used high-performance thermally broken aluminium joinery with low-e double glazing — a clear material distinction that highlighted the honest junction between old and new.

"The most expensive part of a villa renovation isn't the extension’s steel beams or the bespoke cabinetry. It’s the invisible work: making the building dry, insulated, and able to breathe. That’s what transforms a charming museum into a liveable home."

Interior of modern cottage made in minimalist style with wooden furniture in dining zone and convenient kitchen with built in appliances

Services were completely modernised. The original cast-iron waste pipes, cracked and root-invaded, were replaced with PVC. A new hot water heat pump was sited externally, and a centralised heat recovery ventilation system was discreetly ducted through the ceiling cavities, supplying filtered fresh air to living areas and extracting from kitchens and bathrooms. This, combined with the insulation work, dropped the average relative humidity from 75% to below 55% in winter, eliminating the condensation cycle that had plagued the house.

Cost transparency was built into the project from day one. The builder’s quote separated the restoration and structural works from the fit-out, and the owners were given an allowance schedule for key materials with clear guidance on where savings could be made without compromising integrity. The engineered timber floor for the extension was a trade-off they opted for over imported oak, a decision that saved $12,000 and supported local manufacturing. They also chose to retain and rewire the original bakelite light switches — a tiny detail that cost more in labour but preserved a tactile link to the house’s past. These decisions were never about cheap versus expensive; they were about prioritising value where it mattered most to the family.

The finished home is not a pastiche of a villa, nor a jarring box bolted to the back of one. It’s a coherent, layered dwelling where the original rooms feel honoured, the new spaces work hard for a busy family, and the running costs have fallen by more than half. Three years on, the owners say the thing they still notice every day is the quiet: no rattling windows, no cold drafts at ankle height, no musty smell rising from the floor. That silence cost more than the kitchen island but delivered far greater long-term value. For any Auckland villa owner facing a similar journey, the lesson is clear: the fabric you keep demands as much investment as the space you add, and the most successful renovations are those where the house performs as well as it looks.

Wellington Hillside Renovation

Wellington Hillside Renovation

Renovating on a Wellington hillside isn’t for the faint-hearted. The capital’s geography is as dramatic as its weather — steep, bush-clad slopes tumbling into a harbour that funnels the wind into every crevice. When the owners of a 1960s bungalow in the notoriously exposed suburb of Seatoun decided to bring their dark, draughty home into the 21st century, they knew they were battling more than just an outdated floor plan. The site dropped 12 metres from the street, the original stumps were rotting, and the northwest gales regularly found their way through cracks you could put your thumb through.

Charming rustic wooden house exterior with sunlit weathered details and railing.

What emerged was a home that feels like a sanctuary — secure, warm, and remarkably still on the wildest days. The transformation relied on three layers of work that any Wellington hillside renovation must get right: engineered foundations that anchor the building to the earth, access logistics that don’t blow the budget, and a defensive building envelope that can withstand the capital’s horizontal rain and salt-laden air.

Grounding the Build: Engineered Foundations

The existing house sat on a mixture of uneven concrete piles and timber subfloor framing that had been slowly leaning downhill for decades. A geotechnical report revealed what the owners feared: the fill layer beneath the house was deeper than expected, and the underlying bedrock was variable. There was no question of simply adding new piles. The structural engineer designed a system of deep-driven steel piles socketed into the bedrock, combined with a reinforced concrete ring beam to tie the whole foundation together. This created a rigid platform that would resist both settlement and seismic movement — non-negotiable in a zone where the next big shake is always a possibility.

A construction worker in high-visibility gear operates heavy drilling equipment on a construction site.

The lesson here is that on a hillside, the foundation is not a line item to be minimised. Engaging the geotechnical engineer before the design was finalised saved tens of thousands in rework later. It also gave the council consent process a clear path, because the proposed solution addressed concerns around slope stability from the start. For homeowners eyeing a steep site, this upfront investment — typically $3,000 to $6,000 for a thorough geo report — is the best insurance policy you can buy.

Access and Construction on a Slope

Perhaps the biggest logistical headache was getting materials and people onto the site. The street frontage was narrow, with a tight turn-in and power lines overhead. Early on, the builder ruled out a standard scaffold staircase as the sole access. Instead, they coordinated a combination of a temporary work platform cut into the bank mid-site and a mobile crane positioned on the road for lifting structural timber, windows, and cladding sheets directly into place. All smaller materials came down via a construction elevator strapped to the side of the scaffold, which paid for itself within the first month in reduced labour hours.

This changed the way the project was sequenced. Framing, external wrap, and cladding were all planned with the crane lifts in mind, so that each delivery flight was fully utilised. While crane hire added a noticeable sum, the alternative — hand-carrying sheets of ply and long lengths of timber down 50 steps — would have crippled the timeline and exhausted the crew. The takeaway for any Wellington hillside renovation: access isn’t an afterthought; it’s a design element. Talk to your builder about how materials will actually move before you lock in the budget.

Cladding That Earns Its Keep

Anyone who has spent a winter in Wellington knows the rain doesn’t fall down — it comes at you sideways. The original weatherboards, nailed directly to the framing with no cavity, had long since given up. The new cladding system was chosen for durability, performance in very high wind zones, and low maintenance on a site where repainting meant scaffolding again. The final selection was a fibre cement weatherboard with a pre-finished paint coating, installed over a drained cavity on horizontal cavity battens. This kept the classic vertical-line aesthetic the owners loved about their 1960s home but delivered a continuous air gap and moisture escape path.

Contemporary wooden porch with metal chair, white facade, outdoor setting.

On the most exposed northwest corner, the design took an even more robust turn: sheet aluminium, jointed with standing seams that run vertically to shed water fast. The roofing was replaced at the same time with high-profile corrugated steel, secured with cyclone-rated fixings. Each junction, flashing, and opening was detailed to exceed NZS 3604 requirements for the Extra High wind zone. The result isn’t just code-compliant — it’s a house that stays absolutely dry, even when the anemometer at the nearby coastguard station clocks 160 km/h. The combination of a drained cavity and appropriately specified fixings is something NZHomeware’s technical team sees as non-negotiable for any coastal or high-wind renovation in New Zealand.

Lessons from the Hillside

This project reinforced several truths that apply well beyond Seatoun. First, a genuine understanding of your site comes from professional geotechnical and structural input, not from guesswork. Second, access planning will either make or break your schedule — budget for it and design your construction sequence around it. Third, your cladding isn’t just a skin; it’s the difference between a home that breathes and one that slowly rots from the inside. The owners now live in a house that feels planted, not perched, and they no longer brace themselves when the southerly rolls in. It’s a renovation that turned a liability into a lasting asset — the very definition of long-term value.

Christchurch Repair and Rebuild

Christchurch Repair and Rebuild

When Sarah and James bought their 1910 character villa on a tree-lined street in St Albans in 2008, they saw a lifelong home. The matai floors, high stud, and pressed-metal ceilings promised an unhurried future. Then the Canterbury earthquakes began. By late 2011, the couple were living in rented accommodation, staring at a cracked foundation and a scope-of-works document that felt more like a ransom note than a roadmap.

Their journey through insurance processes, engineering assessments and seismic strengthening would consume almost four years. It tested their patience, their finances and the very meaning of “home”. But it also taught them a lesson they now share with anyone facing a major renovation: structural safety is an emotional decision as much as a technical one. Get the process right, and you don’t just repair a house – you reclaim it.

Quaint Victorian-style house set against a majestic mountain backdrop, ideal for architecture and scenery enthusiasts.

The damage was initially classified as minor: cracked plaster, a leaning chimney, some bouncy floors. Like many homeowners, Sarah and James assumed their private insurance and EQC cover would handle it. But after two years of scope renegotiations, they received a cash settlement rather than a managed repair. The insurer’s assessment stopped at cosmetic reinstatement. A site visit by an independent chartered engineer revealed a far more sobering picture: the totara piles had fractured at the bearer connections, the unbraced subfloor had racked by up to 60 mm, and the original brick nogging in the walls was no longer contributing to lateral stability. The house was assessed at less than 34% of New Building Standard (NBS) – an earthquake-prone classification.

The decision point was brutal. A bare-minimum repair would consume most of the insurance payout and leave the home compliant but uncomfortably close to a life-safety threshold. A full seismic upgrade – adding plywood shear walls, steel portal frames in the kitchen opening, and new pile-to-bearer fixings – would cost an additional $120,000. For Sarah and James, this was not a “nice-to-have”. It was the price of sleeping through a moderate shake without the ceiling collapsing on their children.

“We didn’t want a museum we were terrified to live in.” – Sarah

Their project architect, a Christchurch practitioner specialising in heritage strengthening, mapped out an Intervention Hierarchy: preserve character-defining elements at the front, concentrate structural hardware in the rear lean-to, and use the rebuild as a chance to improve thermal performance. Instead of trying to moment-resist every original stud, they created a hybrid – heavy bracing walls at selected lines, while the ornate hallway and bedroom wing remained largely untouched visually. This balancing act, carefully described in the engineer’s Producer Statement, allowed them to reach 100% NBS (IL3) without stripping the home of its soul.

Wooden frame construction of a new residential home under clear blue sky.

The consent process was not trivial. Because the upgrade triggered a change of use in parts of the floor plan (moving the kitchen), it required a full building consent with a peer-reviewed structural design. The council, still processing a backlog from the rebuild boom, took 14 weeks. Sarah and James used that time wisely: they rented a portable moisture meter and mapped subfloor humidity, discovering a leaking gully trap that would have damaged the new foundation board within a year. That small act of diligence saved thousands.

Builder selection was equally deliberate. They bypassed the lowest tender – a company offering a fixed price but vague on timber specification – and chose a mid-sized contractor who could demonstrate completed seismic upgrade projects. The contract included a clear Schedule of Quantities, provisional sums for unknown rotten framing, and a clause that any variations would be priced against an agreed hourly rate. That transparency mattered when the team uncovered a failed waste pipe beneath the bathroom floor; the variation, while painful, was fair and swift.

The result, completed in 2017, is a home that wears its history proudly but stands ready for the next event. The ornate verandah fretwork remains, but behind it a continuous structural tie-down system bolts the roof to the foundation. The kitchen now features a steel moment frame disguised within a timber-clad column that looks like a deliberate design choice. For Sarah and James, the final cost was $360,000 – roughly $25,000 more than the initial high-end estimate, but when they look at their children playing in a house that no longer whispers “flee” during a southerly gale, they consider it the best investment they ever made.

Spacious modern interior featuring an open kitchen and living area with elegant wooden flooring, ideal for contemporary homes.

Lessons from this rebuild:

  • Obtain an independent engineering assessment early, even if insurers assign their own. The difference between a cosmetic repair and a structural deficiency can be invisible to the untrained eye.

  • Seismic strengthening is not about a single “NBS number” but about a coherent strategy. Identify the few critical structural lines and concentrate resources there, guided by a professional who understands both engineering and character architecture.

  • Use the rebuild window to fix latent moisture issues. Deferred maintenance kills more character homes than earthquakes do – the repair phase is your best chance to break that cycle.

  • Choose a builder on demonstrated experience and transparency, not just price. A clear variation procedure protects both parties when the inevitable surprises surface.

At NZHomeware Editorial Studio, we see Christchurch’s rebuild legacy as a powerful reminder that renovation is fundamentally an act of stewardship. The products we recommend – whether structural fixings, weather-resistant claddings or precision-engineered timber – are chosen not just for their aesthetic but for their ability to contribute to a home’s resilience. In a landscape shaped by seismic reality, every decision matters. Sarah and James’s story proves that with the right team, the right information and a refusal to settle for “good enough”, you can turn a fractured past into a foundation you trust.

Townhouse Transformation

Townhouse Transformation

The multi-level townhouse is one of New Zealand’s most common yet misunderstood housing types. Often built between the 1970s and early 2000s in complexes of four to twelve units, they offered a first step onto the property ladder or a low-maintenance downsizer option. Decades later, many feel dark, compartmentalised, and sonically porous—with every neighbour’s conversation a part of daily life. The challenge for one Wellington couple was typical: a three-level, 140-square-metre concrete-block townhouse with original aluminium joinery, a galley kitchen buried on the middle floor, and a master bedroom above the garage that amplified every closing car door.

Their brief centred on light, connection, and quiet. They wanted to open the cramped floor plan without compromising the structural integrity of shared walls, improve vertical circulation, and bring borrowed light down through the core. Crucially, everything had to be achieved within a strict body corporate framework and a $280,000 construction budget—realistic for a mid-range Wellington renovation in 2023, but tight for multi-level work.

Warm and inviting interior with wooden staircase, shelves, and ambient lighting.

Working Within Body Corporate Boundaries

Body corporate rules dictate what can and cannot be altered in a unit-title development. Structural walls, common property services, and the exterior envelope are typically off limits without full body corporate approval—a process that can add months and thousands in legal and engineering fees. In this case, the owners were free to modify everything inside their unit boundary except the party walls, the concrete floors, and the roof drainage. That meant any vertical reconfiguration had to work within the existing structural envelope, and sound isolation had to be retrofitted without touching the party wall’s fire-rated integrity.

Early engagement with a building surveyor familiar with the development’s original construction helped the owners understand exactly what was theirs to change. They discovered the internal stair void was framed rather than blockwork, meaning it could be opened up without triggering body corporate consent. This became the linchpin of the design.

Elegant interior design featuring a wooden staircase with glass railing and artistic lighting.

Vertical Connections and Borrowed Light

Instead of moving walls, the design team—led by an architectural designer with deep townhouse experience—focused on linking the three levels visually and functionally. The cramped stair enclosure was demolished and replaced with an open steel-and-timber stair with a frameless glass balustrade. A new skylight was cut into the roof directly above the stairwell, flooding all three levels with natural light that previously only reached the top landing.

On the middle floor, the galley kitchen and dining room were unified by removing a non-structural nib wall. A long interior window was inserted between the kitchen and the stair void, creating a sightline from the cooking zone up to the skylight and down to the entry. This borrowed-light strategy had an outsized effect: the previously claustrophobic kitchen now felt spacious and connected, despite gaining not a single square metre of floor area. Materials were deliberately restrained—white cabinetry, pale oak flooring, and a soft grey wall colour to bounce light further into the shadowed corners.

Acoustic Upgrades That Transformed Livability

The acoustic environment was the single biggest complaint before renovation. The original inter-tenancy wall was a 200 mm concrete block with direct-fixed plasterboard—excellent for fire separation, poor for airborne sound. Footfall from the unit above transmitted through the concrete floors with little isolation. The solution layered performance without breaching the blockwork.

An independent steel stud wall was erected 20 mm away from the party wall, packed with 90 mm acoustic insulation (Rockwool RW3) and lined with two layers of 13 mm standard plasterboard. This simple decoupling reduced transmitted noise by an estimated 15–18 dB, turning audible conversations into muffled background sound. On the floors, a high-density rubber underlay beneath the new engineered oak floorboards cut impact noise transfer to the garage below. The total acoustic package added approximately $8,500 to the budget—less than 3% of the overall project cost—yet delivered the single greatest improvement in day-to-day happiness.

Scaffolding at a residential building under construction with windows and insulation sheets visible.

Cost-Effective Spatial Moves

A key lesson from this project was the discipline of leaving services where they were. The bathroom and laundry remained in their original locations, saving an estimated $12,000–$15,000 in plumbing and drainage rework. The kitchen shifted only 1.2 metres but stayed on the same wet wall. The budget was redirected into custom joinery that made the small amount of gained space perform harder: full-height pantry cabinets, a bench with integrated charging and mail sorting, and a compact laundry cupboard that freed up the former separate laundry for use as a light-filled home office.

The result is a townhouse that feels larger, quieter, and more gracious than its floor area suggests. It holds heat better, with the new skylight using a thermally broken frame and low-E glass, and the home’s northern orientation finally exploited through strategic internal glazing. Body corporate permission was obtained for the skylight alone; the rest fell within the unit’s ownership. Total timeline: 14 weeks, one week over schedule due to weather delays. Final cost: $276,000, slightly under budget. The owners report that the combination of light and silence transformed not just the house, but their daily experience of coming home—proving that the most powerful renovation moves are often the ones you cannot immediately see, but feel the moment you step inside.

Apartment Adaptation

Apartment Adaptation: Turning an Empty Shell into a Real Home

A raw developer shell offers a blank canvas, but for most New Zealand homeowners that canvas arrives as a concrete box with a single lightbulb dangling from the ceiling and a note from the body corporate reminding them that noise travels. Converting that space into a warm, functional apartment requires a completely different renovation mindset — one that balances personal desire with collective responsibility, and technical detail with strict regulatory boundaries.

Consider James and Rachel, who purchased a 68-square-metre shell on the eighth floor of a recently completed Auckland apartment tower. The unit came with bare concrete walls along two inter-tenancy boundaries, a single service penetration for drainage and ventilation in the bulkhead, and a locked electrical riser cupboard in the corridor. Everything else — every wall, every power point, every drop of sound insulation — was up to them. Their journey highlights the hidden layers of apartment adaptation that no standalone house renovation ever touches.

Bright empty room with arched windows, white walls, and a single wooden chair.

Service Reticulation: The Invisible Framework

In a house, running new pipes or data cables is a matter of lifting floorboards. In an apartment, you are working between fire-rated slabs, inside a masonry or concrete core, with body corporate rules prohibiting any chase deeper than 15 mm into structural elements. James and Rachel’s architect mapped every service route during the design phase, long before a builder was engaged. The kitchen sink had to sit within a few metres of the sole drainage penetration because wet venting calculations limited how far a horizontal branch could run inside a false ceiling without compromising the stack’s air balance. Hot and cold water lines came from a copper riser in the service cupboard and were insulated not just to conserve heat but to prevent condensation forming on pipes buried in the living room bulkhead.

Electrical reticulation added another layer. Because the main switchboard was remote, a new sub-board with dedicated metering was required inside the apartment. Every new circuit had to be labelled and accompanied by a single-line diagram for the body corporate records. The data plan — four Cat 6 outlets and a central wireless access point — was pre-wired before the GIB went up, with conduit runs clearly photographed for future reference. As the NZHomeware Editorial Studio often points out, documenting what’s behind the linings is not just good practice; it’s essential when a single nail through a sprinkler pipe can shut down an entire floor.

Fire Rating and Sound: The Non-Negotiables

Apartment renovation in New Zealand lives under the Building Code’s fire safety clauses (C clauses) and the acoustic requirements of Clause G6. For James and Rachel’s unit, both sides faced adjoining apartments, so the inter-tenancy walls needed a Fire Resistance Rating (FRR) of -/60/60 — meaning 60 minutes of stability, integrity, and insulation. Simply putting up a standard timber frame and 10 mm plasterboard would fail a consent inspection. The solution was a specific GIB Fyreline® system: two layers of 13 mm board on each side of a 90 mm steel stud frame, with mineral wool insulation in the cavity. Penetrations for plumbing were sealed with intumescent collars, and all electrical boxes were wrapped in fire-rated putty pads.

Man in gloves cutting plasterboard for drywall installation inside a building.

Sound insulation demanded equal rigour. While the Code prescribes a Sound Transmission Class (STC) of 55 for new inter-tenancy walls, the real-world difference between a compliant wall and one that performs well at low frequencies is often a single overlooked detail. The designer specified resilient channels on one side of the frame to decouple the plasterboard from the studs, then insisted that the builder not use short offcuts or over-tighten screws — a common mistake that bridges the acoustic break. Final testing achieved an STC of 57, far above the minimum, and the body corporate’s chairman later remarked that the couple’s unit was the quietest in the building.

Navigating the Body Corporate: Scope, Not Persuasion

One of the earliest — and most critical — steps happened before any product was ordered. James and Rachel were required to present their renovation plans to the body corporate committee under the Unit Titles Act 2010. Rather than a sales pitch, they submitted a clearly scoped document: a detailed floor plan with all partition locations, a services schematic, a schedule of fire-rated penetrations, and a construction timetable that limited noisy work to designated hours. They also included a letter from their acoustic engineer confirming the proposed wall assembly, and a fire engineer’s sign-off on the penetration details. The committee approved the alterations in a single meeting.

Where other owners in the same building faced delays, this apartment’s consent pathway was smooth because the scope was unambiguous. No one needed to guess whether the renovation would compromise the building’s fire safety; the documentation answered the hard questions first. The lesson is universal: in multi-unit living, transparency is the fastest route to approval.

Lessons From the Shell

The conversion took 11 weeks and cost $142,000 including professional fees, consent costs, and all fit-out. The result was a home that felt nothing like an apartment — warm underfloor heating, excellent acoustics, and a layout that worked because the services were designed, not improvised. For those considering the same path, three takeaways stand out: integrate services routing into the architectural design from day one, treat fire and acoustic assemblies as a single performance system rather than separate afterthoughts, and never underestimate the value of submitting a body corporate application that could double as a compliance manual. In an apartment shell, what you can’t see truly matters. And as the walls go up, having a supplier who understands these integrated requirements — like the technical team at NZHomeware — can turn a maze of standards into a confident, compliant result.

Elegant kitchen interior featuring a sleek faucet and tiled backsplash.

First Home Renovation

First Home Renovation: A Framework for Confident Decisions

Every case study in this book — from the Auckland villa lovingly stripped back to its kauri bones, to the Wellington hillside home anchored into bedrock, the Christchurch rebuild that put resilience first, the townhouse that squeezed light into a narrow footprint, and the apartment adaptation that turned constraints into character — shares a common DNA. The homeowners who finished with homes they cherish did not possess larger budgets or extraordinary luck. They followed a repeatable pattern of thought and action. Understanding that pattern is the first step toward renovating your own home with confidence, not anxiety.

Whether you are tackling a 1920s bungalow or a 1990s plaster-clad unit, the decisions you make before a hammer is lifted determine 80% of the outcome. The most successful renovations are not defined by expensive finishes but by the quality of the preparation, the honesty of the relationships involved, and a stubborn commitment to thinking beyond the next five years.

Interracial team of architects reviewing plans inside a new construction site.

Preparation: Know What You Actually Have

Every renovation that ended well began with a thorough — occasionally uncomfortable — understanding of the existing building. In the Auckland villa renewal, the owners commissioned a full building survey before settlement, uncovering a failing subfloor ventilation system and undocumented asbestos soffits. Instead of scrapping their budget, they priced the remediation into their offer and negotiated accordingly. In Christchurch, post-quake assessments revealed insufficient foundation tying; the rebuild scope was adjusted to include steel moment frames, adding $28,000 but protecting the structure for decades.

Trustworthy preparation means moving past visual charm. It involves a building inspection, a moisture scan of wet areas, a drain camera survey, and, for older homes, an asbestos register. It means understanding the Council property file, reading the Land Information Memorandum, and checking the natural hazard maps. This upfront investment — typically $2,000 to $4,500 — repeatedly saved homeowners from the most expensive mistake: starting too early.

Investigation

Typical Cost

Value

Full building survey (incl. moisture testing)

$800–$1,500

Uncovers structural defects, weathertightness issues

Drain camera inspection

$300–$600

Identifies cracked pipes, root intrusion

Asbestos survey (pre-2000 homes)

$400–$1,200

Prevents health risks and budget blowouts

Engineering assessment (if required)

$800–$2,000

Confirms feasibility of alterations

The townhouse transformation team took this further. They spent four weeks in the property before designing anything — monitoring natural light, listening to traffic noise, and mapping thermal leaks with an infrared camera. That patient observation informed a floor plan that required no structural changes, saving $35,000 and delivering exactly what the family needed.

Relationships: Honesty Is the Cheapest Material

The renovation industry is built on trust. The homeowners who navigated complex projects without acrimony or litigation shared a clear trait: they invested time in selecting the right people and then communicated with radical transparency. In the Wellington hillside renovation, the builder and structural engineer were brought together before the design was finalised. That three-way conversation identified that the preferred glazing system would require a $12,000 crane setup that the architect hadn’t considered. The team redesigned the window module dimensions, preserving the aesthetic while avoiding the crane cost entirely.

Honest relationships mean reading quotes line by line and asking the uncomfortable questions: Is this a fixed price or an estimate? Who pays for uncovered rot? What are the milestones for payment? They mean having a contract — the NZS 3910 or a simplified residential building contract — that clearly defines scope, variations, and dispute resolution. And they mean staying involved, visiting the site every few days not to micromanage but to say thank you, catch small misunderstandings early, and show that you care as much about the work as your crew does.

NZHomeware Editorial Studio’s renovation research consistently highlights that projects with a collaborative triangle of homeowner, designer, and builder, where each party’s expertise is respected, deliver superior outcomes and lower cost overruns than adversarial, quote-driven arrangements.

A smiling couple wearing safety helmets, holding keys, symbolizing new home ownership.

Lifecycle Thinking: Renovate for 30 Years, Not Three

The apartment adaptation illustrates this principle powerfully. The owners could have replaced the failed single-glazed aluminium joinery with identical units for under $14,000. Instead, they invested $32,000 in thermally broken, double-glazed windows with a higher initial cost but an expected service life of 40-plus years. Combined with a balanced ventilation system, the apartment’s heating demand dropped by 62%, and condensation became a memory. The decision was not about cheapest now; it was about lowest cost per year of comfortable living.

Lifecycle thinking applies to every selection. Roofing — long-run steel versus concrete tile — is not just about style; it’s about maintenance intervals, rust resistance in coastal zones, and recycling potential. Flooring: polished concrete upfront costs more than vinyl plank, but its 50-year lifespan versus 10–15 years changes the equation. Insulation: upgrading to R-values beyond code minimums adds modest cost but reduces energy bills permanently and makes the home feel warmer even in an Auckland winter.

The Christchurch repair and rebuild team made all product choices through a matrix that scored durability, local availability, maintenance burden, and end-of-life disposal. That simple framework — now available as a free tool from NZHomeware Editorial Studio — prevented impulse upgrades that would have offered short-term gratification but long-term regret. The townhouse project applied the same logic to space: they created flexible rooms that could shift from nursery to home office to guest space without renovation, future-proofing the floor plan for a growing family.

Spacious modern living room featuring open plan design with ample natural light.

A Framework You Can Draw on a Napkin

Distilling dozens of renovations into a single decision-making sequence yields three questions that every homeowner should ask at every significant junction:

  1. What is the real condition of the existing element? (Preparation — don’t assume; measure.)

  2. Who needs to be in the room to make this decision right? (Relationships — involve expertise early, not after the problem escalates.)

  3. What will this choice cost me over 20 years, not just today? (Lifecycle — factor in maintenance, energy, and replacement.)

This is not a theoretical exercise. It is a repeatable practice that turned anxious first-home buyers into calm stewards of their properties. The Auckland villa owners didn’t know anything about subfloor ventilation when they started. By the end, they could discuss passive air movement with the builder because they had committed to understanding, not just spending. That transformation — from overwhelmed owner to informed advocate — is the real renovation. It’s available to anyone willing to prepare thoroughly, build honest relationships, and choose for the long term.

Through hundreds of documented projects and expert analysis, NZHomeware Editorial Studio has seen this framework hold true across eras and building types. It doesn’t eliminate surprises — no process can — but it reduces their frequency and, more importantly, gives you the clarity and resilience to handle them when they arrive. Your first home renovation might be your only project, or it might be the beginning of a lifetime of improving places. Either way, these principles will serve you better than any quick-fix guide.

Final Chapter : Renovation Is About Creating the Future

Common Threads: The Framework for Confident Renovation

Common Threads: The Framework for Confident Renovation

After examining real projects — from a 1910s Auckland villa to a leaking Wellington hillside home, from a Christchurch rebuild to a tight townhouse transformation — certain patterns become unmistakable. The homeowners who achieve the best long-term outcomes are not necessarily those with the largest budgets. They are the ones who follow a consistent, informed process. They treat renovation as a form of stewardship, not a transaction.

At NZHomeware Editorial Studio, we have spent years observing how New Zealand homes evolve and where renovation projects succeed or stumble. The common threads form a practical framework that any homeowner can apply, whether tackling a first-home refresh or a full-scale architectural alteration.

Architect wearing a hard hat reviewing blueprints at an outdoor construction site.

Pause Before Spending

The single most expensive mistake in renovation is starting too early — purchasing materials, engaging trades, or signing contracts before truly understanding the home’s condition and the owner’s own priorities. Confident renovators invest in a thorough feasibility phase. They commission a detailed property condition report, not just a builder’s verbal walkaround. They test for moisture, check subfloor ventilation, trace the history of past alterations, and identify any asbestos or hazardous materials before a hammer is lifted. This is not paranoia; it is preparation. The cost of a full building survey and a drainage inspection is a fraction of the cost of discovering a rotted bearer or a non-consented addition halfway through the project.

The framework demands that strategy precedes spending. This means writing a clear renovation brief that separates “must-fix” safety and weathertightness issues from “nice-to-have” aesthetic upgrades. The brief should be shared openly with all parties — designer, builder, and any specialist consultants. When everyone works from the same document, the scope remains stable, and the budget becomes a tool rather than an afterthought.

Understand the House as a System

Old New Zealand houses were built in an era of open fires, timber joinery with gaps, and suspended timber floors that breathed — albeit often draughtily. Modern expectations of airtightness, insulation, and year-round comfort clash with these original constructions. Confident renovators recognise that a house is a system of interdependent layers: exterior cladding, structure, insulation, ventilation, heating, and moisture management. Altering one layer without understanding the others leads to unintended consequences. You cannot simply double-glaze a villa without addressing its ventilation strategy, or you will trap moisture and promote mould. You cannot seal a 1950s subfloor without ensuring adequate ground moisture barriers and a means for passive airflow, or you will accelerate rot in the flooring timbers.

The framework encourages homeowners to think in terms of whole-of-building performance. A thermal envelope upgrade should be paired with a calculated ventilation solution — whether passive stack systems in older homes or balanced mechanical ventilation in new tight envelopes. This integrated view prevents the “sick building” issues that have plagued so many post-2000 constructions, and it turns a renovation into a genuinely healthier living environment.

Senior adult inspecting a crawl space entrance during a home inspection on a sunny day.

Build a Transparent Team

No renovation succeeds in isolation. The relationship between homeowner, designer, builder, and trades is the backbone of any project. Confident renovators select their professional partners based on proven local experience and a demonstrated willingness to communicate. They ask for recent references — not just one, but three — and they actually phone them. They request a detailed fixed-price or cost-plus contract with clearly defined exclusions and allowances, and they read it before signing. They understand that the lowest quote is rarely the best value; trusted trades charge appropriately for the time, skill, and insurance they carry.
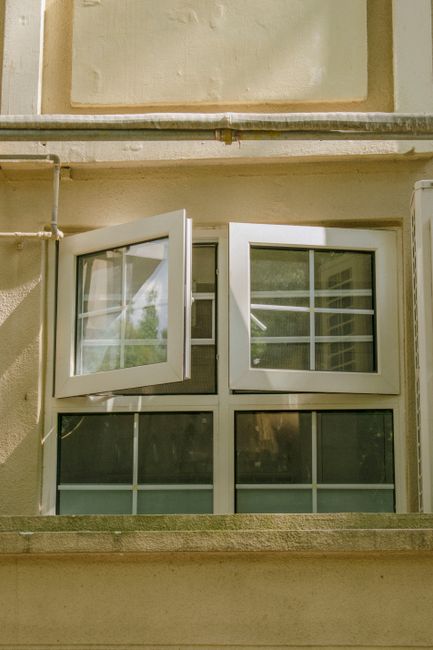
Throughout the build, the framework insists on regular, structured progress meetings. These are not casual chats; they are documented check-ins where variations are discussed before work proceeds, not after the invoice arrives. When unexpected structural issues surface — rotten window heads in a bungalow, corroded steel in a concrete apartment floor — the team already has a contingency allowance, both financial and emotional. Trust, in this world, is built on transparency and paper trails, not on handshakes alone.

Select Materials for Lifecycle Value

Product selection is where many projects drift off course. The market overflows with options, and marketing often obscures real performance. The confident renovator moves beyond initial price and examines whole-of-life cost. This means assessing materials for durability in New Zealand’s specific climate — high UV, coastal salt, wind-driven rain, and frequent wet-dry cycling. It means choosing claddings, flashings, and coatings that have a proven track record locally, not just overseas test certificates. It often leads to specifying higher-grade fixings, stainless steel or aluminium flashings over basic galvanised options, and paints and sealants that might cost 20% more but last twice as long before maintenance is needed.

This lifecycle thinking applies equally to windows, roofing, insulation, and even interior linings. A slightly higher upfront investment in a durable, properly installed product reduces the “ deferred maintenance” burden that eventually eats into the home’s value. Confident renovators see their choices as a long-term assignment to the next generation of occupants, not just a short-term aesthetic fix.

Hands assessing diverse tile samples on marble table with laptop plans.

Embrace Council Processes as a Safety Net

The building consent process is often described as a hurdle, but within this framework it is redefined as a quality assurance layer. Confident renovators pursue proper consents for structural work, alterations to fire safety, and changes to sanitary plumbing. They engage a draftsperson or architect who understands the local council’s expectations. They accept that inspections — while sometimes frustrating — create an independent record of compliance that protects future resale value. The absence of a consent for significant work is a hidden liability that can surface at the worst possible moment. Stewarding a home well means ensuring any future owner can trace the legal history of its modifications.

The Stewardship Mindset

Ultimately, the framework boils down to a single shift in perspective. The most confident renovators are those who see themselves not as owners of a static asset, but as temporary stewards of a dwelling that will shelter many families over its lifespan. They are building for durability, comfort, and health outcomes that outlast their own tenure. Every decision — from repairing a leaking gutter to specifying non-toxic paints, from upgrading insulation to preserving original timber joinery — is weighed against that longer timeline.

This mindset defuses the stress of immediate perfection and spreads the investment over the life of the home. It removes the fear of making mistakes because the process includes discovery, professional guidance, and contingencies. It transforms renovation from a transactional event into a deliberate act of creating the future.

The framework is not a rigid checklist but a set of principles that any homeowner can adapt. It is the common thread running through the Auckland villa that now performs thermally as well as a modern home, the Wellington hillside project that solved its moisture ingress for a generation, the Christchurch rebuild that turned seismic resilience into architectural opportunity, the townhouse that traded square metres for quality of light, and the apartment that proved limited space can still deliver extraordinary livability. All these projects succeeded because their owners paused, planned, understood their homes as systems, built transparent teams, chose materials wisely, and respected the regulatory framework. That is the path to confident renovation — and it is available to every homeowner who is willing to follow it.

Found this useful?

Browse more free guides in our library or explore the latest articles.

Browse Library → Latest Articles