🇳🇿 New Zealand's Home Improvement Magazine Sponsored by NZ Homeware — Premium Bathroom & Kitchen →
The Complete Australian Dining Room Planning Guide
Free E-Book
The Complete Australian Dining Room Planning Guide

A Practical Homeowner’s Handbook for Space Planning, Product Decisions, Delivery, Installation and Long-Term Care.

Contents
Introduction
Why a Dining Room Is a Planning Project Why Australian Homes Need a Different Mindset Who Should Read This Guide How to Use This Guide The Homeowner Decision Path
About This Guide
What This Guide Does and Does Not Covers How to Use the Checklists and Templates
Part 1 — The Australian Dining Room Reality
Part Introduction Chapter 1. Why Dining Rooms Need a Different Mindset Chapter 2. Understanding Australian Homes and Dining Zones Chapter 3. The Traffic-Light Rule: Plan, Caution and Professional Help Chapter 4. Define How Your Household Uses the Room
Part 2 — Before You Spend Money
Part Introduction Chapter 5. Measure the Room Like a Professional Chapter 6. Clearances, Walkways and Traffic Flow Chapter 7. Delivery, Access and Apartment Constraints Chapter 8. Budget Planning and Purchase Priorities Chapter 9. Australian Consumer Rights and Buying Safely
Part 3 — Planning the Dining Zone
Part Introduction Chapter 10. Choose the Dining Zone Location Chapter 11. Plan the Table Position First Chapter 12. Plan Seating Around the Table Chapter 13. Plan Island and Bar Seating Chapter 14. Plan Storage and Serving Space
Part 4 — Choosing the Right Products
Part Introduction Chapter 15. Choosing a Dining Table Chapter 16. Choosing Dining Chairs Chapter 17. Choosing Dining Benches Chapter 18. Choosing Bar Stools and Counter Stools Chapter 19. Choosing Buffets, Sideboards and Display Cabinets Chapter 20. Choosing a Dining Set or Building a Coordinated Room
Part 5 — Finishing the Room
Part Introduction Chapter 21. Lighting the Dining Zone Chapter 22. Choosing a Dining Rug Chapter 23. Wall Art, Mirrors and Table Styling Chapter 24. Colour, Materials and Visual Cohesion
Part 6 — Buying, Delivery and Installation
Part Introduction Chapter 25. Comparing Products and Reading Specifications Chapter 26. Ordering, Delivery and Receiving Furniture Chapter 27. Assembly, Placement and Final Checks Chapter 28. Installation Checkpoints by Product Category
Part 7 — Living With the Room
Part Introduction Chapter 29. Caring for Dining Furniture in the Australian Climate Chapter 30. Maintenance Calendar Chapter 31. Troubleshooting Common Problems Chapter 32. After-Sales, Repairs and Dispute Preparation
Part 8 — Practical Support System
Part Introduction Chapter 33. Before-You-Buy Support Workflow Chapter 34. Delivery and Installation Support Workflow Chapter 35. After-Sales and Troubleshooting Workflow
Appendices A–L
Appendix A. Dining Room Measurement Sheet Appendix B. Clearance and Sizing Cheat Sheet Appendix C. Dining Table Selection Worksheet Appendix D. Dining Chair and Bench Fit Worksheet Appendix E. Bar Stool Measurement Worksheet Appendix F. Buffet and Sideboard Planning Worksheet Appendix G. Product Comparison Template Appendix H. Quote and Purchase Comparison Template Appendix I. Delivery and Installation Checklist Appendix J. Maintenance Calendar Appendix K. Customer Service Scripts Appendix L. Official Reference Links
Read Online ↓ Download PDF

Introduction

Why a Dining Room Is a Planning Project

Most people treat a dining room as a furniture purchase.

They choose a table, add chairs, perhaps buy a sideboard, and hope the room comes together.

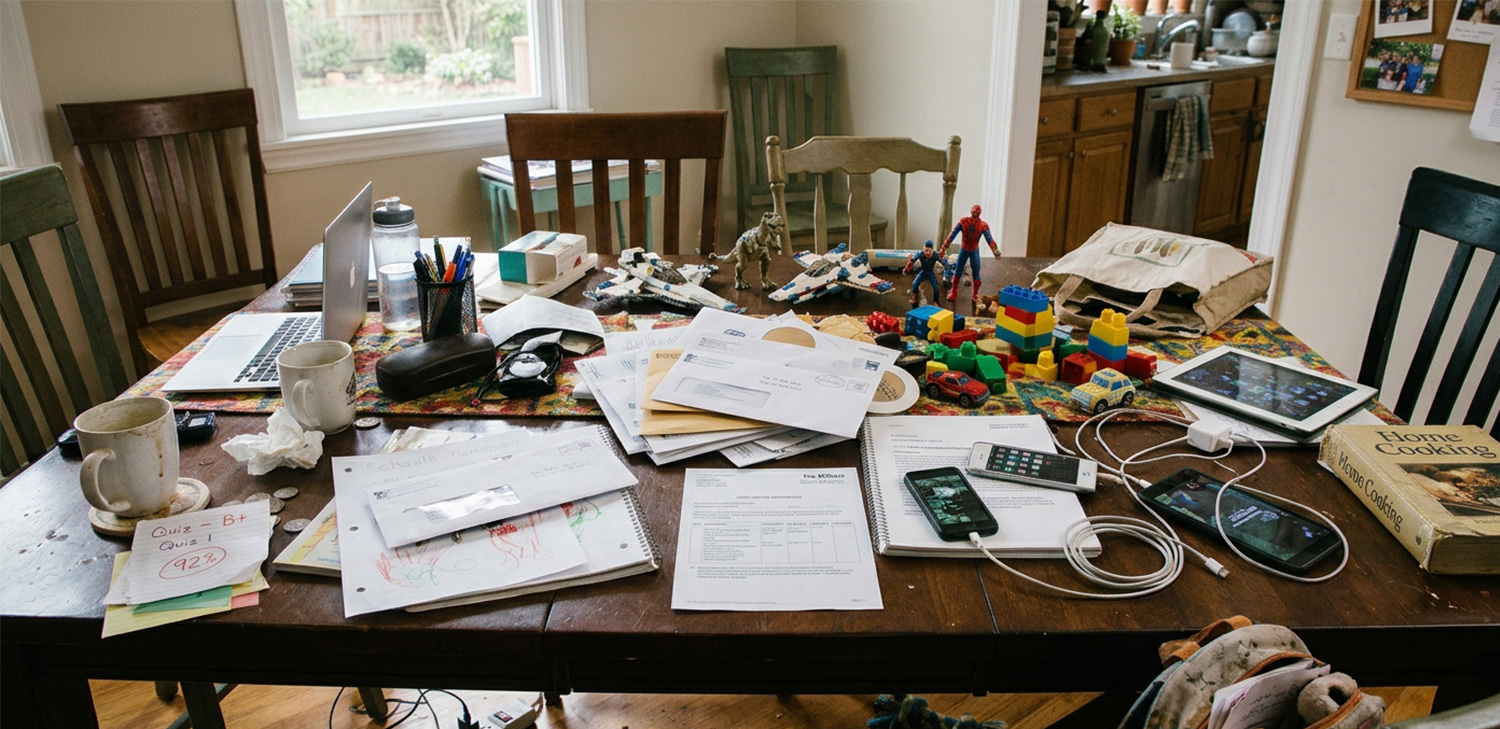
That approach often works in a large, dedicated dining room. It becomes much harder in an apartment, a narrow townhouse, an open-plan living area or a family home where the table is also used for homework, work, craft and everyday clutter.

A dining room is not simply a place to put a table.

It is a working zone. People sit, stand, serve food, carry plates, pull out chairs, open drawers, walk to the kitchen, reach the bathroom and move between indoor and outdoor spaces.

When those movements are not planned, even beautiful furniture can make a room feel awkward.

This guide treats the dining area as a planning project.

The goal is not to find the most attractive table. The goal is to create a room where people can sit comfortably, move freely, store what they need and enjoy spending time.

Before choosing a table, measure the space and think about where it will sit. Leave enough room for chairs to be pulled out and for people to walk around comfortably. IKEA Australia suggests at least 90 cm from the edge of the table to a wall or other furniture, while about 110–120 cm is more practical for pulling out a chair and moving past it.

It also helps to think beyond the day the furniture arrives. Choose surfaces and seating that suit real meals, children, pets and regular cleaning. In Australia, goods bought from a business should be safe, durable, free from defects and suitable for their normal purpose under consumer guarantees.

Timber pieces also benefit from a stable setting. Wood reacts to changing temperature and humidity, so avoid placing it directly beside heaters, vents or strong afternoon sun. AICCM notes that stable conditions, with relative humidity around 40–60%, help wooden furniture age more gracefully.

A successful dining room is not the most expensive one. It is the one that fits the space, supports the household and remains pleasant to use for years.

Why Australian Homes Need a Different Mindset

Australian homes vary more than many people expect.

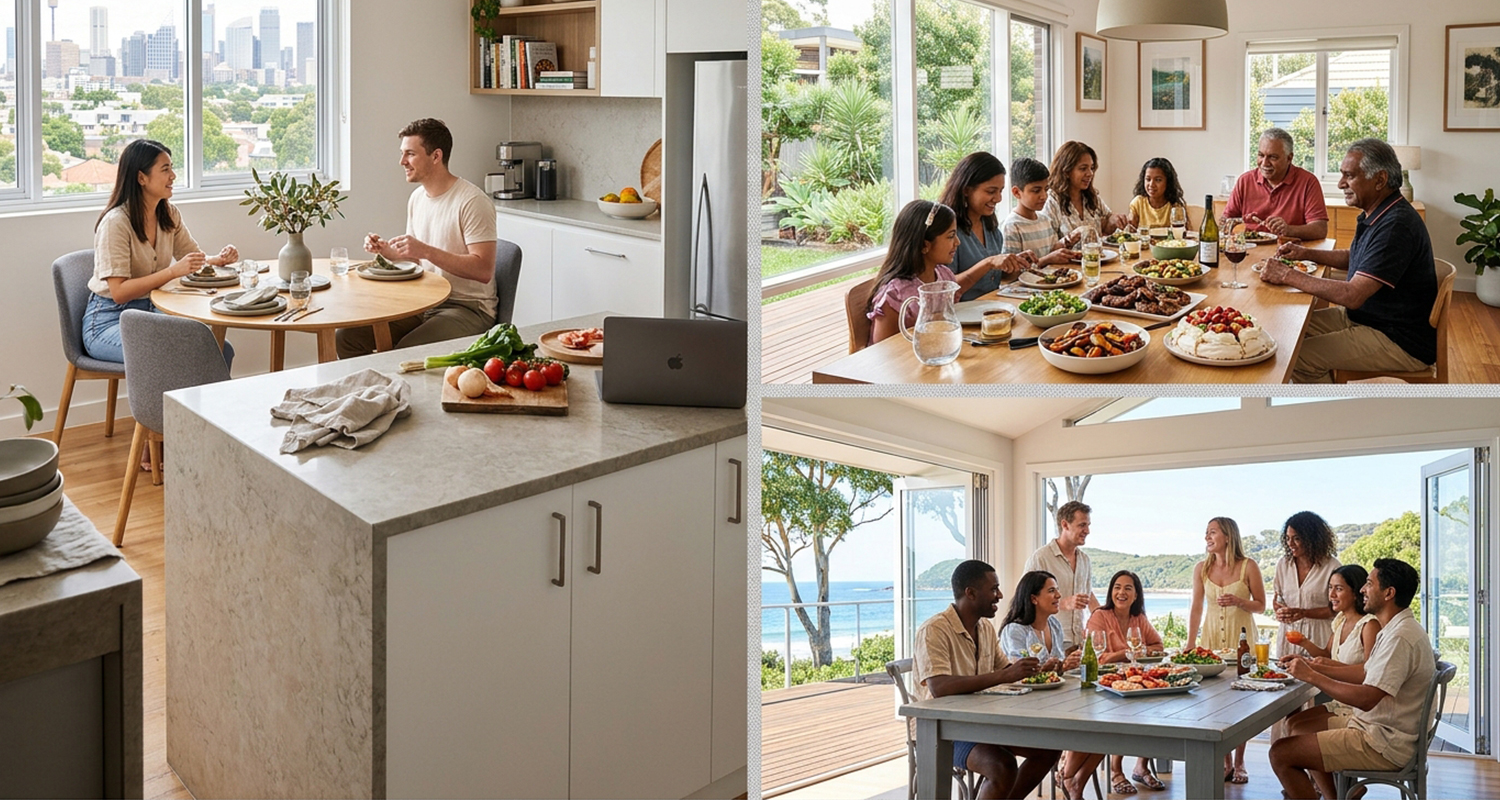
A city apartment may have a compact dining nook beside a kitchen island. A suburban family home may have a separate dining room, a casual kitchen table and an outdoor alfresco area. A coastal home may treat the dining space as one part of a larger indoor-outdoor entertaining zone.

This variety means there is no single correct dining room layout.

There is only the layout that suits your home, your household and the way you live.

Australian conditions also matter.

Strong sunlight can fade fabrics and timber finishes. Heat, humidity and dry air can affect wood. Apartments often have strict delivery constraints. Open-plan layouts require clear zoning. Renters need solutions that can move with them.

A dining room plan that ignores these realities can lead to regret, even when every product looks good online.

The Most Common Mistake

The most common mistake is buying the table first.

A table may look perfect in a showroom or product photo. But once it arrives, it may block a walkway, leave no room for chairs, clash with the kitchen island or prevent a sideboard drawer from opening.

The problem is rarely the table itself.

The problem is that the room was never planned around movement, clearance, storage and daily use.

This guide reverses that order.

You will first understand the space, the household and the traffic patterns. Then you will decide what the room needs to do. Only after that will you choose individual products.

What a Good Dining Room Does

A good dining room does more than look styled.

It supports real life.

It gives people somewhere to eat without balancing plates on their laps. It gives children a place to do homework. It gives guests somewhere to gather. It gives the household somewhere to store tableware, serving pieces and everyday items.

It also allows people to move without squeezing sideways or asking others to stand up.

A successful dining room balances four things:

  • Comfort.

  • Movement.

  • Storage.

  • Appearance.

When one is missing, the room feels incomplete.

The Cost of Getting It Wrong

A dining room mistake is expensive because the main pieces are large.

A table that does not fit cannot easily be returned once assembled. A sideboard that blocks a pathway becomes a daily frustration. Chairs that are too wide can turn a six-seat table into a four-seat table. A pendant light hung at the wrong height can make the whole room feel uncomfortable.

These problems are avoidable.

They are usually caused by skipping one of five steps:

  • Measuring the room.

  • Checking the delivery route.

  • Planning clearances.

  • Understanding how the household uses the space.

  • Reading product specifications carefully.

This guide exists to make those steps simple.

Who Should Read This Guide

This guide is written for anyone planning or improving a dining space in Australia.

It is especially useful for:

  • First-home buyers furnishing an apartment or townhouse.

  • Families replacing a table that no longer suits their routine.

  • Renters who need flexible, non-permanent solutions.

  • People furnishing an open-plan kitchen, dining and living area.

  • Homeowners upgrading a formal dining room.

  • Anyone who has bought furniture that looked right online but felt wrong at home.

  • Anyone planning a renovation that affects the kitchen, dining or living zone.

No design experience is required.

Every term is explained in plain English. Every recommendation is tied to a practical decision.

How to Use This Guide

The chapters follow the order of a real project.

If You Are Starting From Nothing

Read from the beginning.

Part 1 helps you understand your home and household. Part 2 helps you measure, plan and set a budget. Part 3 helps you plan the dining zone. Part 4 helps you choose products. The later parts cover finishing, delivery, installation and long-term care.

If You Are Replacing a Table

Start with Part 2, especially Chapters 5 and 6.

Then move to Chapter 15 for table selection.

A new table can change chair placement, walkways, lighting and storage. Do not choose it in isolation.

If You Are Choosing Chairs

Start with Chapter 12, then read Chapter 16.

Chair comfort depends on the table’s apron height, seat height, available width and pull-out space.

If You Are Adding Island Seating

Start with Chapter 13, then read Chapters 18 and 28.

Bar stools need correct height matching, knee clearance and enough space to be pulled out.

If You Are Buying Storage

Start with Chapter 14, then read Chapter 19.

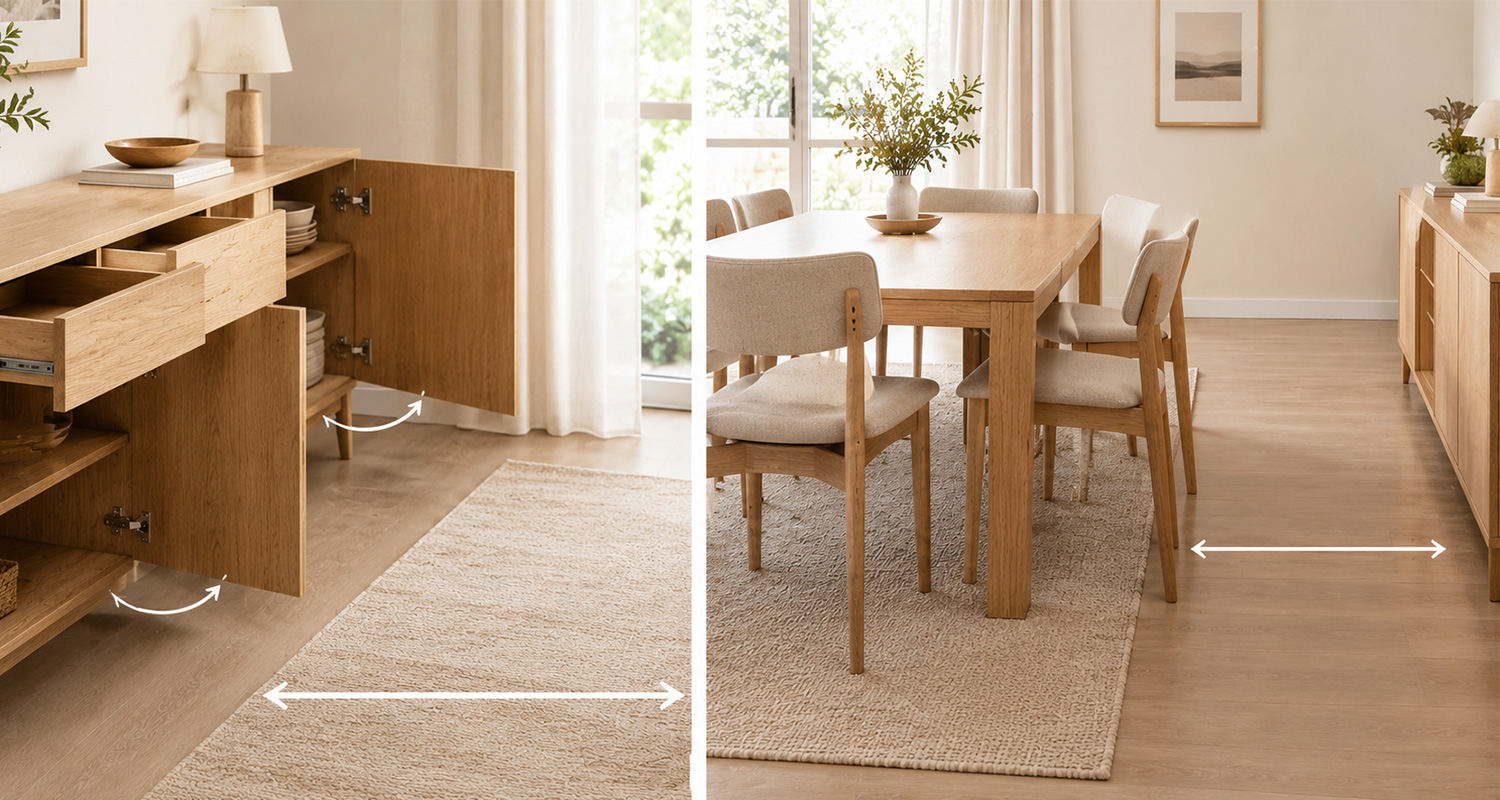
A buffet or sideboard needs more than an empty wall. It needs clearance for doors, drawers, walking space and access to power if required.

If You Are Renovating or Building

Read the whole guide before finalising joinery, lighting or floor finishes.

A dining zone is easier to plan before walls, power points and cabinetry are fixed.

The Homeowner Decision Path

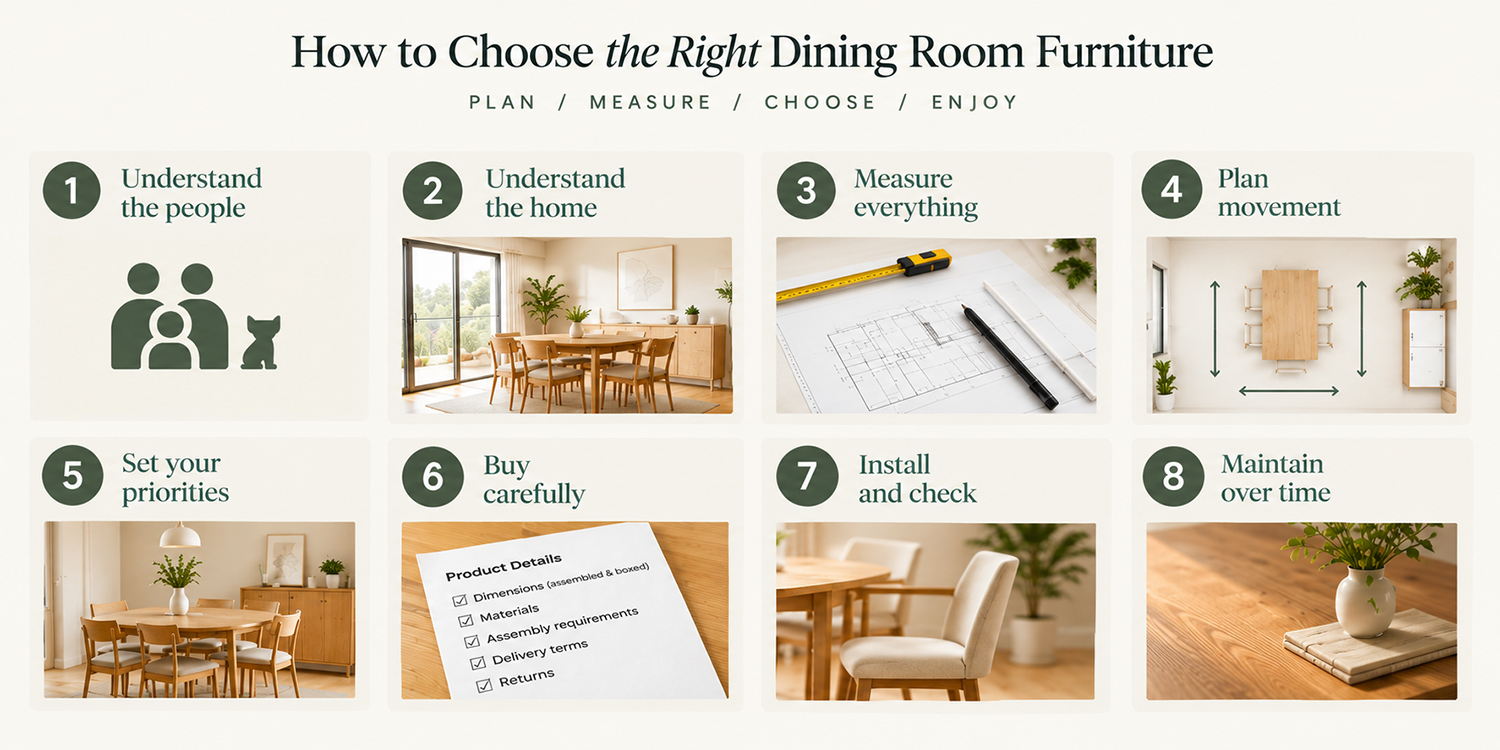
This guide follows a simple decision path.

First, understand the people who will use the space. Think about who eats there, how often, and what else happens around the table. A household that eats together every night has different needs from one that mainly gathers for weekend meals. Children, pets, guests, homework, laptop work and regular entertaining all change what the space needs to do.

Next, understand the home itself. An apartment, townhouse or open-plan living area may have limited wall space, a kitchen nearby, sliding doors or a narrow hallway. These features affect where a table can sit, how many chairs fit, and whether a sideboard can be added later.

Measure everything before shopping. Record the room’s length and width, ceiling height, door swings, windows, power outlets, heaters, built-in cabinetry and existing furniture. Check the delivery route as well, including the front door, hallway, lift, stairs and final room doorway. IKEA Australia recommends measuring the dining area and allowing ample room for chairs and comfortable movement.

Then plan movement. Ask where people walk, where food is served, where chairs are pulled out, and where drawers open. A piece that fits between walls may still block a useful pathway.

Set priorities before choosing products. Decide what matters most: daily comfort, hosting, storage, appearance or flexibility. Then select a table, seating, storage and lighting that support those priorities.

Buy carefully. Read the specifications, including assembled and boxed dimensions, materials, assembly requirements, delivery terms and returns. Online purchases from Australian businesses are still covered by consumer guarantees, which are separate from any warranty offered by a seller.

Install and check. Assemble the item correctly, position it carefully and test the clearances. Pull out every chair. Open every drawer. Walk the main routes.

Maintain the room over time. Protect surfaces, tighten hardware and address small issues early. For tall or unstable pieces, secure them to the wall or floor where appropriate; Product Safety Australia identifies anchoring as the best way to reduce tip-over risk.

Before purchasing any major piece, ask:

“Will this still work on a busy weeknight, with people moving through the room, chairs pulled out and food being served?”

If the answer is yes, the purchase is likely to work.

If the answer is no, no amount of styling will fix it.

About This Guide

What This Guide Does and Does Not Covers

What This Guide Covers

This guide covers the full process of planning and furnishing an Australian dining space.

It includes:

  • Understanding Australian home layouts.

  • Measuring rooms and delivery routes.

  • Planning clearances and traffic flow.

  • Choosing a dining zone location.

  • Selecting dining tables.

  • Selecting dining chairs.

  • Selecting dining benches.

  • Selecting bar stools and counter stools.

  • Selecting buffets, sideboards and display cabinets.

  • Deciding between a dining set and separate pieces.

  • Planning lighting, rugs and styling.

  • Buying online in Australia.

  • Delivery, assembly and installation.

  • Consumer rights and dispute preparation.

  • Cleaning, maintenance and troubleshooting.

The guide is designed to be read once from beginning to end, then used as a reference during the project.

What This Guide Does Not Cover

This guide is not a building code, architectural specification or licensed-trade manual.

It does not replace:

  • A licensed electrician.

  • A registered builder.

  • A qualified cabinetmaker.

  • A structural engineer.

  • A certified plumber or gas fitter.

  • A professional interior designer.

  • Product-specific installation instructions.

Where electrical, structural, gas or major built-in work is involved, use an appropriately licensed or qualified professional.

This guide provides planning knowledge, not trade certification.

How to Use the Checklists and Templates

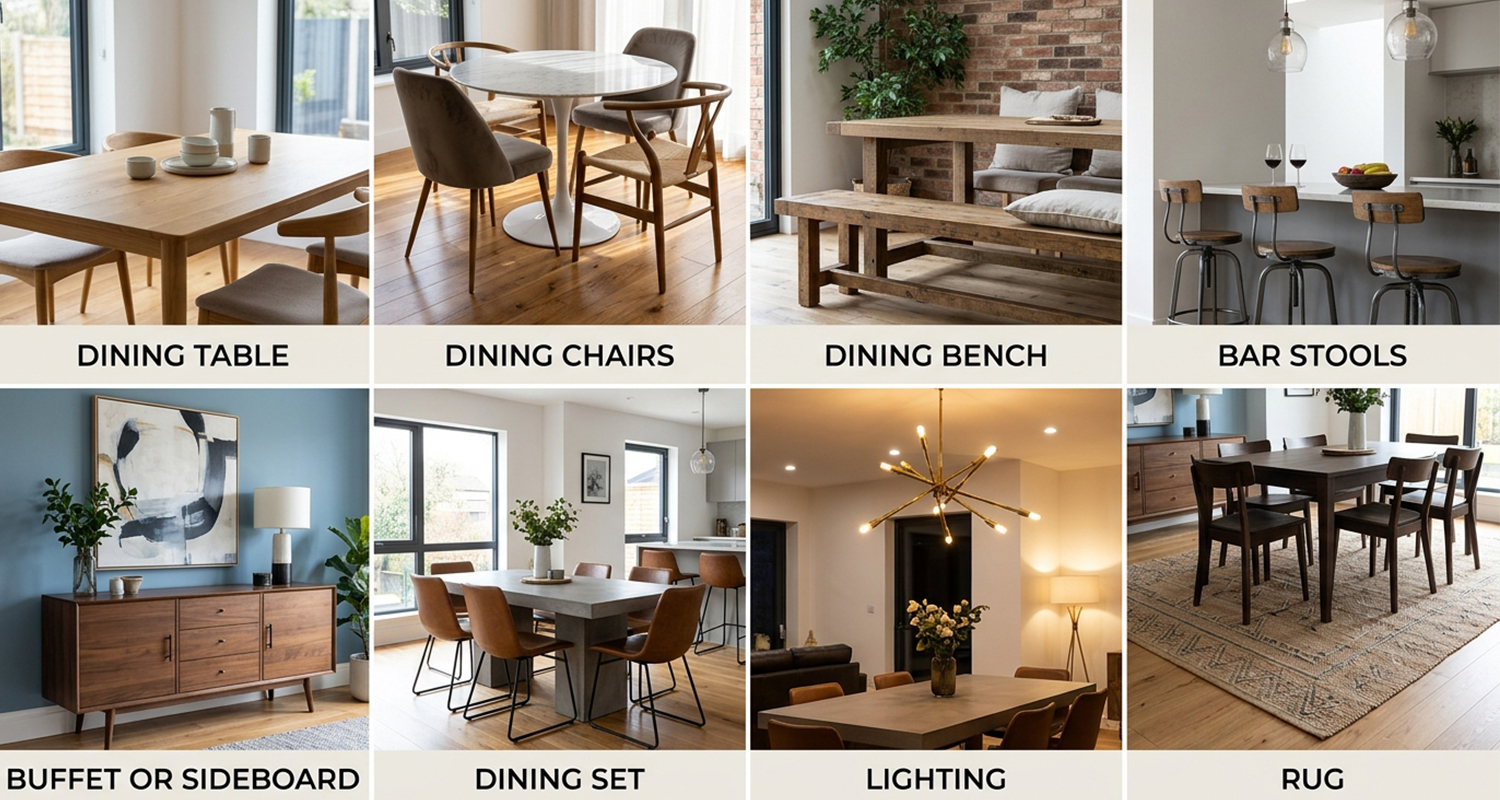
How Product Categories Fit Into the Wider Room Plan

Most dining room guides separate products into categories.

This guide keeps those categories, but places them inside a wider planning system.

Product category

What it contributes

What it depends on

Dining table

The anchor and main work surface

Room size, clearances, household size, traffic flow

Dining chairs

Everyday comfort and flexibility

Table height, apron height, available width, floor type

Dining bench

Space-saving and casual seating

Table base, room width, household habits

Bar stools

Island and high-bench seating

Counter height, overhang depth, pull-out space

Buffet or sideboard

Storage, serving and visual anchor

Wall space, circulation, drawer and door clearance

Dining set

Convenience and coordinated style

Room proportions, household needs, long-term flexibility

Lighting

Function, atmosphere and zoning

Table position, ceiling height, electrical access

Rug

Zone definition, comfort and sound control

Table size, chair pull-out, floor type

A product should never be chosen only because it looks good.

It should be chosen because it fits the role the room needs it to play.

How to Use the Appendices

The appendices are designed to be used during the project, not just read once.

Use them to:

  • Record room measurements.

  • Compare products.

  • Check delivery access.

  • Plan stool and chair heights.

  • Confirm buffet placement.

  • Track maintenance.

  • Prepare questions for retailers.

  • Document a delivery issue.

You do not need to complete every appendix.

Use the ones relevant to your project.

A Note on Measurements

Measurements in this guide are practical planning references.

They are not building regulations or mandatory standards.

Rooms, products, bodies and household habits vary. A number that works in one home may need adjustment in another.

Where industry sources agree, this guide gives the commonly accepted range. Where advice differs, it explains the trade-off rather than pretending there is one perfect answer.

Always confirm the exact dimensions, materials, care instructions, installation requirements and delivery details of the specific products you are considering.

A Note on Australian Consumer Rights

In Australia, goods bought from a business generally come with automatic consumer guarantees under Australian Consumer Law.

These guarantees are separate from any voluntary warranty offered by a retailer or manufacturer.

In practical terms, a product should be:

  • Of acceptable quality.

  • Safe.

  • Durable.

  • Free from defects.

  • Fit for its intended purpose.

  • Match its description.

  • A warranty is an additional promise. It does not replace consumer guarantee rights.

This guide explains how to prepare for those rights before purchase, rather than trying to understand them only after something goes wrong.

Part 1 — The Australian Dining Room Reality

Part Introduction

Every successful dining room begins with the home, not the furniture. Before any table or chair is considered, you need to understand the space it will live in and the people who will use it.

Part 1 lays that groundwork. It explains why dining spaces call for a different planning mindset from other rooms, since they must handle meals, gatherings and everyday clutter all at once.

It looks at how Australian homes, from compact apartments to sprawling family houses, shape your choices. It also shows which tasks you can safely plan yourself and which are best left to professionals, and helps you define the room’s real job.

By the end of this part, you should be able to write a clear, simple brief for your dining zone.

That brief becomes your guide for every later decision, including table size, chair style, storage, lighting, rug size and budget, so each choice stays tied to how you actually live.

Chapter 1. Why Dining Rooms Need a Different Mindset

The Dining Room Has Changed

For many households, the dining room is no longer used only for dinner.

It may be used for:

  • Weekday meals.

  • Weekend gatherings.

  • School lunches.

  • Homework.

  • Laptop work.

  • Craft and art projects.

  • Board games.

  • Sorting mail.

  • Unpacking shopping.

  • Birthday celebrations.

  • Working from home.

  • Casual entertaining.

In an open-plan home, it may also be visible from the kitchen, living room and entryway.

That means the dining zone has to perform several jobs at once.

A room designed only around a formal dinner table may not support the way a household actually lives.

Furniture Is Not the Starting Point

Many people begin with a product.

They see a table they like, buy it, then try to make the room work around it.

This often leads to problems:

  • The table blocks a walking route.

  • Chairs cannot be pulled out properly.

  • The sideboard drawers hit a chair.

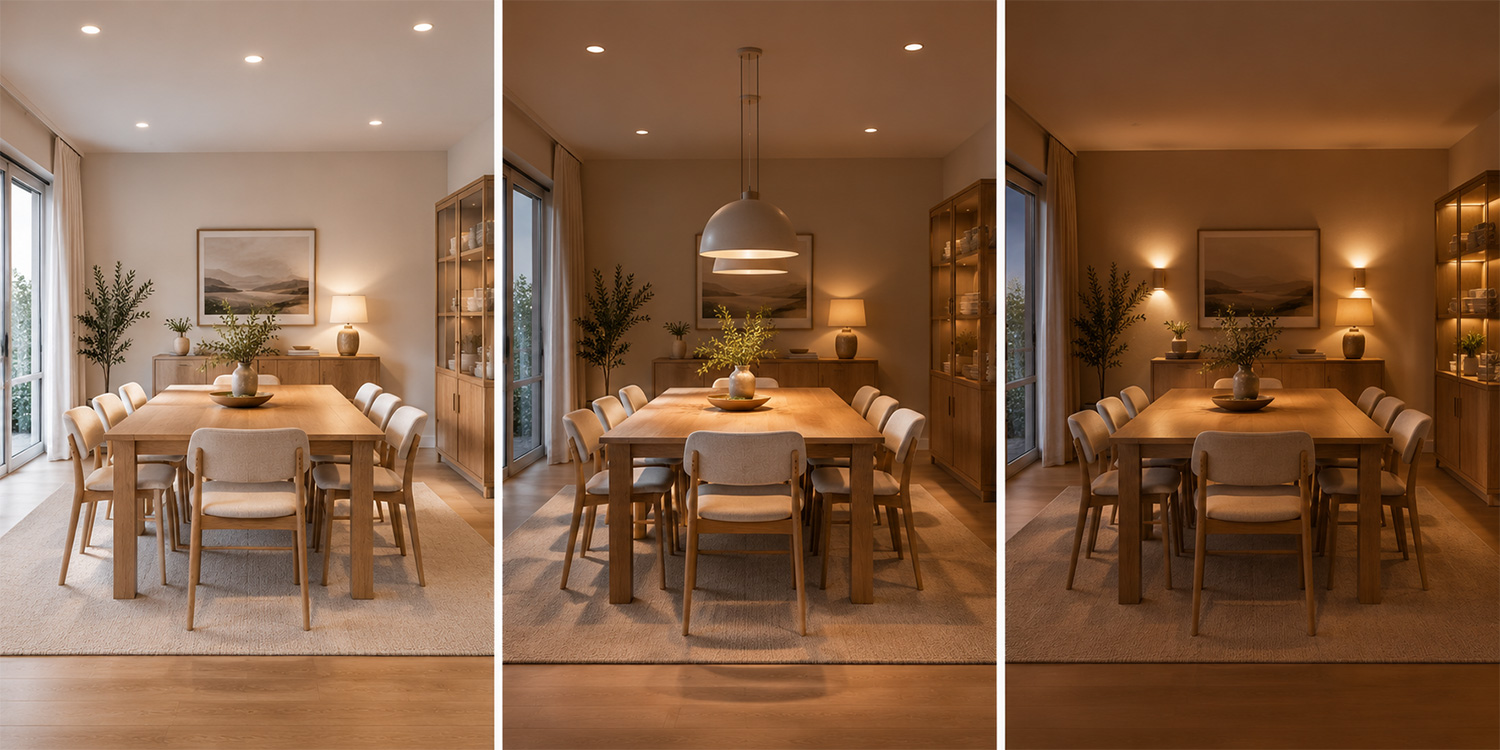
  • The pendant light hangs too high or too low.

  • The rug is too small.

  • The room feels crowded even though the furniture is attractive.

The issue is not taste. It is sequence.

Furniture should follow a plan. A plan should not be forced to fit around furniture that has already been purchased.

Start With Movement

A dining room is full of movement.

People walk from the kitchen to the table. They pull out chairs. They stand up during a meal. They carry plates, drinks and serving dishes. They open drawers. They walk to the bathroom or outdoors.

Every one of those actions needs space.

A room can look spacious when empty and feel cramped when people are using it.

That is why clearance matters more than floor area.

A large room with a badly placed table can feel tighter than a smaller room with a well-planned layout.

Start With the Household

The second starting point is the household.

A couple who eat most meals at the kitchen bench needs a different dining zone from a family of five who eat together every night.

A household with young children needs durable surfaces, stable seating and easy cleaning.

A household that entertains often needs flexible seating and serving space.

A household with older family members may need chairs that are easier to get in and out of.

There is no universally correct table, chair or layout.

There is only the right match between the room and the people using it.

The Room Brief

Before choosing anything, write a one-sentence brief for the room.

A good brief is specific.

Weak brief:

  • “We need a nice dining room.”

Better brief:

  • “We need seating for four every night, space for six during family visits, easy-to-clean surfaces and storage for tableware.”

Even better brief:

  • “This open-plan dining zone needs to seat four on weekdays, accommodate six guests once a month, keep a clear path from the kitchen to the balcony, and store everyday tableware without cluttering the table.”

That sentence becomes your decision-making filter.

Every product must help fulfil it.

The Four Jobs of a Dining Zone

Think of the dining zone as having four jobs.

1. Eating

The room must allow people to sit comfortably and eat without feeling crowded.

This requires:

  • Enough table edge per person.

  • Enough knee clearance.

  • Comfortable seating.

  • Enough space for plates, glasses and shared dishes.

2. Moving

The room must allow people to walk, serve and pull out chairs.

This requires:

  • Clear walkways.

  • Enough chair pull-out space.

  • No blocked doorways.

  • No conflicts between drawers and seating.

3. Storing

The room must keep everyday items accessible without cluttering the table.

This requires:

  • A buffet, sideboard, cabinet or nearby storage.

  • Enough space for drawers and doors.

  • A sensible place for tableware, linens and serving pieces.

4. Feeling Good

The room must feel inviting.

This requires:

  • Appropriate lighting.

  • A cohesive palette.

  • Comfortable proportions.

  • A rug or visual anchor in open-plan spaces.

  • Enough empty space so the room does not feel crowded.

A beautiful room that fails the first three jobs will eventually feel frustrating.

Why “Table Plus Chairs” Is Not a Plan

A table and chairs create seating.

They do not automatically create a functional dining room.

A complete plan also considers:

  • Where people walk.

  • Where food is served.

  • Where items are stored.

  • Where light falls.

  • Where the room begins and ends.

  • How the space connects to the kitchen and living area.

  • How the room will be used in five years.

A table and chairs are important pieces. But they are parts of a system.

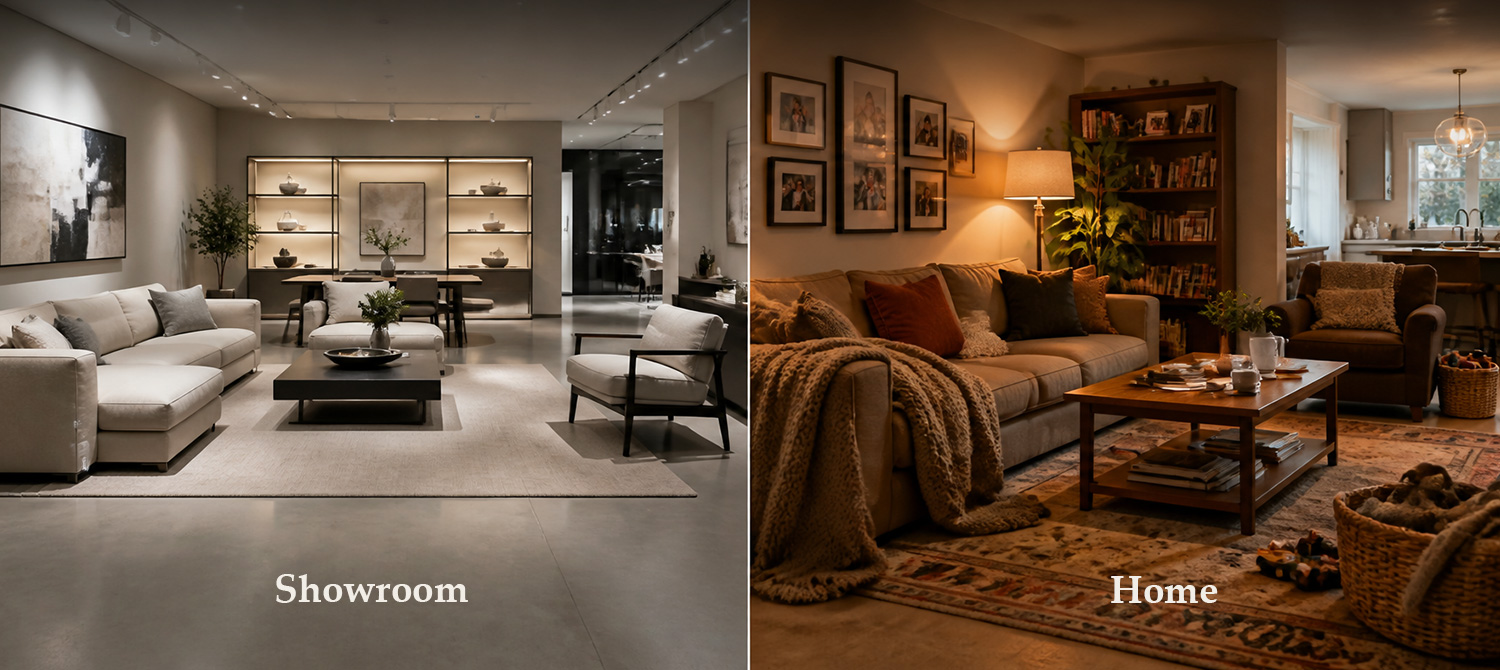
The Difference Between a Showroom and a Home

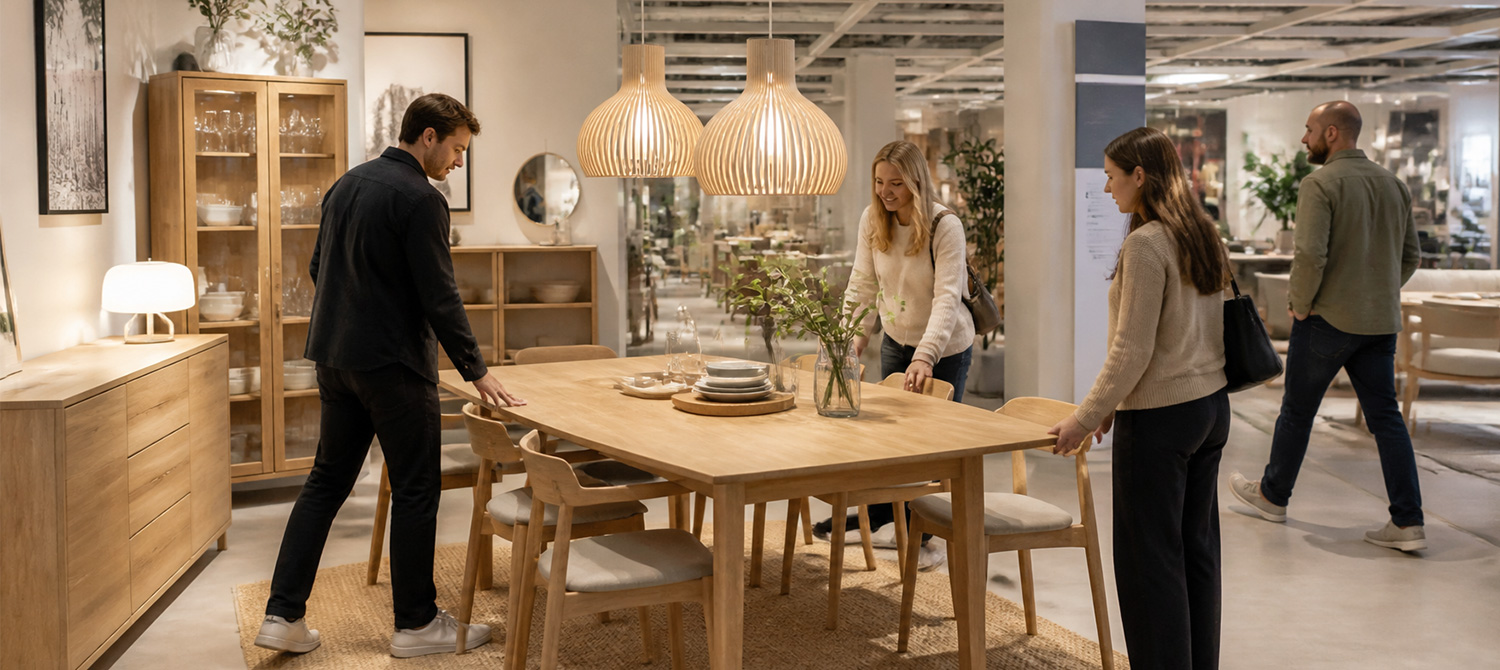
Showrooms are designed to make furniture look appealing.

They usually have:

  • High ceilings.

  • Wide open space.

  • Controlled lighting.

  • No children’s toys.

  • No pets.

  • No daily clutter.

  • No delivery constraints.

  • No nearby kitchen traffic.

Your home is different.

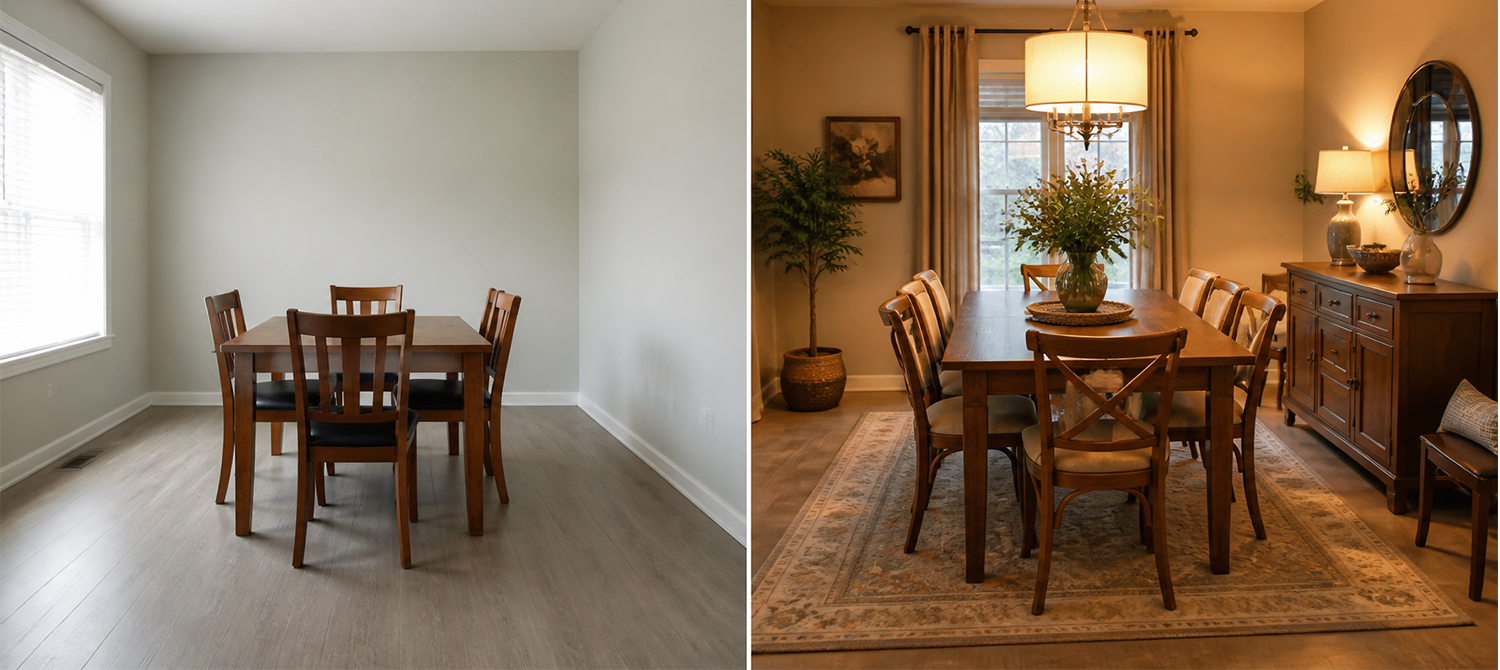
A table that looks elegant in a showroom may feel too large in a room with a hallway, sliding door or kitchen island.

Always judge furniture in the context of your own room.

The Planning Mindset

A planning mindset means asking questions before spending.

  • Who uses this room?

  • When do they use it?

  • What do they carry through it?

  • What needs to be stored nearby?

  • What blocks movement?

  • What will be used daily?

  • What will be used occasionally?

  • What can be changed later?

  • What must be decided now?

These questions turn a vague desire for “a nice dining room” into a practical project.

Chapter Summary

A dining room does more than hold a table. Think of it as a busy corner of daily life where people eat, chat, do homework and sometimes spread out paperwork. Because Australian houses range from compact apartments to sprawling family homes, no single layout suits everyone. Before you buy anything, map out how people will walk through the space, where plates, linen and spare chairs will be kept, and what your household actually needs day to day. Try summing up the room’s purpose in one short sentence, such as “a relaxed spot for family meals and weekend hosting.” Simply placing a table with chairs in the middle won’t make the space work well. A piece that looks perfect on a showroom floor can feel cramped or awkward once it’s sitting in your own home, so always judge each item against your real rooms and routines.

Next, we’ll look at how different Australian home types shape the way you plan a dining area.

Chapter 2. Understanding Australian Homes and Dining Zones

There Is No Single Australian Dining Room

Australian homes range from compact inner-city apartments to large family homes with multiple living zones.

Because of this, the best dining room is not defined by one style, one table shape or one furniture arrangement.

It is defined by how well the space supports the household.

A dining zone that works in a large family home may feel cramped in an apartment. A minimal apartment setup may feel too casual in a formal dining room.

The first step is understanding what kind of space you have.

Apartments: Compact Space, Tight Access

Apartments often have the most constrained dining areas.

The dining table may sit beside the kitchen, near a balcony door or within an open-plan living space.

Space is limited, and every centimetre matters.

In an apartment, prioritise:

  • A table with a compact everyday footprint.

  • Armless chairs that tuck fully beneath the table.

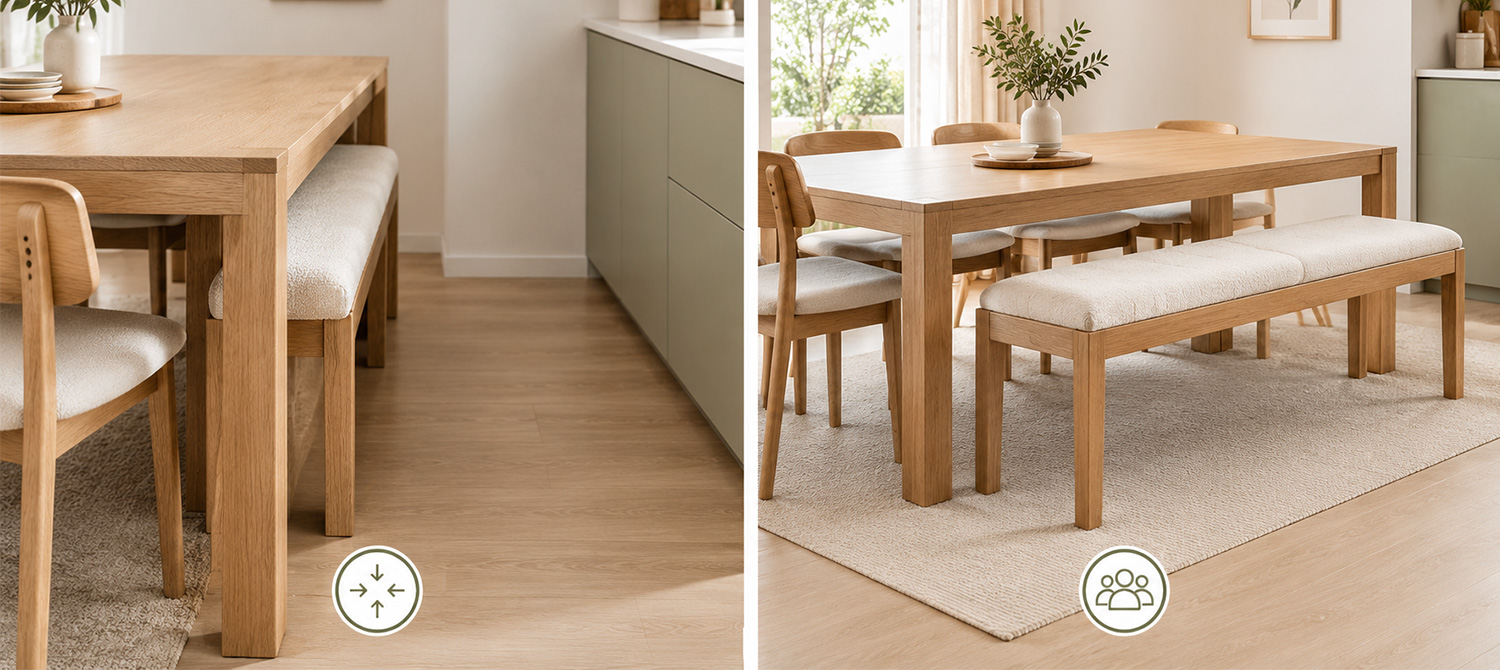
  • A bench that can slide under the table.

  • Lightweight furniture that can be moved easily.

  • A clear delivery path through the lobby, lift, hallway and front door.

A compact table that works every day is usually better than a large table that only works when nobody needs to walk past it.

Apartment Delivery Constraints

In an apartment, the delivery route can be as important as the room itself.

Check:

  • Street access.

  • Building entry.

  • Lift lobby.

  • Lift cabin dimensions.

  • Corridor width.

  • Corner turns.

  • Front door width.

  • Internal hallway width.

  • Final room access.

A table may fit through the front door but fail at a corridor turn or lift door.

Always compare the product’s boxed dimensions with the narrowest point on the delivery route.

Townhouses: Long Rooms and Shared Walls

Townhouses often have long, narrow living areas.

The kitchen, dining space and living room may sit in one continuous line.

In this layout, a rectangular table placed along the long axis usually works best.

It leaves the width of the room free for chairs and movement.

Avoid placing a wide table across the narrowest part of the room. It may look balanced on a floor plan, but it can make everyday movement feel awkward.

Townhouse Storage Challenges

Townhouses often have limited storage.

A buffet or sideboard can be especially valuable because it keeps tableware, serving pieces and everyday items out of the kitchen.

But storage needs space.

Before choosing a sideboard, check:

  • Available wall length.

  • Distance from the table.

  • Drawer extension space.

  • Door swing space.

  • Walking space in front of the cabinet.

  • Power outlet locations.

A sideboard that blocks circulation creates a new problem while solving another.

Family Homes: Multiple Eating Zones

Larger Australian homes often have more than one place to eat.

There may be:

  • A kitchen island for breakfast and quick snacks.

  • A casual dining table near the kitchen.

  • A formal dining room for gatherings.

  • An outdoor alfresco area for warm-weather meals.

If your home has multiple eating zones, do not try to make one table do every job.

Let each zone do what it does best.

  • The island handles quick meals and casual gathering.

  • The main table handles family dinners and guests.

  • The outdoor area handles relaxed entertaining.

  • The formal dining room handles larger or more formal occasions.

Open-Plan Homes: Define the Zone

In an open-plan home, the dining area often has no walls to define it.

That does not mean it has to feel undefined.

You can create a clear dining zone using:

  • A rug under the table.

  • A pendant light above the table.

  • A sideboard or buffet along one edge.

  • A consistent material palette.

  • A clear walking path between kitchen, dining and living areas.

The rug and pendant work together as invisible walls. They tell the eye where one activity ends and another begins.

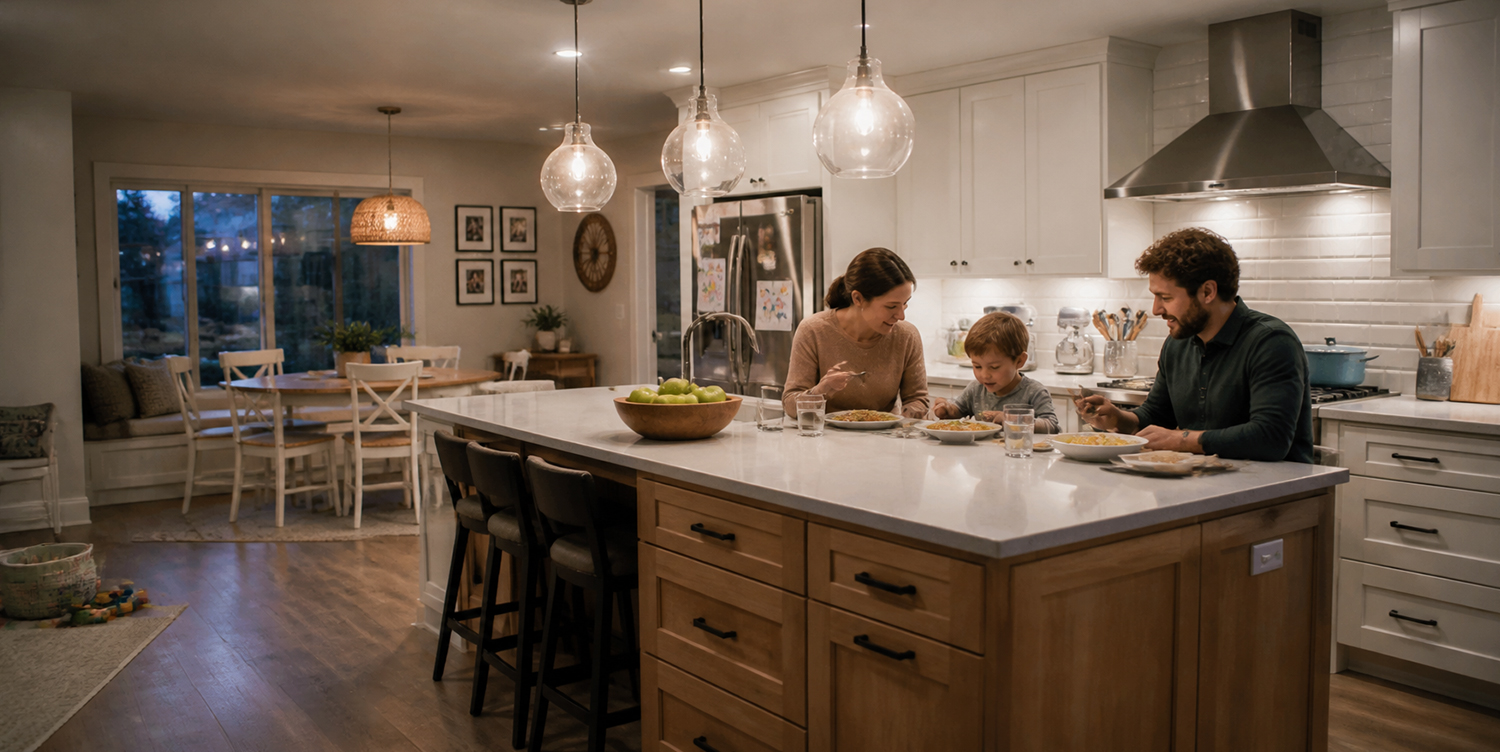
The Kitchen Island Effect

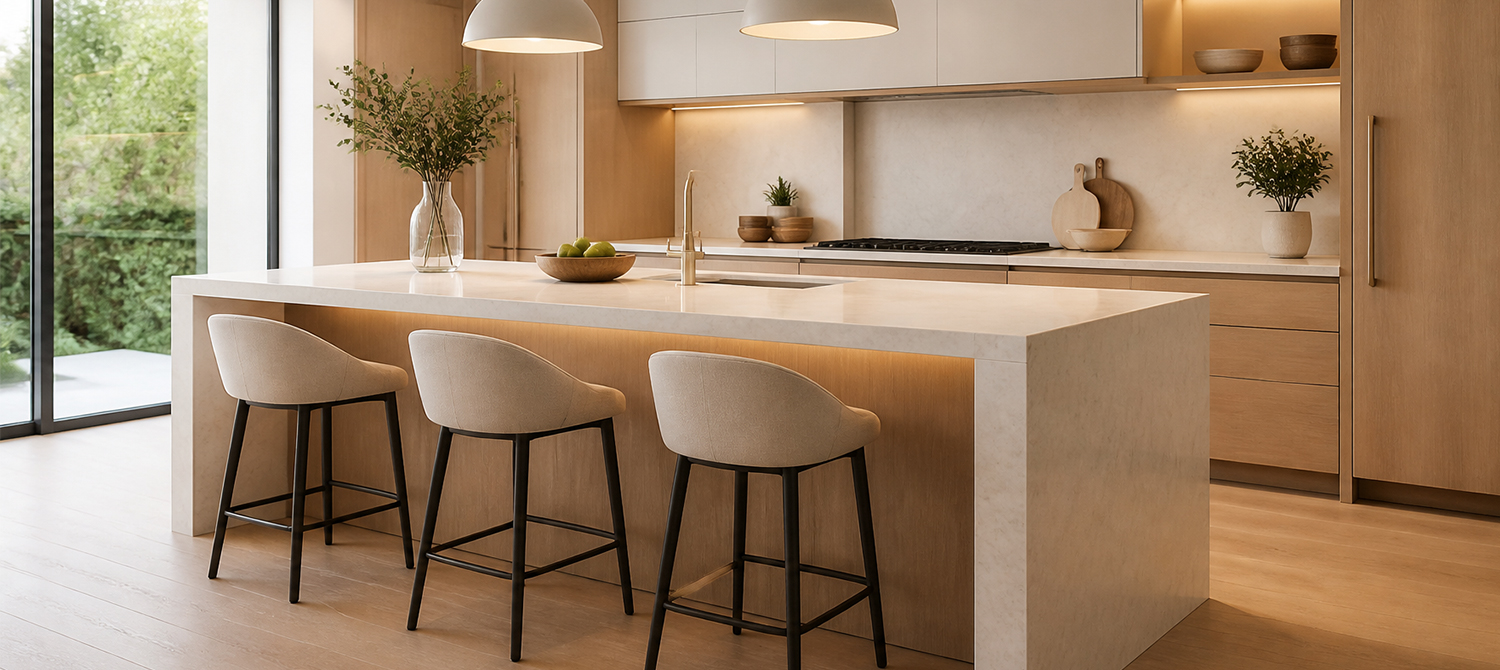
In many Australian homes, the kitchen island has become a second dining table.

It is used for:

  • Breakfast.

  • Coffee.

  • Snacks.

  • Homework.

  • Casual meals.

  • Entertaining.

  • Working from home.

This changes the role of the formal dining table.

If the island handles most quick meals, the dining table may only need to handle family dinners and guests.

That can allow a smaller everyday table, an extendable table or a more flexible seating arrangement.

Indoor-Outdoor Living

Many Australian homes blur the line between inside and outside.

Sliding doors, courtyards, balconies and alfresco areas mean the dining table may be only one part of a larger entertaining flow.

Plan for clear pathways between:

  • The kitchen and dining table.

  • The dining table and outdoor area.

  • The sideboard and the table.

  • The front door and the main living space.

Furniture near sliding doors should not block the door’s travel path.

Chairs should not prevent a door from opening fully.

Renting: Choose Flexibility

Renters should avoid assuming that every dining problem needs a built-in solution.

A fixed banquette, wall-mounted shelving or custom joinery may not be appropriate.

Instead, focus on pieces that can move with you.

Good renter-friendly choices include:

  • A freestanding table.

  • Lightweight dining chairs.

  • A movable bench.

  • A sideboard that can be disassembled or moved.

  • A rug with a non-permanent rug pad.

  • Plug-in lighting rather than hard-wired fixtures.

When you eventually move, the furniture should be able to move with you.

Heritage and Older Homes

Older Australian homes can present different challenges.

Walls may not be straight. Doorways may be narrow. Floor levels may vary. Power points may be limited. Natural light may be uneven.

In these homes, measure each wall separately.

Do not assume that a room is square or that furniture will sit level without adjustment.

Older homes can also have beautiful character, but that character often comes with irregular proportions.

A smaller table, flexible seating and adjustable furniture can work better than forcing a large modern layout into an older room.

New Builds and Open-Plan Living

New homes often favour open-plan layouts, where the kitchen, dining and living areas flow together as one large space.

This brings real flexibility, because the cook can chat with guests, children can play within sight and the furniture can be rearranged as life changes.

It also creates visual challenges.

With no walls or doorways to mark where one activity ends and another begins, the dining zone can feel like leftover space, a table floating somewhere between the sofa and the stove.

Without clear boundaries, the room may look unfinished and the table can seem to drift without a purpose.
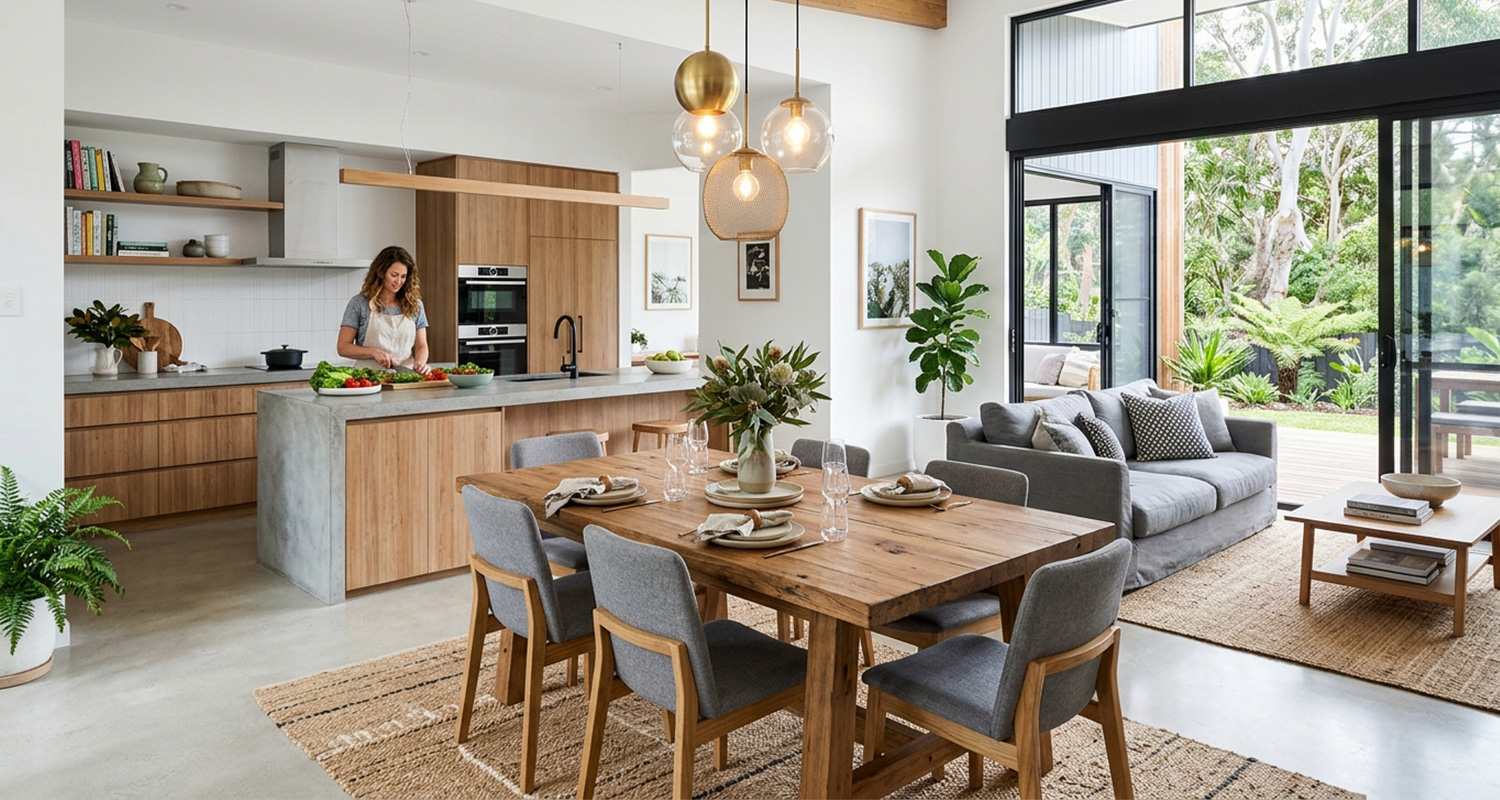
The solution is to define the zone on purpose. A rug beneath the table, a pendant light overhead, a sideboard along one edge or a change in wall colour can all draw soft, invisible lines.

Once the dining area has its own identity, the whole open-plan space feels calmer and better organised.

Define it deliberately.

Use:

  • A rug.

  • A pendant light.

  • A sideboard.

  • A consistent palette.

  • A clear pathway.

  • A table positioned in relation to the kitchen and living areas.

Do not simply centre the table in the available space. Align it with the features that give the room structure.

Climate and Location

Australia’s climate varies from humid coastal conditions to dry inland heat.

These conditions affect furniture differently.

  • Humid coastal air can affect timber, metal and woven materials.

  • Dry inland heat can dry out timber and finishes.

  • Strong sun can fade upholstery, rugs and timber.

  • Temperate zones may have fewer extremes but still experience seasonal changes.

Choose materials that suit your local conditions, not just the style you like.

The Practical Question

Instead of asking, “What dining table should I buy?”

Ask: “What kind of dining zone does my home actually need?”

The answer may be:

  • A compact everyday table.

  • A flexible extendable table.

  • A formal dining room.

  • A casual kitchen dining zone.

  • An island with stools.

  • A combination of several zones.

Once you know the answer, product choices become much easier.

Chapter Summary

Australian homes come in many shapes, and each one asks something different of a dining area. In an apartment, space is tight, so smaller, slimmer pieces work best, and it pays to check lift sizes, stairwells and door widths before anything is ordered. Townhouses tend to be long and narrow, which means a rectangular table running lengthwise usually fits the flow far better than a round one. Bigger family homes can handle more than one place to eat, such as a formal table plus a casual bench near the kitchen. In open-plan layouts, there are no walls to mark the zone, so a rug, a pendant light and a nearby sideboard can quietly set it apart. If you rent, lean towards furniture that can be moved or taken apart, since you can’t alter the property itself. Finally, think about local conditions: strong sun, heat and humidity can fade, warp or damage some finishes, so choose materials that cope with your climate.

Next, we’ll cover what you can plan on your own, what needs extra care and when it’s worth calling in a professional.

Chapter 3. The Traffic-Light Rule: Plan, Caution and Professional Help

Why Homeowners Need Boundaries

A dining room project can involve everything from choosing a cushion to changing electrical wiring.

Some tasks are simple. Some require care. Some should only be done by a licensed or qualified professional.

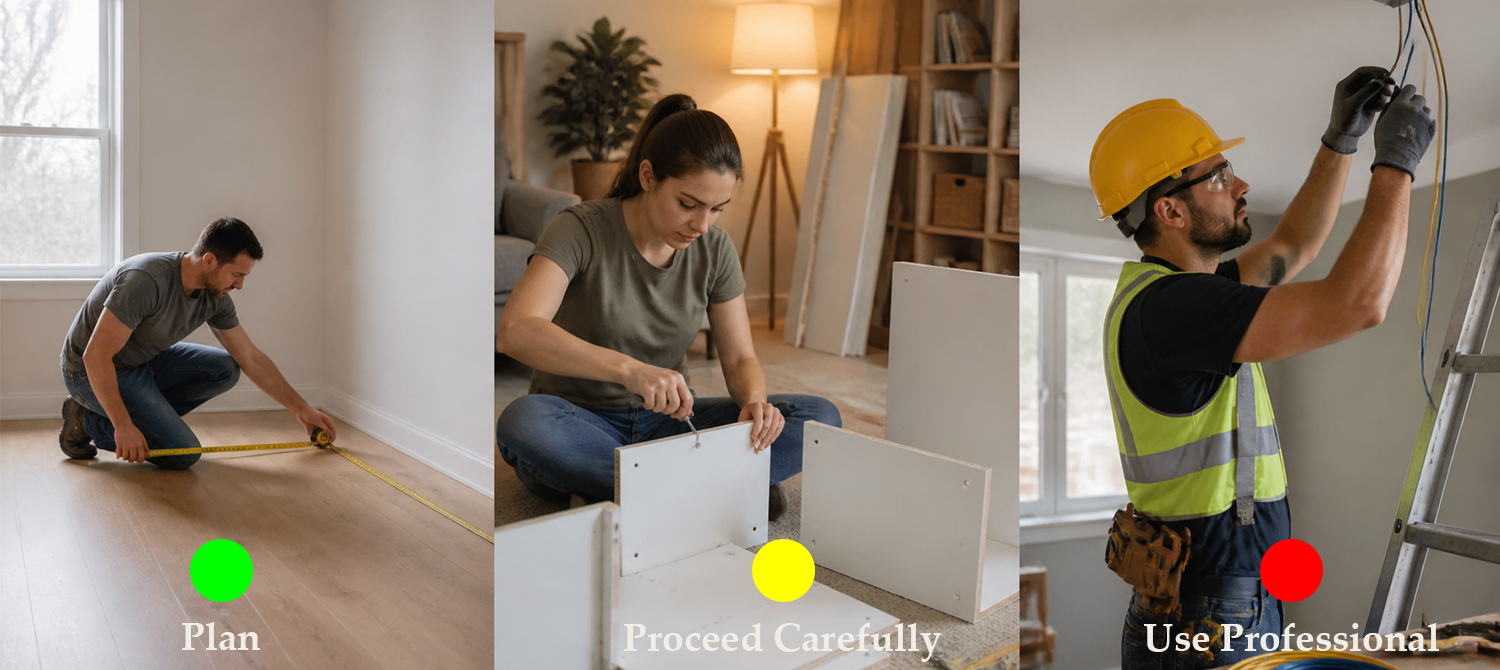
The traffic-light rule gives homeowners a simple way to decide.

  • Green: plan, research, measure and choose.

  • Yellow: proceed carefully, follow instructions and ask questions.

  • Red: stop and use a licensed or qualified professional.

This rule protects both your budget and your safety.

Green: Plan and Choose Yourself

Green tasks are those you can do without special qualifications.

They include:

  • Measuring the room.

  • Drawing a simple floor plan.

  • Identifying traffic routes.

  • Testing furniture layouts with masking tape.

  • Researching products.

  • Comparing specifications.

  • Ordering samples.

  • Choosing colours and materials.

  • Planning a rug size.

  • Styling shelves and tabletops.

  • Choosing freestanding furniture.

  • Arranging delivery.

  • Assembling simple flat-pack furniture.

These tasks benefit from patience, not licences.

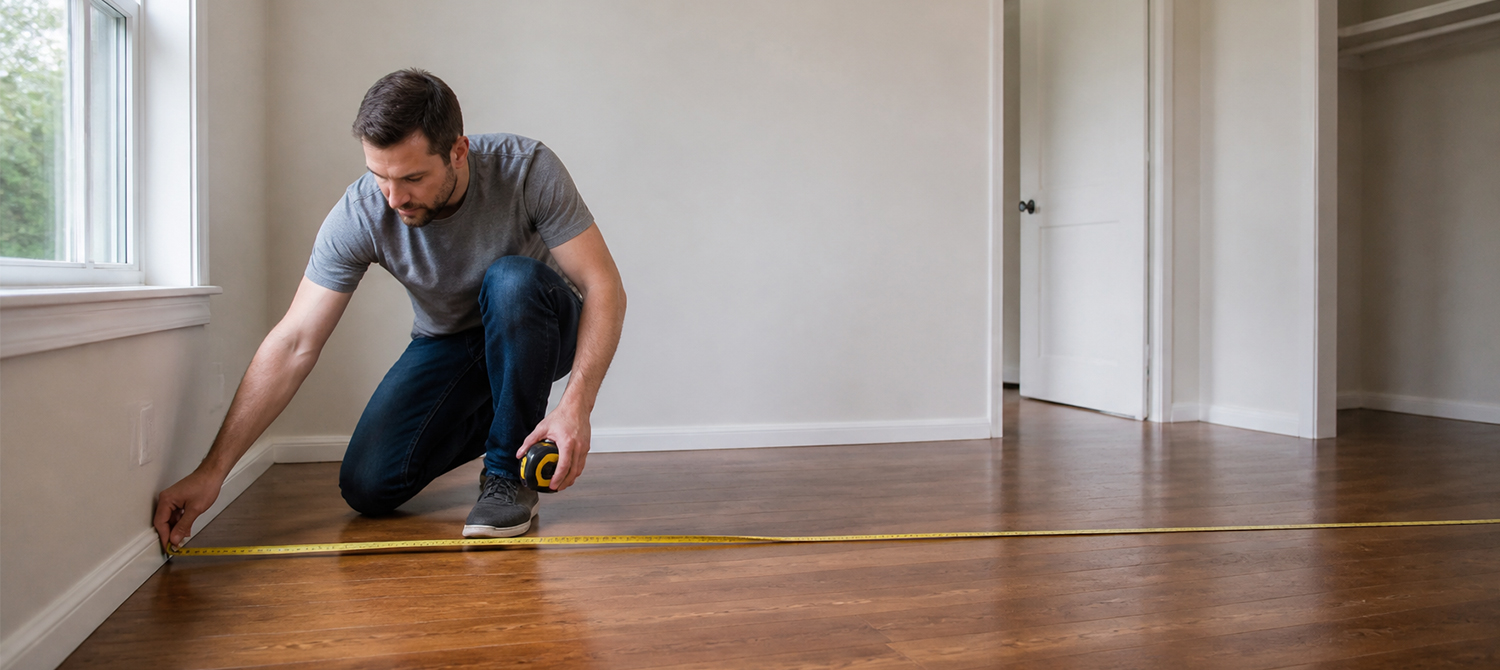
Green: Measure Before You Buy

Measuring is one of the most valuable things a homeowner can do.

Measure:

  • Room length and width.

  • Ceiling height.

  • Doorways.

  • Windows.

  • Sliding doors.

  • Existing furniture.

  • Delivery route.

  • Table position.

  • Chair pull-out space.

  • Sideboard wall length.

  • Island overhang.

Write the numbers down.

A phone photo of the measurements is useful, but a written list is better.

Green: Test the Layout

Use masking tape to mark the footprint of a proposed table on the floor.

Then mark the chairs in their pulled-out positions.

Walk around the layout.

Ask:

  • Can I pull out a chair without hitting anything?

  • Can I walk behind a seated person?

  • Can I carry a plate from the kitchen?

  • Does a door still open?

  • Does a drawer still open?

  • Does the layout leave enough space for storage?

This simple test prevents many expensive mistakes.

Yellow: Proceed With Caution

Yellow tasks are not necessarily dangerous, but they require care, correct tools or product-specific knowledge.

They include:

  • Assembling complex furniture.

  • Moving very heavy items.

  • Installing wall-mounted shelving.

  • Hanging heavy artwork or mirrors.

  • Positioning large sideboards.

  • Installing plug-in lighting.

  • Using wall anchors.

  • Adjusting furniture on uneven floors.

  • Handling glass tabletops.

  • Installing a rug pad.

  • Modifying furniture placement around power points.

These tasks can often be done by a capable homeowner, but only with the right preparation.

Yellow: Heavy Furniture Needs Two People

Do not move a large table, sideboard or display cabinet alone.

Heavy furniture can cause:

  • Back injuries.

  • Floor damage.

  • Wall damage.

  • Broken corners.

  • Pinched fingers.

  • Damaged door frames.

Use two people, furniture sliders, protective blankets and a clear path.

Lift rather than drag whenever possible.

Yellow: Wall Fixings Need Care

Before drilling into a wall, check what may be behind it.

Walls can contain:

  • Electrical wiring.

  • Plumbing.

  • Gas pipes.

  • Structural elements.

  • Studs.

  • Masonry.

  • Previous repairs.

If you are unsure, use a qualified professional or a suitable detection tool.

Never drill blindly near switches, power points, plumbing fixtures or gas appliances.

Yellow: Follow the Product Instructions

Furniture instructions exist for a reason.

They specify:

  • Assembly sequence.

  • Required tools.

  • Wall-fixing requirements.

  • Weight limits.

  • Floor protection.

  • Maintenance.

  • Safety warnings.

Read the entire instruction manual before starting.

Do not substitute tools unless the manufacturer says it is safe to do so.

Red: Use a Licensed or Qualified Professional

Red tasks involve risk, regulation or specialised knowledge.

They include:

  • Hard-wired lighting.

  • New power points.

  • Electrical repairs.

  • Switchboard work.

  • Structural changes.

  • Removing or altering walls.

  • Gas work.

  • Plumbing work.

  • Waterproofing.

  • Major built-in joinery.

  • Ceiling modifications.

  • Work that affects fire safety or building compliance.

Do not attempt these tasks based on online advice alone.

Use an appropriately licensed or qualified professional.

Red: Lighting Is Not Always a DIY Job

Changing a plug-in lamp is usually simple.

Installing or moving a hard-wired pendant is different.

It may involve:

  • Ceiling access.

  • Electrical wiring.

  • Switch control.

  • Load requirements.

  • Compliance requirements.

  • Safety testing.

If a pendant needs to be hard-wired, moved or replaced, use a licensed electrician.

A beautiful dining pendant is not worth an electrical risk.

Red: Built-In Joinery Is a Project

A built-in banquette, integrated sideboard or custom dining nook can be beautiful.

But it is a small construction project.

It may involve:

  • Wall fixing.

  • Floor fixing.

  • Electrical planning.

  • Cabinetry.

  • Upholstery.

  • Ventilation.

  • Structural considerations.

Once built, it cannot easily be moved.

If you are renting, or if you may move within a few years, a freestanding solution is usually safer.

Red: Do Not Ignore Product Safety Warnings

Follow all safety warnings supplied with a product.

This includes:

  • Weight limits.

  • Wall-anchoring requirements.

  • Assembly instructions.

  • Cleaning restrictions.

  • Heat warnings.

  • Glass handling warnings.

  • Child safety warnings.

Do not remove warning labels or modify a product in a way that affects its stability or safety.

The Traffic-Light Rule in Practice

Use this simple table.

Task

Light

What to do

Measure the room

Green

Do it yourself

Draw a floor plan

Green

Do it yourself

Choose a rug size

Green

Do it yourself

Style a sideboard

Green

Do it yourself

Assemble a simple chair

Green or yellow

Follow instructions

Move a heavy sideboard

Yellow

Use two people and protection

Install wall shelving

Yellow

Check wall type and fixings

Hang a heavy mirror

Yellow

Use correct anchors or professional help

Install a hard-wired pendant

Red

Use a licensed electrician

Move a power point

Red

Use a licensed electrician

Remove a wall

Red

Use a qualified professional

Install gas appliances

Red

Use a licensed gas fitter

Build a fixed banquette

Red or yellow

Use a qualified cabinetmaker or builder

When in Doubt, Ask

It is always cheaper to ask a question before a mistake than to repair one afterwards.

Before starting a yellow or red task, ask:

  • Is this within my skill level?

  • Do I have the right tools?

  • Could this affect wiring, plumbing or structure?

  • Does the product require professional installation?

  • Will this affect my warranty?

  • Could this create a safety risk?

  • Should I get a quote first?

If any answer is uncertain, pause.

Chapter Summary

Think of your dining room projects in three tiers, a bit like traffic lights. Green jobs are the safe, easy ones you can do on your own: measuring the room, researching ideas, sketching a layout and handling simple styling such as swapping cushions or placing a centrepiece. Yellow jobs call for more care. Assembling heavy furniture, mounting a shelf or lifting a solid timber table might need proper tools or a second pair of hands, so don’t rush them alone. Red jobs are the ones to leave to qualified tradespeople, including anything involving wiring, gas, pipes, load-bearing walls or large built-in cabinetry. Even a small mistake there can be costly or dangerous. Never drill into a wall without knowing what’s behind it, since cables and pipes often hide where you least expect them. Always read the warnings and instructions that come with a product, and if you’re ever unsure, pause and ask a professional first.

Next, we’ll work out exactly how your household uses its dining space.

Chapter 4. Define How Your Household Uses the Room

The Room Should Follow the Household

The costliest error when setting up an eating zone is purchasing items for an imagined lifestyle rather than your daily reality.

An eight-seater setup might seem stunning, yet it creates unnecessary clutter if merely two people gather there each evening. Likewise, a fragile white surface may appear gorgeous in photos, but it proves impractical for a busy family with toddlers and frequent sauce-heavy dinners. Furthermore, a traditional meal area often goes completely unused if everyone naturally gravitates toward the kitchen island.

To avoid these costly missteps, beginners should carefully analyze their household's actual habits and routines before selecting any home furnishings.

Ask the Right Questions

Answer these questions honestly.

  • How many people eat together on a normal weekday?

  • How often do you host guests?

  • How many guests do you usually have at once?

  • Do children eat, study or play at the table?

  • Do pets share the space?

  • Does anyone work or study at the table?

  • Do you prefer formal meals or casual eating?

  • Do you need storage nearby?

  • Does anyone have mobility or comfort needs?

  • Do you eat indoors, outdoors or both?

There are no wrong answers.

There are only mismatches between the room and the household.

Separate Everyday Needs From Occasional Needs

Most households have two different seating needs.

They have an everyday number and an occasional number.

For example:

  • A couple may eat together daily but host six people a few times a year.

  • A family of four may eat together every night and host eight during holidays.

  • A share house may need flexible seating that changes weekly.

  • A retired couple may host large family lunches several times a year.

Do not buy a permanently large table for an occasional need.

Consider:

  • An extendable table.

  • A bench that can accommodate extra people.

  • Folding chairs stored elsewhere.

  • A kitchen island for overflow seating.

  • A separate outdoor dining area.

Write Your Room Brief

A room brief is one or two sentences that describe what the space must do.

It should include:

  • Everyday seating.

  • Occasional seating.

  • Main activities.

  • Storage needs.

  • Traffic requirements.

  • Style direction.

Example:

“This open-plan dining zone needs to seat four on weekdays, accommodate six guests monthly, keep a clear path from the kitchen to the balcony, and store everyday tableware without cluttering the table.”

That sentence is more useful than a mood board.

It tells you what to prioritise.

Identify the Main Activities

List everything that happens at or near the table.

Common activities include:

  • Eating.

  • Homework.

  • Laptop work.

  • Reading.

  • Craft.

  • Games.

  • Sorting mail.

  • Entertaining.

  • Food preparation.

  • Packing school bags.

Each activity has different requirements.

Eating needs comfortable seating and enough table edge.

Homework needs good lighting and a clear surface.

Craft needs a durable, wipeable surface.

Entertaining needs serving space and flexible seating.

If the table has many jobs, choose a larger and more durable surface than a household that only uses it for meals.

Consider Children

Children change the priorities.

They bring spills, sticky hands, craft materials, climbing and frequent movement.

For a family dining zone, prioritise:

  • Durable surfaces.

  • Rounded corners.

  • Stable chairs.

  • Easy-clean upholstery.

  • Washable rugs.

  • Enough space to move around.

  • Storage for craft and school items.

Avoid delicate materials if they will create daily stress.

A beautiful chair that cannot survive real life will not remain beautiful for long.

Consider Pets

Pets also change the plan.

They bring hair, scratches, spills and occasional climbing.

For pet households, consider:

  • Tight-weave upholstery rather than loose bouclé.

  • Mid-tone fabrics rather than very pale or very dark colours.

  • Durable timber or metal frames.

  • Washable rugs.

  • Floor protection under furniture.

  • Stable seating.

A performance fabric may cost more initially, but it can reduce long-term frustration.

Consider Mobility and Comfort

A dining room should work for everyone who uses it.

Some people need:

  • Chairs with arms.

  • Higher seats.

  • Firmer cushions.

  • More space to stand up.

  • Clear pathways.

  • Fewer obstacles.

  • Stable furniture.

If mobility is a consideration, avoid cramped layouts and low, soft seating.

Allow extra clearance around the table and choose chairs that are easy to rise from.

Consider Entertaining

If you host often, plan for it.

You may need:

  • Flexible seating.

  • A larger table or extension.

  • A sideboard for serving.

  • Good lighting.

  • Clear circulation.

  • Extra chairs stored nearby.

  • A rug large enough for pulled-out chairs.

A household that entertains monthly has different needs from one that entertains once a year.

Do not buy for the rare occasion unless that occasion is genuinely important to you.

Consider Work and Study

If the table doubles as a workspace, treat it partly as a desk.

You may need:

  • A larger surface.

  • Good task lighting.

  • Comfortable seating.

  • Cable management.

  • Storage for laptops and papers.

  • A surface that resists scratches and heat.

A dining table used for work needs more durability than one used only for meals.

Consider Storage

Clutter is often a storage problem, not a styling problem.

If the table constantly collects mail, school notes, chargers and toys, the room needs somewhere else for those items to live.

Storage options include:

  • A buffet.

  • A sideboard.

  • A display cabinet.

  • A console table.

  • A nearby cupboard.

  • Baskets.

  • Drawers.

  • Shelving.

The right storage keeps the table clear without making the room feel crowded.

Consider the Kitchen Connection

In most homes, the dining zone is connected to the kitchen.

People carry food, plates, drinks and serving dishes between the two spaces.

That route must stay clear.

Ask:

  • Can someone carry a hot dish without asking people to move?

  • Is the route wide enough?

  • Do chairs block it when pulled out?

  • Does the island interrupt the path?

  • Is there somewhere to put food down near the table?

A dining room that ignores the kitchen route will feel inconvenient every day.

Consider the Living Area Connection

In open-plan homes, the dining zone also connects to the living area.

People move between:

  • Sofa and table.

  • Table and television.

  • Kitchen and living room.

  • Entry and dining area.

  • Indoor and outdoor spaces.

The dining table should not sit across these natural routes.

Use the floor plan to identify where people already walk, then keep those routes clear.

Consider the Future

Your needs may change.

A couple may become a family. Children grow. Pets arrive. Work patterns change. Entertaining habits evolve.

Choose a base that can adapt.

  • A neutral table can work with changing chairs.

  • An extendable table can adapt to a growing household.

  • A sideboard can store different things over time.

  • A simple palette can be updated with cushions, rugs and artwork.

The best dining room is not finished on day one. It evolves.

Create a Priority List

Once you understand the household, create a priority list.

For example:

  1. Seat four comfortably every night.

  2. Accommodate six guests monthly.

  3. Keep the kitchen-to-balcony path clear.

  4. Store tableware and school items.

  5. Choose surfaces that are easy to clean.

  6. Create a warm, relaxed atmosphere.

This list becomes your buying brief.

When choosing between two products, choose the one that better serves the top priorities.

Chapter Summary

Before shopping, get honest about how your household really lives, not how you imagine it might look in a magazine. Start by separating daily habits from once-in-a-while events: a table used every morning for breakfast has different demands from one that only hosts a big dinner at Christmas. Then think about who is in the picture, such as small kids, a dog that weaves between chair legs, a relative who needs easy access, or someone who works from the table during the day. Jot down a clear, specific description of the space before you browse any catalogues. Keep the paths to the kitchen and living area free, so nobody has to squeeze past a chair. Give everyday items a proper home nearby, like a sideboard or bench with drawers, otherwise the tabletop quickly turns into a dumping ground. Finally, pick a versatile foundation that can adjust as your family grows or your routines shift.

Next, we’ll measure the room properly before any furniture is chosen.

Part 2 — Before You Spend Money

Part Introduction

Most dining room regrets don’t come from poor taste. They come from planning steps that were quietly skipped. Maybe a table is ordered before anyone has checked whether it can get through the front door and up the stairs. Maybe a sideboard is picked without measuring how far its drawers pull out. Chairs get chosen because they look lovely, yet nobody tests whether they slide neatly under the tabletop. A rug is bought for its pattern, then turns out too small to stay beneath the chairs when people sit back from the table.

Part 2 is designed to head off exactly these slip-ups. It walks through the five decisions worth settling before any major purchase:

  1. Measure the room.

  2. Plan clearances and movement.

  3. Check delivery access.

  4. Set a budget and priorities.

  5. Understand your consumer rights.

Work through them in order and you’ll buy with confidence instead of crossing your fingers. Each step is simple on its own, but together they save money, time and a good deal of frustration.

Chapter 5. Measure the Room Like a Professional

Measuring Is the Cheapest Insurance

Measuring takes less than an hour, and it doesn’t cost a cent. Yet this small job heads off some of the most common and expensive dining room mistakes. A table turns out too big for the space. A sideboard ends up blocking the way to the kitchen. Chairs hit a wall when someone tries to pull them out, or a lovely new piece simply won’t squeeze through the front door.

All it takes is a tape measure, a notepad and a little patience. Walk around the room and jot down each wall, doorway and window, then write the numbers somewhere you can find them again, such as your phone. Once you have them, you can judge every item you see against real figures rather than guesswork.

So before you scroll through a single product page or visit a showroom, measure the room first. It’s the quickest, cheapest way to shop with confidence.

You will need:

  • A tape measure.

  • A pencil.

  • Paper or a notes app.

  • A phone camera.

  • Masking tape.

  • A second person for large rooms, if possible.

Do not rely on memory, floor plans or estate-agent listings. Measure the space yourself.

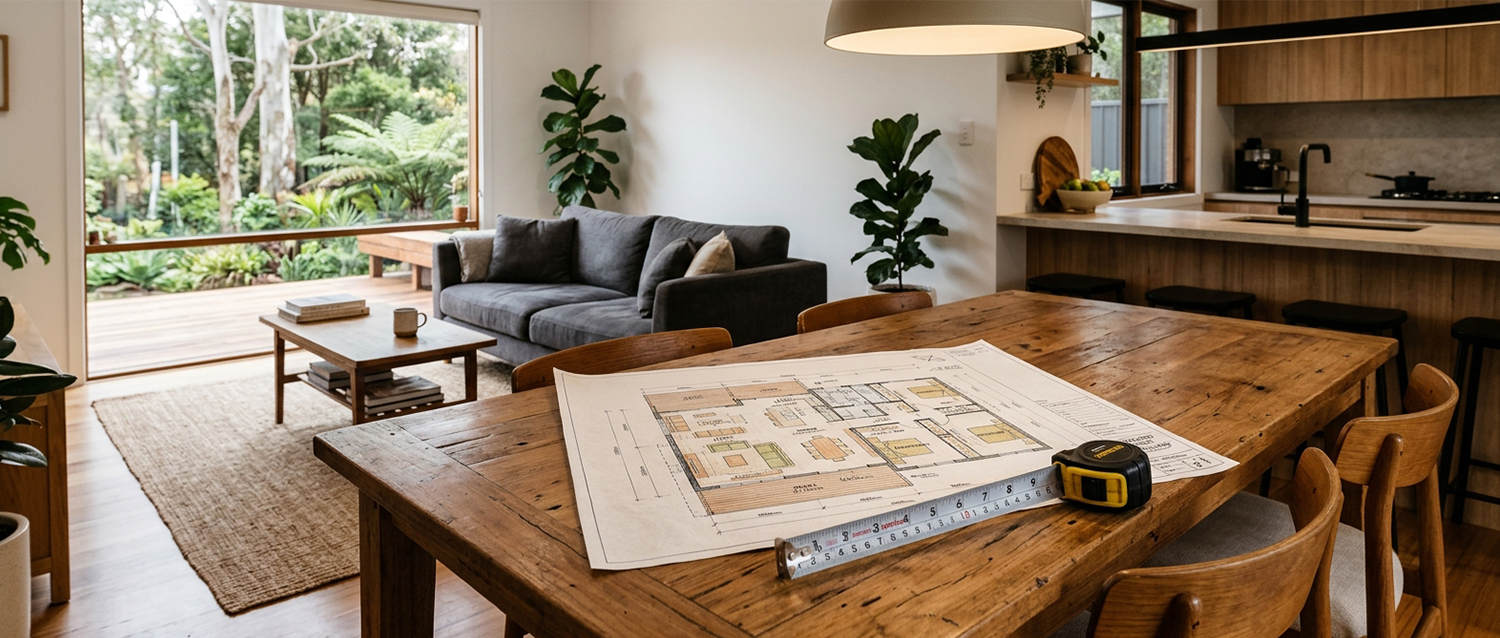
Draw a Simple Floor Plan

You do not need design software.

Draw a simple rectangle representing the room. Mark the walls, doors, windows and fixed features.

The drawing does not need to be beautiful. It needs to be useful.

Include:

  • Walls.

  • Doorways.

  • Windows.

  • Sliding doors.

  • Power outlets.

  • Light switches.

  • Heaters.

  • Air-conditioning vents.

  • Built-in cabinetry.

  • Kitchen islands.

  • Pass-throughs.

  • Existing furniture.

Take a photo of the completed sketch. You will refer to it many times.

Measure Every Wall Separately

Do not assume the room is square.

Measure each wall separately, including:

  • The longest wall.

  • The shortest wall.

  • Alcoves.

  • Recesses.

  • Angled walls.

  • Areas where the ceiling height changes.

Older homes, in particular, often have walls that are not perfectly straight or parallel.

A difference of a few centimetres can matter when fitting a large table or sideboard.

Record the Room Dimensions

Start with the basics.

Measurement

Why it matters

Room length

Determines maximum table length

Room width

Determines table width, chair space and walkways

Ceiling height

Affects lighting and visual proportion

Usable zone length

Important in open-plan spaces

Usable zone width

Defines the real dining area

Wall-to-wall distance

Helps calculate maximum furniture size

In an open-plan home, measure the intended dining zone, not the entire open area.

A living room may be six metres long, but only part of it may be available for dining.

Mark Fixed Features

A room is more than four walls.

Mark the position and size of:

  • Doors.

  • Windows.

  • Sliding doors.

  • Built-in robes.

  • Kitchen islands.

  • Pass-through windows.

  • Power outlets.

  • Light switches.

  • Heaters.

  • Air-conditioning vents.

  • Ceiling roses.

  • Smoke alarms.

  • Skirting boards.

Each feature can affect furniture placement.

A sideboard may fit against a wall in theory, but not if a power point sits exactly where you want it.

A chair may fit beside a window, but not if it blocks the window’s operation.

Measure Doors Correctly

Measure the clear opening, not just the door leaf.

For each door, record:

  • Width of the opening.

  • Height of the opening.

  • Direction of swing.

  • Whether the door can be removed temporarily.

  • Any handles, locks or architraves that reduce usable space.

An inward-opening door can consume more floor space than expected.

A sliding door saves floor space but may still limit the height of furniture passing through.

Measure Windows and Light

Record where natural light enters the room.

Note:

  • Which walls have windows.

  • The direction the windows face.

  • Whether sunlight is direct or filtered.

  • The time of day when light is strongest.

  • Whether blinds or curtains are installed.

Strong Australian sunlight can fade fabrics, rugs, timber finishes and artwork.

A table placed in direct afternoon sun may need more protection than one in a shaded room.

Measure Existing Furniture

If you are keeping any existing pieces, measure them too.

Record:

  • Length.

  • Width.

  • Height.

  • Distance from the wall.

  • Chair pull-out space.

  • Drawer extension space.

  • Door swing space.

This is especially important in open-plan homes, where the dining table may need to coexist with a sofa, coffee table, kitchen island or television unit.

Measure Traffic Routes

Identify the paths people already use.

Common routes include:

  • Kitchen to dining table.

  • Dining table to bathroom or hallway.

  • Front door to living area.

  • Living area to balcony or outdoor area.

  • Kitchen to outdoor entertaining area.

  • Sideboard to dining table.

Mark these routes on your sketch.

A dining table should not sit across a main walking route.

If people constantly carry food through the room, that route must remain clear.

Use Masking Tape

Once you have measurements, use masking tape to mark the footprint of a candidate table on the floor.

Then add tape for the chairs in their pulled-out positions.

Walk around the taped outline.

Check:

  • Can you pull out a chair without hitting anything?

  • Can you walk behind a seated person?

  • Can you carry a plate from the kitchen without turning sideways?

  • Does a door still open?

  • Does the layout leave enough space for a sideboard later?

This test reveals problems that a product photo never will.

Create a Measurement Sheet

Use a simple table or the measurement sheet in Appendix A.

Record:

  • Room length.

  • Room width.

  • Ceiling height.

  • Door widths and swing directions.

  • Window positions.

  • Outlet and switch positions.

  • Existing furniture dimensions.

  • Traffic routes.

  • Delivery route measurements.

  • Maximum table size.

A completed measurement sheet turns shopping from guesswork into decision-making.

Chapter Summary

Start by measuring everything in the room: every wall, doorway and window, plus any fixed feature such as a fireplace or built-in cupboard. Don’t assume the space is a perfect square, because many Australian rooms have slightly uneven walls or small nooks that change the numbers. Note where the doors, windows, power points and heaters sit, since each one affects where furniture can go. Also observe how people already move through the room on the way to the kitchen, garden or bedrooms.

Once you have the figures, put them in a simple sheet so they’re on hand whenever you shop. Then test your ideas for real: stick masking tape on the floor to outline a proposed table, chairs and sideboard, and walk around the shape. It costs almost nothing and shows quickly whether a layout feels roomy or cramped.

Next, we’ll look at how much space a dining room needs for chairs, walking and serving.

Chapter 6. Clearances, Walkways and Traffic Flow

Clearance Makes a Room Usable

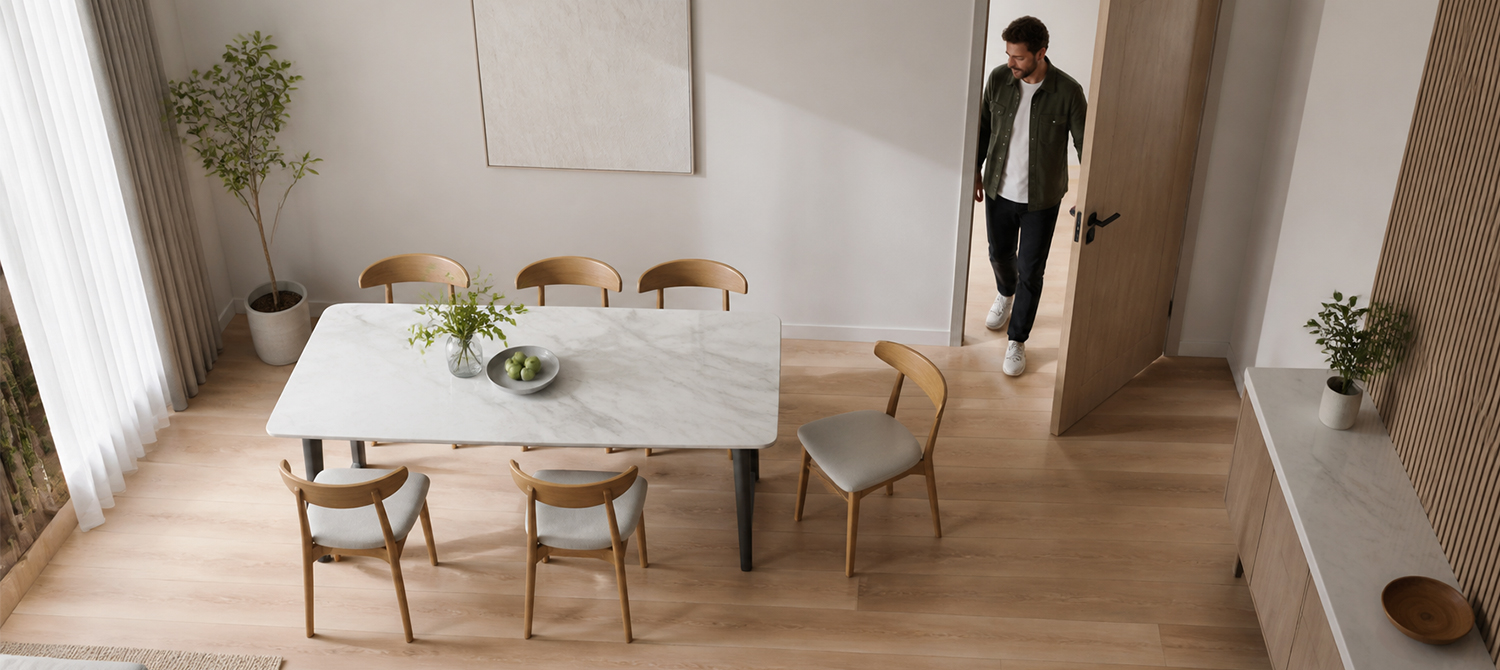
A dining room can be filled with the right furniture and still feel awkward if people can’t move around easily. The missing ingredient is often clearance, which simply means the empty space left around each piece so that people can pass, sit and stand without a squeeze.

Think of it as the breathing room of the layout. When a chair has space to slide back, a guest can slip past without turning sideways, and a drawer can open fully without hitting anything, the whole room feels calmer and more welcoming. When that space is missing, even a beautiful table and a well-chosen sideboard end up feeling cramped, and everyday routines such as clearing plates or carrying a hot dish become a small obstacle course.

This is why clearance deserves as much attention as style. Plan it early, check it against your measurements, and the room will feel comfortable long after the novelty of the new furniture has worn off.

It allows people to:

  • Pull out chairs.

  • Sit down.

  • Stand up.

  • Walk past the table.

  • Serve food.

  • Open drawers.

  • Move between rooms.

Clearance is not wasted space. It is what makes a dining room functional.

The Three Clearance Zones

There are three different clearance situations, and people often confuse them.

Situation

What it allows

Practical guide

Basic clearance

Pulling out a chair and walking past an empty table

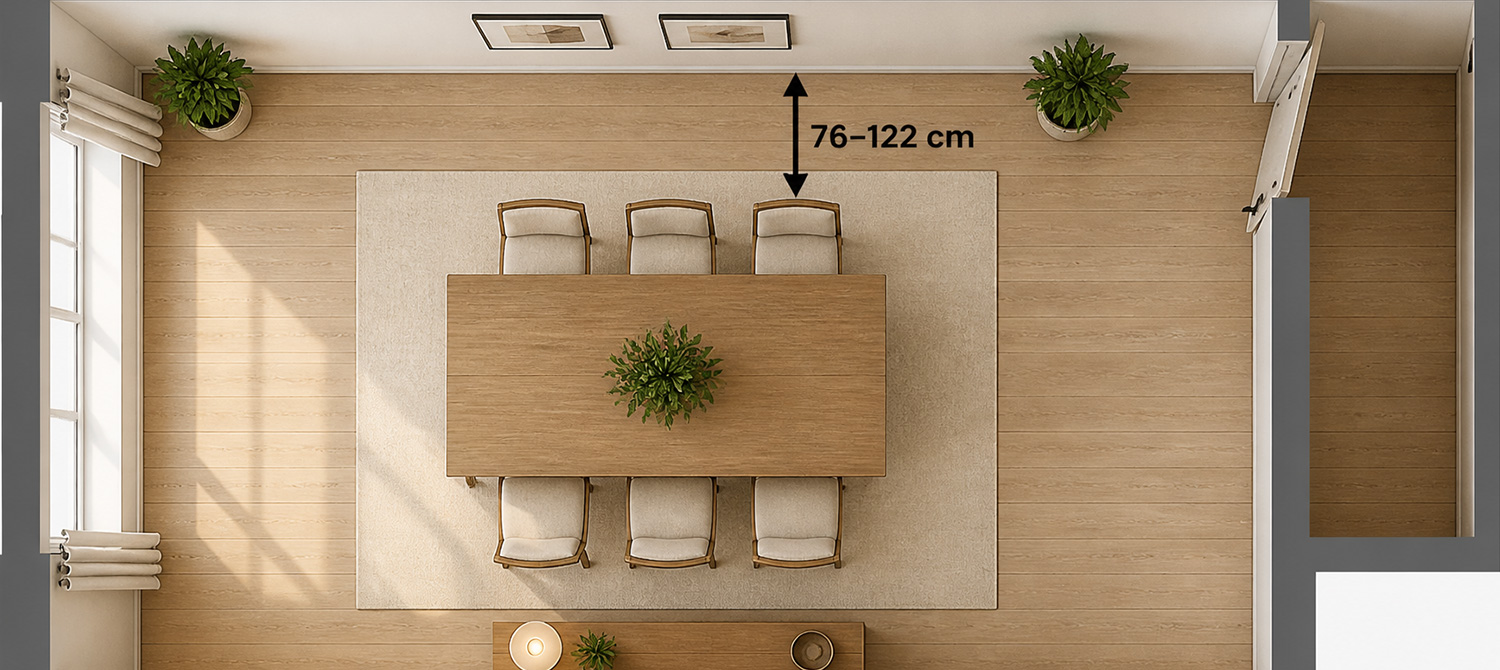
About 90 cm

Comfortable circulation

Walking behind a seated person or serving from behind

About 107–122 cm

Tight-space minimum

Making a very small room work

About 76 cm, only as a last resort

The 90 cm figure is the most useful everyday target.

It gives enough room for a chair to be pulled out and for someone to edge past.

The 107–122 cm range is better when people regularly need to walk behind seated guests.

The 76 cm minimum can work in a compact apartment, but it will feel tight during busy meals.

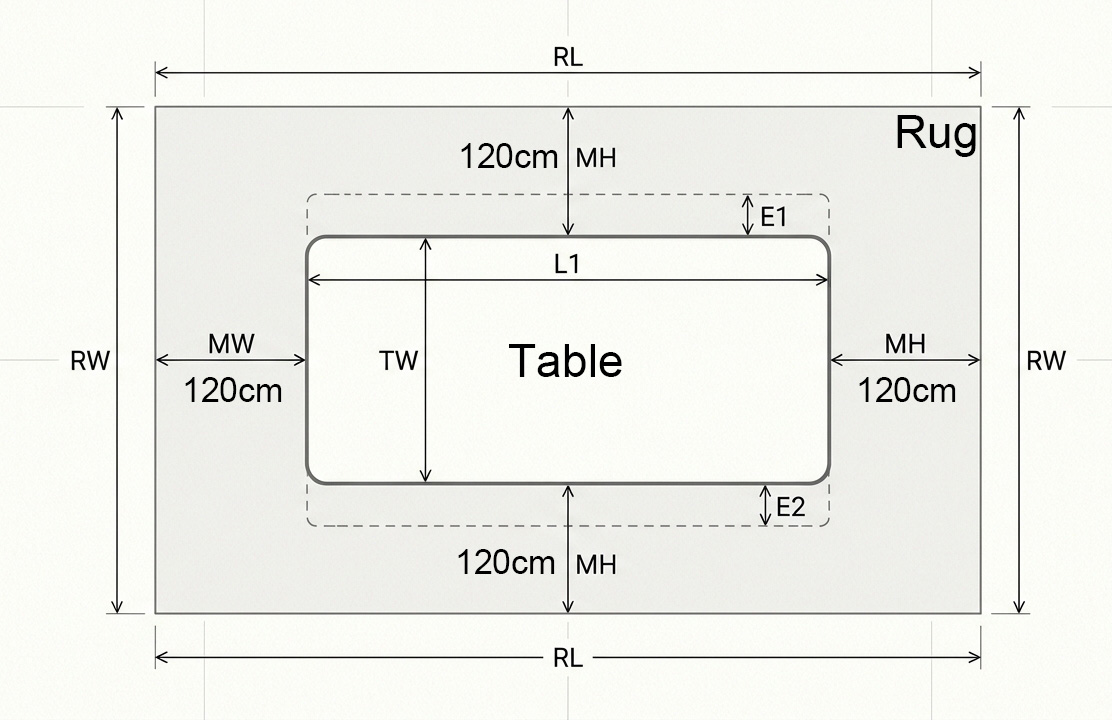
The Maximum Table Formula

Once you know your clearances, calculate the largest table your room can handle.

Use this formula:

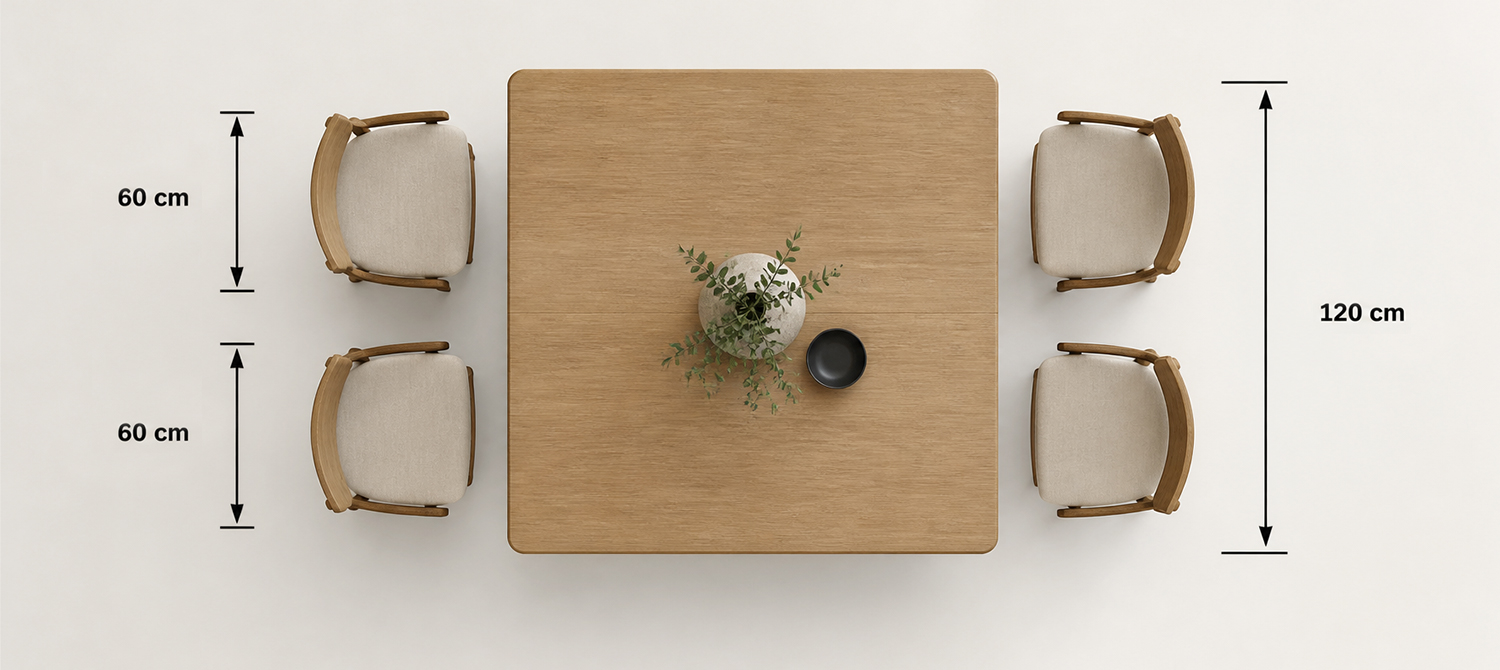
Room dimension − (2 × clearance) = maximum table dimension

For example, if a room is 400 cm long and you want 90 cm of clearance at each end:

400 − (2 × 90) = 220 cm maximum table length

A 220 cm table is the practical maximum in that direction.

Anything longer will reduce the walking space below the comfortable target.

Apply the Formula to Width Too

The same formula applies to the room’s width.

If the dining zone is 300 cm wide and you want 90 cm of clearance on both sides:

300 − (2 × 90) = 120 cm maximum table width

That means a 120 cm-wide table is the practical maximum if you want a 90 cm walkway on both sides.

Most dining tables are narrower than this, but the calculation still matters when adding a sideboard, buffet or island.

Do Not Forget Chair Pull-Out

A chair does not disappear when someone stands up.

When pulled out, a dining chair may extend 40–60 cm behind its normal position.

This is why the space between the table edge and a wall matters.

If the gap is too small, the chair will hit the wall every time someone sits down or stands up.

For a comfortable setup:

  • Allow enough room for the chair to be pulled out.

  • Keep a walkway behind the pulled-out chair.

  • Avoid placing chairs directly in front of doors, drawers or narrow gaps.

Plan for the Busiest Ten Minutes

The real test of a dining layout is not a quiet morning.

It is the busiest ten minutes of a dinner gathering.

Ask yourself:

  • Can someone carry a hot dish from the kitchen to the table?

  • Can a guest stand up and reach the bathroom without asking several people to move?

  • Can two people pass each other in the main walking path?

  • Does any pulled-out chair block a door or appliance?

  • Can the sideboard drawers open while people are seated?

If any answer is no, adjust the layout before buying.

Kitchen-to-Table Routes

In most homes, the most important route is between the kitchen and the dining table.

People carry:

  • Plates.

  • Hot dishes.

  • Drinks.

  • Serving boards.

  • Cutlery.

  • Rubbish.

  • Shopping.

That route should be direct and clear.

Avoid placing a table where people must squeeze past it every time they move between the kitchen and another room.

Living-Area Routes

In open-plan homes, the dining zone also connects to the living area.

People move between:

  • Sofa and table.

  • Table and television.

  • Kitchen and living room.

  • Entry and dining area.

  • Indoor and outdoor spaces.

The dining table should not sit across these natural routes.

Use your floor plan to identify where people already walk, then keep those routes clear.

Door Swings and Drawers

A door and a chair cannot occupy the same space at the same time.

The same applies to drawers.

Before finalising a layout, check:

  • Does a door swing into the dining zone?

  • Does a sideboard drawer open into a walking path?

  • Does a chair block a cabinet door?

  • Does an island drawer conflict with a stool?

  • Does a sliding door need clear floor space?

These small conflicts become daily annoyances.

Plan for the Extended Table

An extendable table must work in both positions.

A table may fit comfortably when closed but become a problem when extended.

Before buying, calculate clearance using the fully extended dimensions.

Ask:

  • Does the extended table still leave 90 cm at each end?

  • Can chairs still be pulled out?

  • Does it block a doorway?

  • Does it crowd the sideboard?

  • Does it leave enough space for people to walk behind seated guests?

If the extended table fails the clearance test, it will not be used as often as you expect.

Match Layout to Room Shape

Different room shapes favour different arrangements.

  • Long, narrow rooms usually suit a rectangular table placed along the long axis.

  • Square rooms often suit round or square tables.

  • Open-plan areas benefit from a rug, pendant light and sideboard that define the dining zone.

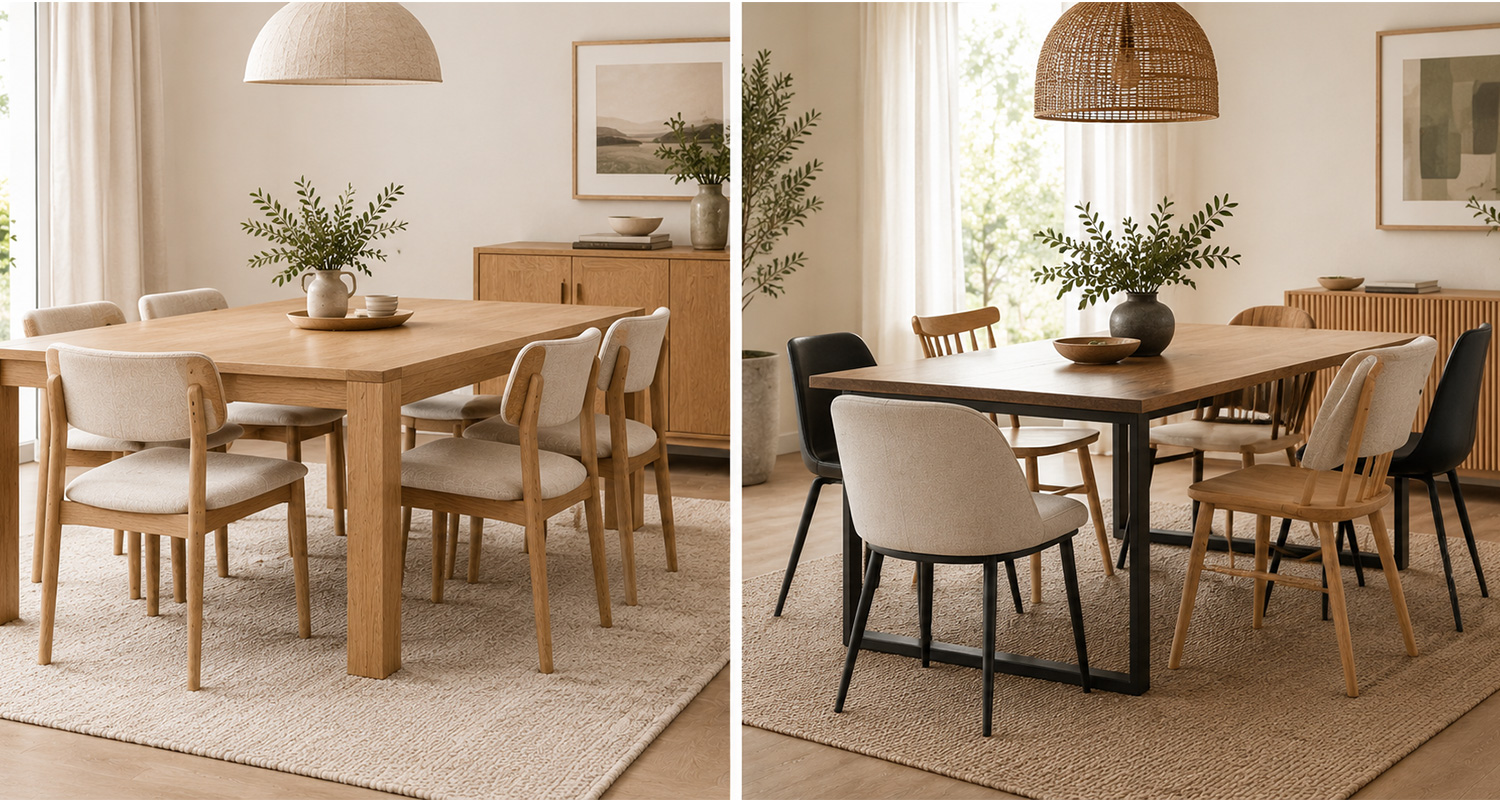
  • Small or awkward spaces often work best with round tables, armless chairs or a bench.

These are useful defaults, not strict rules.

A round table can work in a long room if it sits in a bay, corner or clearly defined nook.

Common Layout Mistakes

Most disappointing dining rooms come from a handful of avoidable errors.

  1. Sizing the table to the walls rather than the walkways.
    A table may fit between walls but leave no room to move.

  2. Ignoring door swings.
    A door and a chair cannot occupy the same space at the same time.

  3. Blocking the main kitchen route.
    If people constantly carry food through the room, that route must stay clear.

  4. Forgetting drawer extension.
    A sideboard drawer needs space to open fully.

  5. Planning only for the closed table.
    An extendable table must have clearance in its open position too.

  6. Centring the table by reflex.
    In an open-plan space, the table may work better aligned with a rug, pendant light or kitchen island.

Create a Traffic Plan

Draw arrows on your floor plan.

Mark:

  • Kitchen to table.

  • Table to bathroom.

  • Entry to living area.

  • Living area to balcony.

  • Sideboard to table.

  • Any route that crosses the dining zone.

Then check whether the proposed furniture blocks any arrow.

If it does, change the layout before changing your expectations.

Chapter Summary

As a general rule, aim for roughly 90 cm of clear space around the table for everyday use. That gives people room to pull a chair out, sit down and stand up without bumping into a wall or cabinet. If guests will need to walk behind seated diners, allow more, somewhere between 107 and 122 cm. A gap of 76 cm can work in a tight room, but treat it as a compromise rather than a goal. To find the biggest table that will fit, take the room’s length or width and subtract twice your chosen clearance, one for each side.

Remember that furniture moves. Chairs slide back, doors swing open and sideboard drawers extend, so check that none of these collide with each other. Finally, test the plan at the busiest moment, such as serving a meal with everyone seated and dishes being passed around.

Next, we’ll check how furniture will actually get into the home.

Chapter 7. Delivery, Access and Apartment Constraints

Delivery Is Part of the Design

Furniture shopping doesn’t finish when you click “pay”. It finishes when the piece is standing steadily in your room, put together correctly and sitting with enough space around it for people to move comfortably. Until then, the job is only half done.

A little preparation makes all the difference. Before the truck arrives, clear a path from the front door to the final spot, move small items out of the way and lay down protection for your floors. Check that you know where the piece will go, and tape out its footprint if that helps the delivery team place it first time. If assembly is needed, set aside enough time, gather the right tools and read the instructions before you start, rather than halfway through.

Once it’s in place, step back and test it. Pull out a chair, open a drawer and walk past. With these simple steps, delivery day stops being a gamble and becomes a routine you can handle calmly.

Know What You Are Buying

Before ordering, confirm:

  • Assembled dimensions.

  • Boxed dimensions.

  • Product weight.

  • Whether assembly is required.

  • Whether delivery includes room of choice.

  • Whether the delivery team will remove packaging.

  • Whether the item can be returned if it does not fit.

The assembled dimensions tell you whether the piece fits the room.

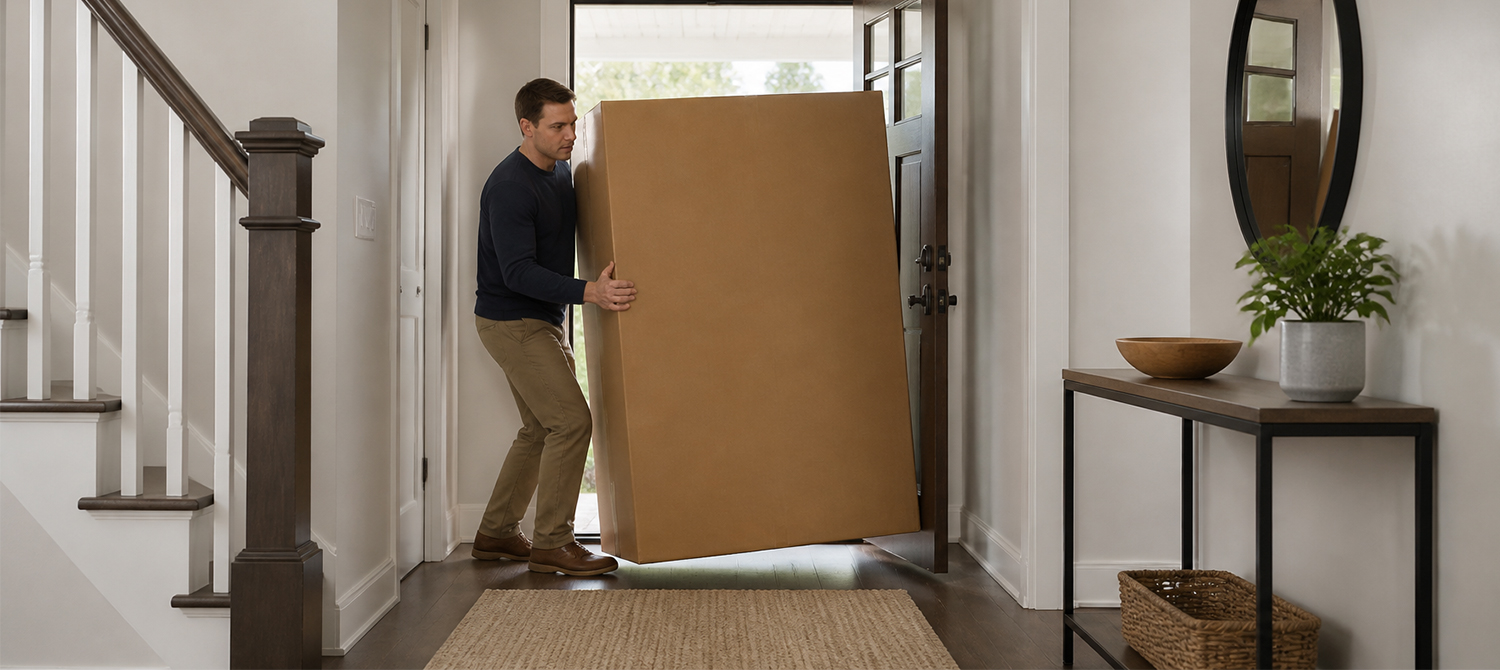
The boxed dimensions tell you whether it fits through your front door.

These are not the same thing.

Assembled Versus Boxed Dimensions

A table may measure 180 cm long when assembled.

But its boxed dimensions may be quite different.

A table may arrive:

  • Fully assembled.

  • With legs removed.

  • In two pieces.

  • Flat-packed.

  • In multiple boxes.

Each option has different access requirements.

Before ordering, ask:

  • What are the assembled dimensions?

  • What are the boxed dimensions?

  • How many boxes are included?

  • What is the weight of each box?

  • Does the table require assembly?

  • Can it be carried upstairs?

  • Will it fit in the lift?

Check Every Access Point

For a large table, sideboard or set of chairs, check:

  • Street or driveway.

  • Front gate.

  • Front porch.

  • Front door.

  • Hallway.

  • Stairs.

  • Lift lobby.

  • Lift cabin.

  • Corridor.

  • Final room doorway.

  • Final position in the room.

Measure the narrowest point at every stage.

A 90 cm-wide lift door is not helpful if the corridor turn outside it is only 75 cm wide.

Apartments Need Extra Planning

Apartment delivery is often more complex than house delivery.

Check:

  • Building access hours.

  • Lift booking requirements.

  • Loading dock rules.

  • Parking restrictions.

  • Body corporate requirements.

  • Stairwell width.

  • Corridor corners.

  • Front door clearance.

  • Balcony access, if relevant.

Some buildings require notice before large deliveries. Others restrict delivery times or require use of a service lift.

Ask before ordering.

Measure the Lift Correctly

Do not rely on the advertised lift size.

Measure:

  • Lift door width.

  • Lift door height.

  • Internal cabin width.

  • Internal cabin depth.

  • Internal cabin height.

  • Diagonal space across the cabin.

A long table may fit in a lift only if it can be angled diagonally.

If the lift is too small, check whether the item can be carried via stairs and whether the stairwell allows it.

Check Stairs and Corners

For homes with stairs, measure:

  • Stair width.

  • Landing size.

  • Corner angles.

  • Ceiling height.

  • Handrail position.

  • Turn radius.

A product may fit through a doorway but fail at a stair landing.

If the item is heavy, consider professional delivery or white-glove service.

Flat-Pack Versus Fully Assembled

Flat-packed furniture can be easier to move into tight homes because the boxes are smaller.

However, it may require more assembly time and careful handling.

Fully assembled furniture can be more convenient, but it may not fit through narrow access points.

Neither option is automatically better.

  • Choose flat-pack if access is tight and you are comfortable with assembly.

  • Choose fully assembled if you want less work and your access route allows it.

  • Ask about white-glove delivery if the item is heavy, valuable or complex.

Prepare the Room Before Delivery

Before the delivery arrives:

  • Clear the destination area.

  • Remove fragile items.

  • Move the rug if necessary.

  • Protect floors along the route.

  • Measure the final position one more time.

  • Check that overhead lights will not interfere with the table or people standing near it.

If you are placing a table beneath a pendant light, make sure the light is installed at the correct height before the table arrives.

Protect Floors and Walls

Large furniture can damage floors, walls and door frames.

Use:

  • Cardboard sheets.

  • Old blankets.

  • Furniture sliders.

  • Corner protectors.

  • Floor runners.

  • Painter’s tape for temporary protection.

Do not drag heavy furniture across timber or tile floors.

Lift it where possible.

Inspect Before Signing

Inspect every box and visible surface before signing for delivery.

Look for:

  • Crushed corners.

  • Water damage.

  • Scratched surfaces.

  • Missing hardware.

  • Broken legs.

  • Damaged upholstery.

  • Missing parts.

Take photos immediately if there is any damage.

It is much easier to resolve an issue when it is documented on delivery day.

What to Do if Something Is Damaged

If an item arrives damaged:

  1. Do not dispose of the packaging.

  2. Take clear photos.

  3. Note the damage on the delivery document if possible.

  4. Contact the retailer promptly.

  5. Keep all emails, receipts and photos.

  6. Ask for the next steps in writing.

A damage claim is easier to resolve when evidence is collected immediately.

Delivery Questions to Ask

Before placing an order, ask:

  • Does delivery include room of choice?

  • Does delivery include upstairs access?

  • Does delivery include assembly?

  • Is packaging removal included?

  • What happens if the item does not fit?

  • Who pays return freight?

  • Are there additional charges for stairs, lifts or remote areas?

  • Can delivery be scheduled?

  • What happens if I am not home?

  • What is the process for damaged or missing parts?

These questions are especially important when buying online.

Chapter Summary

Before ordering anything, compare two sets of numbers: the size of the furniture once it’s assembled and the size of the boxes it arrives in. A table that fits the room beautifully may still be too large to get through the entrance. Measure every point along the delivery route, including the front door, hallways, stairwells, corners and any lift. In apartments, this often takes extra planning, and some buildings require you to book the lift or get approval from the owners’ committee first.

On delivery day, clear a path, move fragile items aside and lay down protection for your floors. Open and inspect each item before you sign for it. If you spot a scratch, dent or missing part, photograph it straight away and note it on the paperwork. Keep every receipt, email and delivery document, because they make any later claim far easier to settle.

Next, we’ll set a realistic budget and decide where to spend first.

Chapter 8. Budget Planning and Purchase Priorities

A Dining Room Budget Is a Priority List

A dining room budget is more than a single figure. It’s really a series of choices about what matters most to you. Two households can spend exactly the same amount and still end up with very different rooms. One might put the money into a hardwearing table and comfortable chairs that will last for years. Another might lean towards good lighting, handy storage and a polished, stylish finish.

Neither route is wrong. Each simply reflects how that household lives, eats and entertains. A family with young children may reasonably want a tough surface that shrugs off spills, while a couple who love hosting might care more about warm lighting and a roomy sideboard for serving.

The real mistake is spending with no sense of priorities. Without a ranked list, it’s easy to be drawn towards whatever looks appealing in the moment, then discover there’s nothing left for the pieces you use most. Decide what matters first, then let the numbers follow.

Start With the Room’s Job

Return to the room brief from Chapter 4.

Ask:

  • What does this room need to do every day?

  • What does it need to do occasionally?

  • What problems must it solve?

  • What can wait?

A room used daily by children needs different priorities from a formal dining room used a few times a year.

Spend First on Daily Contact Points

When money is limited, spend first on the pieces your body touches every day.

These are usually:

  • The table surface.

  • Chair seats.

  • Chair frames.

  • Flooring protection.

  • Lighting.

A beautiful sideboard cannot compensate for uncomfortable chairs.

A decorative rug cannot compensate for a table that wobbles.

Prioritise comfort and structure before decoration.

A Simple Budget Split

A practical starting split for many households is:

Category

Approximate share

What it covers

Dining table

35–50%

The main surface and anchor piece

Seating

25–35%

Chairs, benches or stools

Storage

10–20%

Buffet, sideboard or display cabinet

Lighting

5–15%

Pendant, dimmer, lamps or accent lighting

Rug and styling

5–15%

Rug, artwork, tableware and décor

These are starting points, not rules.

A household that already owns good chairs may spend more on the table. A household with an existing table may spend more on seating or storage.

Do Not Forget Hidden Costs

The advertised price is rarely the full cost.

Include:

  • Delivery.

  • Assembly.

  • Packaging removal.

  • Return freight.

  • Rug pad.

  • Floor protectors.

  • Extension leaves.

  • Spare parts.

  • Installation.

  • Electrical work.

  • Replacement cushions.

  • Cleaning products.

A cheaper table with expensive delivery and assembly may not be the best value.

Buy in Stages

You do not need to buy everything at once.

A sensible order is often:

  1. Table.

  2. Everyday seating.

  3. Lighting.

  4. Storage.

  5. Rug.

  6. Styling.

  7. Extra seating.

  8. Decorative updates.

This allows you to live with the room before completing it.

It also prevents rushed purchases.

When to Invest in the Table

Invest more in the table when:

  • It is used every day.

  • You expect to keep it for many years.

  • You want a surface that can be repaired.

  • You entertain regularly.

  • The table is the room’s main visual anchor.

  • You want solid timber or high-quality stone.

A durable table can outlast several changes in chairs, rugs and décor.

When to Invest in Seating

Invest more in seating when:

  • People sit for long meals.

  • Household members have comfort needs.

  • Children use the table daily.

  • You work or study at the table.

  • You want upholstered comfort.

  • The chairs will be used more than the table.

Chairs are used intensively. A beautiful but uncomfortable chair will be avoided.

When to Invest in Storage

Invest more in storage when:

  • The table constantly collects clutter.

  • The kitchen has limited storage.

  • You entertain often.

  • You need a serving surface.

  • You want to define an open-plan dining zone.

  • You own tableware, linens or serving pieces that need a home.

A well-placed buffet can make the entire room feel calmer.

When to Invest in Lighting

Invest more in lighting when:

  • The room is used in the evening.

  • The dining area is part of an open-plan space.

  • The table is the visual centre of the room.

  • You want flexible brightness for meals, homework and entertaining.

  • The existing light is harsh or poorly placed.

Lighting changes how a room feels more than almost any other finishing layer.

When to Save

Save on items that are easy to replace or update.

These include:

  • Table runners.

  • Cushions.

  • Artwork.

  • Small décor.

  • Seasonal centrepieces.

  • Temporary seating.

  • Basic rugs.

  • Accessories.

These items can evolve with your taste.

Do not spend your entire budget on decorative pieces before the functional base is right.

Compare Total Cost, Not Ticket Price

When comparing products, calculate the total cost of ownership.

For each option, record:

  • Product price.

  • Delivery.

  • Assembly.

  • Return risk.

  • Warranty.

  • Spare parts.

  • Expected lifespan.

  • Maintenance requirements.

  • Replacement cost.

A higher-priced table may be better value if it lasts longer and can be repaired.

A lower-priced table may be a good choice if your needs are temporary.

Avoid Buying Everything at Once

Buying everything in one day often leads to a room that feels like a catalogue.

Buying gradually allows the room to develop.

Start with the pieces that are hardest to replace:

  • Table.

  • Main seating.

  • Storage.

  • Lighting.

Add softer layers later:

  • Rug.

  • Artwork.

  • Cushions.

  • Tableware.

  • Seasonal décor.

Set a Contingency

Keep a portion of the budget for the unexpected.

Common surprises include:

  • Delivery fees.

  • Assembly costs.

  • Extra floor protection.

  • Replacement hardware.

  • A larger rug than expected.

  • Electrical work.

  • Return shipping.

  • A product that does not fit.

A contingency prevents a small problem from becoming a budget crisis.

Use a Purchase Priority List

Create a list before shopping.

For example:

  1. Table that seats four daily and six occasionally.

  2. Comfortable, easy-clean chairs.

  3. Pendant light at the correct height.

  4. Sideboard for tableware and serving.

  5. Rug large enough for pulled-out chairs.

  6. Table styling and artwork.

Rank the list.

Buy from the top down.

Chapter Summary

Think of your budget as a ranked list of priorities rather than one big number. Put your money first into the things you touch every day: a sturdy tabletop and comfortable chairs. These take the most wear, and they’re the hardest to swap out later. When you add up the true cost, remember to include delivery, assembly, possible returns and the upkeep that timber or fabric may need over the years.

You don’t have to buy everything in one go. Start with the table and seating, then add a sideboard, rug or lighting as your finances allow. Save where it’s easy to change your mind, such as cushions, vases and wall art, because these decorative extras can be refreshed cheaply at any time. Finally, set aside a small cushion of extra funds for surprises like a longer delivery route, missing hardware or a chair that doesn’t suit.

Next, we’ll go over your Australian consumer rights before you pay.

Chapter 9. Australian Consumer Rights and Buying Safely

Consumer Rights Are Not the Same as Warranties

Many shoppers mix up warranties and consumer guarantees, but the two are quite different. Knowing which is which can make a big difference when a purchase goes wrong.

A consumer guarantee is an automatic right under Australian Consumer Law. You don’t have to sign up for it, pay extra or tick a box. It simply applies whenever you buy goods from a business, covering things like safety, durability and whether the item matches its description.

A warranty, on the other hand, is an additional promise made by a seller or manufacturer. It might cover particular faults or last for a set period, such as five years on a timber frame. Importantly, it sits on top of your legal rights and cannot take them away. Even if a warranty has expired or its fine print excludes your problem, your consumer guarantee rights may still apply.

This distinction matters most when something goes wrong. If a seller says “that isn’t covered by our warranty,” you can calmly check whether a consumer guarantee has been breached instead. Keep your receipts and delivery records handy, since they help prove when and where you bought the item.

What Consumer Guarantees Cover

Under Australian Consumer Law, goods bought from a business should be:

  • Of acceptable quality.

  • Safe.

  • Durable.

  • Free from defects.

  • Acceptable in appearance and finish.

  • Fit for their intended purpose.

  • As described.

  • Match any sample or demonstration model.

For dining furniture, this means a table should be sturdy enough for normal dining use. A chair should be stable. A sideboard should function as described. A stool should be safe and suitable for its stated purpose.

Acceptable Quality Includes Durability

“Acceptable quality” includes durability.

A product does not need to last forever, but it should last for a reasonable time considering:

  • What the product is.

  • How much it cost.

  • How it was described.

  • How it was used.

  • What a reasonable consumer would expect.

A basic flat-pack table and a premium solid-timber table may have different expected lifespans. But both should be free from defects and suitable for normal use.

Warranties Are Extra Promises

A warranty may promise:

  • A specific repair period.

  • Replacement parts.

  • Labour.

  • Structural coverage.

  • Fabric or mechanism coverage.

But a warranty is voluntary.

It is an addition to your rights, not a replacement for them.

Do not accept “it is out of warranty” as the end of the conversation if the product has failed prematurely or does not meet consumer guarantees.

Major and Minor Problems

The remedy depends on whether the problem is major or minor.

Major Problems

A problem may be major when:

  • The product cannot be fixed.

  • It cannot be fixed within a reasonable time.

  • It is unsafe.

  • It is significantly different from the description.

  • It has a serious defect.

  • It cannot be used for its intended purpose.

For a major problem, consumers may generally choose a replacement or refund.

Minor Problems

For a minor problem, the business may first be entitled to repair or replace the product.

Examples may include:

  • A small scratch.

  • A loose screw.

  • A minor cosmetic defect.

  • A part that can be replaced.

Even then, the business must provide a remedy within a reasonable time.

Online Purchases Have the Same Rights

Buying furniture online does not remove your consumer rights.

When you buy from an Australian business operating online, your usual Australian Consumer Law rights apply, including rights to a repair, replacement or refund when a consumer guarantee is not met.

Before buying online, check:

  • The seller’s identity.

  • Australian business details.

  • Contact information.

  • Delivery terms.

  • Return process.

  • Warranty information.

  • Product specifications.

  • Total price.

  • Payment security.

If buying from an overseas business, enforcement can be more difficult.

Read the Full Product Listing

A product photo is not a specification.

Before ordering, collect:

  • Assembled dimensions.

  • Boxed dimensions.

  • Weight.

  • Materials.

  • Finish.

  • Seat height.

  • Apron height.

  • Weight rating.

  • Assembly requirements.

  • Cleaning instructions.

  • Warranty terms.

  • Delivery terms.

  • Return policy.

If this information is missing, ask the retailer before buying.

A retailer that cannot provide basic specifications is a warning sign.

Ask About Delivery Before Paying

Large furniture creates delivery risks.

Ask:

  • Does delivery include room of choice?

  • Does it include stairs or upstairs access?

  • Does it include assembly?

  • Is packaging removed?

  • What happens if the item does not fit?

  • Who pays return freight?

  • Are there extra charges for apartments, lifts or remote areas?

  • Can delivery be scheduled?

  • What happens if the item arrives damaged?

Get answers in writing where possible.

Keep Records

Save:

  • Order confirmation.

  • Tax invoice.

  • Product listing.

  • Specification sheet.

  • Delivery confirmation.

  • Photos of the item.

  • Photos of any damage.

  • Emails with the retailer.

  • Warranty documents.

  • Assembly instructions.

These records make a claim much easier if something goes wrong.

Inspect on Delivery Day

Do not sign for a delivery without inspecting it.

Check:

  • Number of boxes.

  • External damage.

  • Crushed corners.

  • Water damage.

  • Missing hardware.

  • Broken parts.

  • Scratched surfaces.

  • Damaged upholstery.

Take photos before opening boxes if the packaging is damaged.

Take more photos once the item is unpacked.

Product Safety Matters

Furniture safety is part of acceptable quality.

From 4 May 2025, Australia’s mandatory information standard for toppling furniture requires suppliers to provide safety warnings online and in-store, attach permanent warning labels to relevant furniture, and include safety information in instruction manuals.

The standard covers certain categories of freestanding furniture, including some clothing storage units, entertainment units and certain hall tables, display cabinets, buffets and sideboards of 686 mm or greater in height.

Even where a specific product is not covered, stability matters.

A dining room should not contain furniture that tips easily, especially in a household with children.

Anchor Where Appropriate

Tall or unstable furniture should be secured to the wall or floor where the manufacturer recommends it.

This is particularly important for:

  • Tall display cabinets.

  • Bookcases.

  • Shelving.

  • Tall sideboards.

  • Furniture near children’s play areas.

  • Furniture in earthquake-prone or high-traffic households.

Follow the manufacturer’s instructions and use appropriate fixings for the wall type.

Questions to Ask Before Buying

Use this list before placing an order.

  • What are the assembled dimensions?

  • What are the boxed dimensions?

  • What is the product weight?

  • What materials are used?

  • What is the finish?

  • What is the weight rating?

  • Does it require assembly?

  • Are spare parts available?

  • What is the cleaning method?

  • What is the warranty?

  • What are the delivery terms?

  • What is the return process?

  • Who pays return freight?

  • Is the seller an Australian business?

  • Does the product meet relevant safety information requirements?

These questions protect both your money and your household.

If Something Goes Wrong

Follow a simple process.

  1. Stop using the product if it is unsafe.

  2. Take photos and videos.

  3. Gather receipts and order records.

  4. Contact the seller in writing.

  5. Explain the problem clearly.

  6. State the outcome you are seeking.

  7. Keep copies of all communication.

  8. Allow a reasonable time for response.

  9. Escalate to the relevant consumer protection agency if needed.

A calm, documented complaint is more effective than an angry phone call.

Chapter Summary

Under Australian Consumer Law, you automatically get certain protections when you buy furniture, known as consumer guarantees. These are separate from a warranty, which is an extra promise a seller or manufacturer chooses to offer. In practice, the guarantees mean your furniture should be safe, reasonably durable, fit for its purpose and match the description you were given. If something goes wrong, the fix depends on how serious it is. A minor fault may be repaired, while a major one can entitle you to a replacement or refund.

These rights apply equally whether you shop in a showroom or buy online from an Australian business. Even so, read the specifications, delivery terms and return policy before you pay, and keep every receipt and message. Inspect your items on delivery day too. Finally, take safety seriously: follow the warnings supplied, and anchor tall or top-heavy pieces to the wall where required.

Next, we’ll cover how to choose the right table shape and size for your room.

Part 3 — Planning the Dining Zone

Part Introduction

By this stage, you should have a clear picture of the room’s dimensions, the paths people already walk, any delivery limits, your budget priorities and the needs of everyone in the household. With that groundwork done, the next task is to make some key placement decisions. Where in the home does the dining zone belong? Where should the table sit within it? How will people move around the table, and where will storage and serving space live?

This part deliberately does not ask you to pick a specific table or chair yet. Choosing products too early is how people end up forcing a layout around a piece they’ve already fallen for. Instead, the goal is to draw up a layout that any good product must fit into.

Think of it as writing the rules before the game begins. Once you know the footprint available, the routes to keep clear and the spots set aside for sideboards or serving, every item you consider can be tested quickly against that plan, and anything that doesn’t fit can be ruled out without regret.

Chapter 10. Choose the Dining Zone Location

A Dining Zone Is More Than a Table Position

A dining zone is the part of your home where eating, gathering and serving all take place. It’s more than the table itself. It also takes in the space needed for chairs to slide in and out, the walking routes that run around the furniture, any storage that keeps tableware close at hand, and the lighting that hangs above it all.

In a dedicated dining room, the boundaries of this zone are usually easy to spot, because the walls and doorways do the work for you. In an open-plan home, things are different. With the kitchen, living area and dining space flowing into one another, nothing marks where one activity ends and the next begins, so the zone has to be created on purpose. A rug, a pendant light or a well-placed sideboard can all help draw those invisible lines.

Start With the Room You Actually Have

Before choosing a location, identify the type of dining space in your home.

Common Australian dining spaces include:

  • Dedicated dining rooms.

  • Open-plan kitchen, dining and living areas.

  • Dining nooks beside a kitchen or window.

  • Compact apartment dining areas.

  • Townhouse dining zones within a long living area.

  • Indoor-outdoor dining zones near a balcony, patio or alfresco area.

  • Multipurpose spaces that also function as a study or play area.

Each type has different constraints. A layout that works in a large formal room may feel cramped in an apartment.

Dedicated Dining Rooms

A dedicated dining room gives you the most freedom.

The table can usually be centred, larger chairs can be used, and storage can be placed on a full wall.

However, a dedicated room can still feel awkward if it is too small, has too many doorways or is disconnected from the kitchen.

In a dedicated room, plan for:

  • A clear route from the kitchen.

  • Enough clearance around every side of the table.

  • A storage wall that does not block circulation.

  • Lighting centred over the table.

  • Enough space for chairs to be pulled out.

A dedicated dining room does not need to be formal. It can be warm, relaxed and family-friendly.

Open-Plan Kitchen, Dining and Living Areas

Open-plan living is common in Australian homes.

The challenge is that the dining zone often has no walls to define it.

Without definition, the dining area can feel like leftover space between the kitchen and living room.

Create definition using:

  • A rug under the table.

  • A pendant light above the table.

  • A buffet or sideboard along one edge.

  • A consistent material palette.

  • A clear walking path between zones.

  • A table positioned in relation to the kitchen and living area.

The rug and pendant work together as invisible walls. They tell the eye where one activity ends and another begins.

Dining Nooks

A dining nook is a small, defined area often located beside a kitchen, window or corner.

It is common in apartments and smaller homes.

A nook can work very well, but it needs careful planning.

Because space is limited:

  • Use a compact table.

  • Choose armless chairs or a bench.

  • Keep one side open for movement where possible.

  • Use a round table if the space is tight.

  • Consider a bench against the wall.

  • Ensure the table does not block a doorway or walkway.

A nook works best when it has one clear job: everyday meals, breakfast or casual dining.

Compact Apartment Dining Areas

In an apartment, the dining area often shares space with other functions.

The table may need to work as a dining surface, workspace and occasional entertaining area.

Prioritise flexibility.

Good apartment choices include:

  • A round table for easier movement.

  • A slim rectangular table placed against a wall.

  • Armless chairs that tuck fully underneath.

  • A bench that disappears beneath the table.

  • An extendable table for occasional guests.

  • Lightweight furniture that can be moved for cleaning.

Avoid choosing a large table simply because the room can physically contain it. Ask whether people can still move comfortably once chairs are pulled out.

Townhouse Dining Zones

Townhouses often have long, narrow living areas.

The kitchen, dining space and living room may sit in one continuous line.

In this layout, a rectangular table placed along the long axis usually works best.

It leaves the width of the room free for chairs and movement.

Avoid placing a wide table across the narrowest part of the room. It may look balanced on a floor plan, but it can make everyday movement feel awkward.

Indoor-Outdoor Dining

Many Australian homes blur the line between inside and outside.

Sliding doors, courtyards, balconies and alfresco areas mean the dining table may be only one part of a larger entertaining flow.

Plan for clear pathways between:

  • The kitchen and dining table.

  • The dining table and outdoor area.

  • The sideboard and the table.

  • The front door and the main living space.

Furniture near sliding doors should not block the door’s travel path.

Chairs should not prevent a door from opening fully.

Choose a Location With a Natural Anchor

A dining zone needs an anchor.

An anchor is a feature that gives the space visual structure.

Common anchors include:

  • A window.

  • A kitchen island.

  • A pendant light.

  • A sideboard.

  • A feature wall.

  • A change in flooring.

  • A bay window or alcove.

In an open-plan space, position the dining zone near one of these anchors rather than placing it randomly in the middle of the room.

Keep the Kitchen Connection Clear

In most homes, the dining zone is connected to the kitchen.

People carry food, plates, drinks and serving dishes between the two spaces.

That route must stay clear.

Ask:

  • Can someone carry a hot dish without asking people to move?

  • Is the route wide enough?

  • Do chairs block it when pulled out?

  • Does the island interrupt the path?

  • Is there somewhere to put food down near the table?

A dining room that ignores the kitchen route will feel inconvenient every day.

Avoid Putting the Table in a Traffic Path

A common mistake is placing the table across the natural route between two rooms.

This happens often in open-plan homes, where the dining area sits between the kitchen and living room.

If the table must sit in a traffic path, orient it so people walk around the ends rather than squeezing between chairs.

Alternatively, use a smaller table, a round table or a bench to reduce obstruction.

Test the Location Before Committing

Use masking tape to mark the proposed dining zone on the floor.

Include:

  • The table footprint.

  • Chair positions.

  • Chair pull-out space.

  • Walking routes.

  • Storage footprint.

  • Door swing paths.

Live with the taped layout for a few days if possible.

Walk through it at different times of day. Notice where people naturally move.

Chapter Summary

Start by remembering what a dining zone actually includes: the table, the seating space around it, the walking routes, nearby storage and the lighting overhead. How you arrange these depends heavily on the kind of home you have. A dedicated dining room gives you plenty of freedom, because the walls already define the space. An open-plan layout is different, since the zone has to be marked out deliberately. Apartments and small nooks call for compact, flexible furniture, while townhouses, which tend to be long and narrow, often work best with a rectangular table running along the length of the room.

Whatever the layout, keep the route between kitchen and table clear, so carrying food never means dodging chairs. It also helps to choose an anchor that gives the zone a focal point, such as a window, a kitchen island, a pendant light or a sideboard. Before you buy anything, stick masking tape on the floor to test the location and see how it feels in daily use.

Next, we’ll plan the table position, because the table is the anchor of the entire dining zone.

Chapter 11. Plan the Table Position First

The Table Is the Anchor

The dining table is the largest and most influential piece in the room. Its size, shape and position decide where chairs can sit, how people walk past, and which spots are left for storage or serving. Get the table’s place right first, and every other choice, from lighting to sideboards, falls into line around it.

Its position affects:

  • Chair placement.

  • Walking routes.

  • Lighting.

  • Rug size.

  • Storage placement.

  • Conversation.

  • Serving flow.

  • The overall feel of the room.

This is why the table should be planned before individual chairs, stools or storage pieces are chosen.

Do Not Centre the Table by Reflex

Many people automatically place a table in the centre of the room.

Sometimes that is correct.

But in an open-plan space, the centre of the room may not be the best location.

The table may work better when aligned with:

  • A pendant light.

  • A rug.

  • A kitchen island.

  • A window.

  • A sideboard.

  • A change in flooring.

  • A visual axis between two rooms.

A table can be perfectly functional without being perfectly centred.

Start With the Long Axis

In a rectangular room, identify the long axis.

A rectangular table usually works best when its length follows that axis.

This leaves the narrower dimension free for chairs and movement.

For example, in a room that is 4 m long and 3 m wide, a rectangular table placed along the 4 m direction usually leaves more usable space than one placed across the 3 m direction.

Leave Clearance on Every Side

A table needs space around it.

A widely used planning rule is to allow at least 90 cm from the table edge to a wall or other furniture.

This allows chairs to be pulled out and guests to move around comfortably.

Use these practical targets:

Situation

Recommended clearance

What it allows

Basic clearance

About 90 cm

Pull out a chair and walk past the table

Comfortable circulation

About 107–122 cm

Walk behind a seated person or serve from behind

Tight-space minimum

About 76 cm

A last-resort compromise in very small rooms

Do not reduce clearance simply to fit a larger table.

If the table does not leave enough room, choose a smaller table, a different shape or a more flexible seating arrangement.

Calculate the Maximum Table Size

Use this formula:

Room dimension − (2 × clearance) = maximum table dimension

For example, if the dining zone is 400 cm long and you want 90 cm at each end:

400 − (2 × 90) = 220 cm maximum table length

That means a 220 cm table is the practical maximum in that direction.

Anything longer will reduce the walking space below the comfortable target.

Plan for Chair Pull-Out

A chair needs room to be pulled away from the table.

When pulled out, a dining chair may extend 40–60 cm behind its normal position.

This is why the space between the table edge and a wall matters.

Before finalising the table position, check:

  • Can every chair be pulled out without hitting a wall?

  • Does any chair block a doorway?

  • Does any chair block a cabinet or drawer?

  • Can someone walk behind a seated person?

  • Can the chair be pushed fully back under the table?

Avoid Door Swings

A door and a chair cannot occupy the same space at the same time.

Before placing the table, mark every door swing on the floor plan.

Check:

  • Front doors.

  • Internal doors.

  • Sliding doors.

  • Balcony doors.

  • Cupboard doors.

  • Pantry doors.

  • Bifold doors.

A table that blocks a sliding door may prevent ventilation, access to the outdoors or emergency exit routes.

Plan for Serving

Think about how food reaches the table.

Ask:

  • Where will hot dishes be placed before serving?

  • Is there a sideboard or bench nearby?

  • Can someone carry a plate from the kitchen without crossing behind every chair?

  • Is there a clear route from the kitchen to the table?

  • Can people reach shared dishes in the centre?

  • If the table is far from the kitchen, a sideboard or serving trolley can reduce unnecessary trips.

Consider the Pendant Light

The table and pendant light should be planned together.

A pendant should be centred over the table, not necessarily over the room.

If the table is off-centre, the light should follow the table.

Before finalising the table position, check:

  • Where the ceiling rose or electrical point is located.

  • Whether the light can be repositioned.

  • Whether a licensed electrician is required.

  • Whether the pendant will hang at a comfortable height.

  • Whether the light will interfere with sightlines.

Hard-wired lighting should be installed or moved by a licensed electrician.

Plan the Rug With the Table

A rug should be planned around the table and chairs, not chosen after everything else.

The rug should be large enough that chairs remain mostly on it when pulled out.

A practical target is to allow about 60 cm of rug beyond the table on each side, with around 45 cm as a tight-space minimum.

If the rug is too small, chairs will catch on its edge every time they are pulled out.

Round Tables: Position for Movement

Round tables are flexible, but they still need clearance.

Because there are no corners, they can feel easier to move around.

However, chairs still need pull-out space.

A round table works well when:

  • The room is square or nearly square.

  • The dining zone is compact.

  • Conversation is a priority.

  • The table sits in a bay or corner.

  • Children use the space.

Avoid placing a large round table in a narrow room where it blocks circulation.

Rectangular Tables: Position Along the Long Axis

Rectangular tables suit long rooms and open-plan spaces.

They provide more usable edge length and work well with benches and extensions.

Position a rectangular table so that:

  • Its length follows the room’s long axis.

  • The ends have enough clearance.

  • The long sides have enough chair pull-out space.

  • The kitchen route remains clear.

  • The pendant light aligns with the table centre.

Square Tables: Position for Balance

Square tables suit square rooms and smaller households.

They work best when:

  • The room is square or nearly square.

  • The household seats two to four people.

  • The table can be positioned with even clearance.

  • The space does not need to accommodate large gatherings.

A square table can feel cramped if it is pushed into a corner or used for more than four people.

Test the Table Position

Use masking tape to mark the table footprint.

Then mark the chairs in their pulled-out positions.

Walk through the layout.

Ask:

  • Can I sit down without squeezing?

  • Can I stand up without moving another chair?

  • Can I walk behind a seated person?

  • Can I carry a plate from the kitchen?

  • Does the table block a door or pathway?

  • Does the room still feel balanced?

If any answer is no, move the table before buying it.

Chapter Summary

Settle the table’s position before you think about chairs, storage or lighting, since all of those depend on where the table sits. Where possible, leave at least 90 cm between the table’s edge and the nearest wall or piece of furniture, so people can move without squeezing.

A simple formula helps you find the largest table that will fit: take the room’s length or width, then subtract twice your chosen clearance, one allowance for each side. The result is the maximum table size for that direction.

Also think about how the room behaves in use. Chairs need space to slide back, doors need room to swing open, and someone carrying a hot dish needs a clear route from the kitchen. Where you can, line the table up with a visual anchor such as a pendant light, a rug or a kitchen island, so the arrangement feels intentional. Finally, mark the footprint with masking tape and walk around it before you buy.

Next, we’ll plan the seating around the table.

Chapter 12. Plan Seating Around the Table

Seating Is a System

Dining seating is not just a collection of chairs.

It is a system that includes:

  • Everyday chairs.

  • Occasional guest seating.

  • Benches.

  • Host chairs.

  • Armchairs.

  • Bar stools.

  • Storage seating.

  • Children’s seating.

A good seating plan balances comfort, capacity, movement and appearance.

Start With Everyday Seats

Count how many people sit at the table on a normal day.

Not on holidays. Not when relatives visit. Not in the ideal version of your life.

The everyday number should determine the table’s permanent size.

Occasional guests can be accommodated with extensions, folding chairs, a bench or another seating zone.

Allow Enough Table Edge per Person

Each diner needs enough table edge for a plate, glass, cutlery and elbows.

A practical planning allowance is about 60 cm of table edge per person.

IKEA uses the same general guide: each seat needs about 60 cm in width, meaning a four-person table needs at least 120 cm in length and a six-person table needs at least 180 cm.

This does not mean each person needs 60 cm in every direction. It means each seat should have roughly 60 cm of usable space along the table’s edge.

Plan Chairs Along the Long Sides

For a rectangular table, most people sit along the long sides.

Check:

  • Table length.

  • Chair width.

  • Space between chairs.

  • Table leg position.

  • Whether end seats are usable.

A table that seats six with slim chairs may seat only four comfortably with wide upholstered chairs.

Plan the End Seats

End seats are useful, but they are not always practical.

They depend on:

  • Table length.

  • Leg position.

  • Apron depth.

  • Chair width.

  • Whether the end chair has arms.

  • Whether the table base blocks knee room.

A corner-leg table may restrict end seats. A pedestal base usually makes end seating easier.

Armless Chairs: The Flexible Default

Armless chairs are the most flexible seating choice.

They:

  • Tuck under tables more easily.

  • Take less width.

  • Suit compact rooms.

  • Make chair placement simpler.

  • Reduce the risk of collision with aprons.

They are usually the best choice for everyday side seating.

Armchairs: Comfort With Conditions

Armchairs offer more support and presence.

They suit:

  • Host and hostess positions.

  • Formal dining rooms.

  • People who need help standing.

  • Larger tables with generous clearance.

But they need more room.

Before choosing armchairs, measure:

  • Arm height.

  • Table apron height.

  • Table leg spacing.

  • Chair overall width.

  • The space available at the end of the table.

A common solution is to use armless chairs along the sides and armchairs only at the ends.

Dining Benches: Space and Flexibility

A bench is one of the most space-efficient seating options.

It has no gaps between sitters, can often seat three people where two chairs would sit, and can slide beneath the table when not in use.

A bench works especially well when:

  • The dining area is narrow.

  • The table sits against a wall.

  • Children use the table daily.

  • You need flexible seating for guests.

  • You want a more casual feel.

The most practical arrangement is often a bench on one side and chairs on the other.

Bench Limitations

Benches have trade-offs.

  • They usually offer no back support.

  • People must slide along to let others in or out.

  • Long formal dinners can be less comfortable.

  • They may not suit people with mobility issues.

A bench is excellent for casual meals and children. It is less ideal as the only seating option for long, formal dinners.

Mixing Chairs and Benches

A mixed seating plan can give you the best of both.

A common arrangement is:

  • A bench on one long side.

  • Two or more chairs on the other side.

  • Optional chairs at the ends.

This provides space savings from the bench and back support from the chairs.

The bench should share at least one element with the chairs, such as timber tone, leg style or seat height.

Host Chairs and Feature Chairs

Host chairs sit at the ends of the table.

They can be more sculptural, upholstered or comfortable than the side chairs.

This is a practical way to add character without making every chair expensive or bulky.

Use the head-and-sides formula:

  • Simple side chairs along the long sides.

  • Two feature or host chairs at the ends.

  • One shared material, colour or finish.

This creates rhythm without making the room feel like a showroom set.

Keep Seat Heights Consistent

Chairs do not need to look identical, but they need to fit the same table.

Keep seat heights within a small range, ideally within about 2–3 cm.

If one chair is much lower, its user will sit below the table edge.

If one is much higher, its user may feel cramped beneath the tabletop.

Plan for Children

Children need stable, safe seating.

Prioritise:

  • Sturdy chairs or a bench.

  • Rounded corners.

  • Easy-clean surfaces.

  • Stable bases.

  • Floor protection.

  • Enough room to move.

Avoid delicate woven chairs, unstable stools or chairs that tip easily.

Plan for Mobility and Comfort

Some people need more support when sitting down or standing up.

Consider:

  • Chairs with arms.

  • Higher seat heights.

  • Firmer cushions.

  • Clear pathways.

  • Fewer obstacles.

  • Stable furniture.

Avoid cramped layouts and low, soft seating if mobility is a concern.

Plan for Guests

Guest seating should not compromise everyday comfort.

Options include:

  • An extendable table.

  • A bench.

  • Folding chairs stored elsewhere.

  • Kitchen island seating.

  • Outdoor dining overflow.

  • A second casual table.

Choose the option that matches how often you actually host.

Check the Table Base

The table base determines where chairs can go.

Check:

  • Corner legs.

  • Pedestal base.

  • Trestle supports.

  • Sled legs.

  • Crossbars.

  • Apron depth.

A beautiful chair can become unusable if the table base blocks it.

Test the Seating Plan

Before buying, mark each seat on the floor.

Include:

  • Chair width.

  • Chair depth.

  • Pull-out space.

  • Walking routes.

  • Bench position.

  • End-chair clearance.

Sit in each position if possible.

Ask whether a real person could eat comfortably there.

Chapter Summary

Plan your seating around how the household eats most days, not around the rare occasion when a crowd turns up. A good rule of thumb is to give each person about 60 cm of table edge, which leaves enough elbow room for a comfortable meal. Chairs without arms are the flexible choice, because they tuck neatly under the table and suit smaller rooms. If there is clearance to spare, you might put armchairs at the two ends for a more generous feel. A bench paired with chairs often strikes the best balance, since it squeezes more people along one side while keeping comfortable seating on the other.

Keep the seat heights consistent, so nobody feels perched too high or sunk too low against the tabletop. Finally, look closely at the table base before you settle on seating. Thick legs, a central pedestal or a bulky frame can steal knee space and limit where chairs can go.

Next, we’ll plan island and bar seating, which often sits alongside the dining table in Australian homes.

Chapter 13. Plan Island and Bar Seating

The Island Is Often a Second Dining Table

In many Australian homes, the kitchen island has become a second dining space.

It is used for breakfast, coffee, homework, casual meals, entertaining and working from home.

Because it does so many jobs, the seating around it needs to be practical.

A stool should be easy to pull out, stable enough for daily use, comfortable enough for a reasonable sit and easy to clean.

Stools Are for Shorter Sits

A bar stool is not a replacement for a dining chair.

It is excellent for breakfast, coffee, snacks, quick meals and conversation.

It is less ideal for a long, relaxed three-course dinner.

This is because most stools offer:

  • Less back support.

  • A higher seat.

  • Less room to shift position.

  • A more upright posture.

  • Less space for elbows and plates.

If your household eats most meals at the island, choose stools with better back support and a footrest.

Measure the Island Before Choosing Stools

Before choosing stools, measure:

  • Benchtop height.

  • Underside of the overhang.

  • Overhang depth.

  • Available benchtop length.

  • Distance to walls or cabinets.

  • Floor space in front of the island.

  • Cabinet and drawer locations.

The most important measurement is the underside of the counter overhang.

This is where knees and thighs need to fit.

The Height Formula

A practical rule is to leave about 25–30 cm between the top of the stool seat and the underside of the counter or bar.

Use this formula:

Underside height − 25–30 cm = target stool seat height

For example, if the underside of the island overhang is 90 cm:

90 − 25 = 65 cm target seat height

90 − 30 = 60 cm target seat height

A stool with a seat height around 60–65 cm is likely to work well.

Counter Stools Versus Bar Stools

Counter stools and bar stools are different.

Type

Typical seat height

Usually suits

Counter stool

About 61–66 cm

Standard kitchen islands and benches around 86–91 cm high

Bar stool

About 71–76 cm

Higher bars and raised benchtops around 102–107 cm

Extra-tall stool

About 79–86 cm

Very high bars or spectator-style seating

A common mistake is buying a stool because it looks right, then discovering that the sitter’s knees press into the benchtop.

The stool’s seat height matters far more than its overall height.

Check Overhang Depth

The overhang is the part of the benchtop that extends beyond the cabinetry.

It determines whether knees can fit beneath the surface.

A shallow overhang may be fine for occasional perching.

A deeper overhang is better for regular seated use.

If the overhang is too shallow, stools may need to sit further back, making the posture awkward and taking more floor space.

Allow Enough Width per Stool

Stools need elbow room.

A useful planning allowance is about 60–66 cm of benchtop edge per stool.

This allows people to sit without shoulders touching and gives enough space for a plate, bowl or laptop.

For a more compact arrangement, 55–60 cm per stool can work, but it will feel tighter.

Avoid crowding stools together simply because the benchtop is long enough.

Allow Pull-Out Space

A stool needs room to be pulled away from the island.

Before buying, check:

  • Can the stool be pulled out without hitting a wall?

  • Does it block a cabinet door?

  • Does it interfere with a drawer?

  • Does it block the path between the kitchen and dining area?

  • Can someone walk past while the stool is pulled out?

A stool that cannot be moved easily becomes an obstacle.

Backless Stools

Backless stools are the simplest option.

They work well when:

  • The island is used for short meals.

  • Space is tight.

  • You want a clean, minimal look.

  • The stools need to tuck fully under the benchtop.

  • The seating is mostly occasional.

Their limitation is support.

A backless stool is fine for breakfast or coffee, but it can become tiring for longer sits.

Low-Back Stools

A low-back stool offers a useful middle ground.

It provides some lumbar support while still allowing the stool to tuck beneath many benchtops.

It suits households that use the island for regular meals but do not want a bulky high-back chair.

High-Back Stools

High-back stools offer the most support.

They suit dedicated bar areas, higher benchtops and homes where people sit for longer periods.

Their trade-off is size.

A high-back stool cannot usually tuck under a benchtop and takes more visual space.

Footrests Are Essential

A footrest matters more as stool height increases.

Without one, the sitter’s feet hang unsupported.

This can become uncomfortable quickly.

Check that the footrest:

  • Sits at a useful height.

  • Is strong enough for regular use.

  • Does not interfere with leg movement.

  • Is easy to clean.

  • Does not create a tripping hazard.

Swivel Stools

A swivel stool rotates on a central mechanism.

This can make it easier to get on and off, especially in a tight kitchen.

But swivel mechanisms add moving parts.

Before buying, check:

  • Whether the swivel is smooth.

  • Whether it makes noise.

  • Whether it wobbles.

  • Whether it can be repaired.

  • Whether it has a weight rating.

  • Whether children can use it safely.

Adjustable Stools

Adjustable stools can solve height problems.

They are useful when the island has an unusual height or when the stool must suit different users.

But they include a gas lift or mechanical mechanism, which adds a potential failure point.

Check the minimum and maximum seat height, stability, weight rating and quality of the mechanism.

Connect Stools to the Dining Zone

In an open-plan home, stools are often visible from the dining area and living room.

They do not need to match the dining chairs exactly.

Connect them through:

  • A shared timber tone.

  • A shared metal finish.

  • A similar seat colour.

  • A repeated material, such as rattan or bouclé.

  • A similar level of formality.

    For example, black metal stools can relate to black pendant lights or dining-chair legs.

Safety Around Islands

Islands are close to cooking, hot surfaces and sharp benchtop edges.

Keep stools away from:

  • Hot cooktops.

  • Oven doors.

  • Sharp benchtop corners.

  • Drawer pathways.

  • High-traffic routes.

Choose stools with stable bases, especially in households with children.

When Not to Use Stools

Stools are not the answer for every dining need.

Avoid relying on them when:

  • Your household eats long meals together.

  • Older family members need easier seating.

  • People need back support.

  • The island has insufficient knee clearance.

  • The stools block major walkways.

  • Children need safer, lower seating.

In those cases, a dining table with proper chairs is usually more comfortable and practical.

Chapter Summary

Treat island or bar seating as its own small dining zone rather than an afterthought. Before choosing stools, measure the underside of the benchtop overhang, then pick a seat height that leaves about 25-30 cm between the stool seat and that underside, so legs fit comfortably. Standard islands usually suit counter stools, while a raised benchtop calls for taller bar stools.

Give each stool roughly 60-66 cm of benchtop edge, otherwise elbows collide and the seats feel crowded. Remember that stools need pull-out space behind them, so keep the walkway beyond them clear enough for someone to pass while others are seated. Comfort and safety matter too: a footrest lets people rest their feet instead of dangling them, and a sturdy, stable base stops the stool from wobbling or tipping, which is especially important for children.

Next, we’ll plan storage and serving space.

Chapter 14. Plan Storage and Serving Space

Storage Prevents Table Clutter

A dining table easily becomes a landing zone. Mail, school notes, chargers, keys, toys and unpacked shopping all drift towards the nearest flat surface, and soon they are competing with plates and glasses for space. Clearing it before every meal quickly turns into a chore.

The solution is not more discipline. Asking everyone to remember to put things away rarely works for long, because the table is simply the most convenient spot. The solution is nearby storage, so that putting something away is as easy as setting it down.

A buffet, sideboard, display cabinet or console gives everyday items a home away from the table. Keys and chargers can go in a shallow top drawer, school papers in a basket on a shelf, and spare placemats behind a closed door. When each item has a place within a few steps of the table, the tabletop stays clear, and the room is ready for a meal at a moment’s notice.

What Storage Should Do

Dining storage usually performs several jobs.

  • Stores tableware and glassware.

  • Holds table linens and serving pieces.

  • Stores candles, placemats and seasonal décor.

  • Provides a surface for serving food.

  • Holds chargers, board games or children’s items.

  • Defines the dining zone in an open-plan space.

  • Provides a surface for a lamp, vase or artwork.

Before choosing a piece, decide which of these jobs matter most.

Buffets and Sideboards

A buffet and a sideboard are essentially the same type of low storage cabinet.

The names are used interchangeably.

A good buffet or sideboard:

  • Keeps everyday items accessible.

  • Provides a serving surface.

  • Anchors the dining zone.

  • Reduces table clutter.

  • Adds visual weight to an open-plan space.

It is one of the most useful pieces in a dining room, especially in an open-plan home.

Choose the Wall First

Do not choose a sideboard before choosing its wall.

The best wall is one that:

  • Does not block circulation.

  • Is not crossed by a main walking route.

  • Has enough length for the cabinet.

  • Has enough clearance for drawers and doors.

  • Is visible from the dining table.

  • Does not conflict with door swings.

In an open-plan space, a sideboard can act as the dining zone’s back wall.

Measure the Available Wall

Measure the wall length, not just the distance between two obvious points.

Account for:

  • Door frames.

  • Windows.

  • Power points.

  • Skirting boards.

  • Heaters.

  • Air-conditioning vents.

  • Existing furniture.

  • Traffic routes.

A cabinet should not run wall to wall with no breathing space.

Leave a small gap on each side unless the cabinet is built in.

Plan Drawer Clearance

Drawers need space to open.

A drawer may extend 40–50 cm or more from the cabinet.

Before placing a sideboard, check:

  • Can drawers open fully?

  • Do they hit a chair when pulled out?

  • Do they block a walking route?

  • Do they conflict with a door swing?

  • Can someone stand in front of the drawer while using it?

A sideboard with deep drawers needs more clear space in front of it than one with shallow drawers.

Plan Door Clearance

Cabinet doors also need space.

Check whether doors:

  • Open outward.

  • Fold back.

  • Slide.

  • Are glass-fronted.

  • Interfere with nearby furniture.

  • Block a walkway when open.

A cabinet with outward-opening doors needs more clearance than one with sliding doors.

Choose Closed, Open or Mixed Storage

Different storage types suit different households.

Storage type

Best for

Trade-off

Closed cabinets and drawers

Family homes, everyday clutter, tableware

Less display space

Open shelving

Ceramics, books, decorative objects

Shows dust and clutter

Glass-front cabinets

Glassware, collectables, formal dining

Needs regular cleaning

Mixed storage

Households wanting both display and concealment

Can look busy if overfilled

Console or sideboard

Narrow rooms and serving space

Less internal storage

For most family homes, closed storage is the most practical default.

Open shelving works best when it is edited regularly.

Plan Power and Lighting

A sideboard can do more than store things.

It can support:

  • A table lamp.

  • A bar fridge.

  • A coffee machine.

  • A charging station.

  • A wine fridge.

  • Decorative lighting.

If you plan to use electrical items, check:

  • Power outlet location.

  • Cable access.

  • Safety.

  • Ventilation.

  • Whether an electrician is required.

Do not run extension leads across walking routes.

Plan the Serving Surface

A sideboard top is useful during gatherings.

It can hold:

  • Serving dishes.

  • Drinks.

  • Desserts.

  • Coffee.

  • Extra plates.

  • Candles.

  • Flowers.

Leave enough clear surface for actual use.

A sideboard that is completely covered in décor cannot serve food.

Display Cabinets

A display cabinet protects glassware, ceramics and collectables while keeping them visible.

It suits formal dining rooms and households with items worth displaying.

Its discipline is editing.

A cabinet stuffed edge to edge loses its elegance.

Display cabinets can also be top-heavy or unstable if not properly anchored.

Anchor Tall Storage

Tall cabinets, display units and sideboards can pose a toppling risk, especially around children.

Australian product safety guidance identifies buffets, sideboards, hall tables and display cabinets of 686 mm or more in height among the furniture categories covered by the toppling furniture information standard.[web:69]

Product Safety Australia advises choosing stable furniture, placing it on a flat surface, and securing it to the wall or floor where appropriate.[web:70]

If a cabinet comes with anchoring hardware, use it.

If it does not, ask about a suitable anchoring kit for your wall type.[web:70]

Children and Storage

Children may climb on drawers, cabinets and shelves.

Reduce risk by:

  • Choosing stable, low-set furniture where possible.

  • Securing tall pieces to the wall.

  • Keeping heavy items on lower shelves.

  • Not placing tempting items near the top.

  • Discouraging climbing.

  • Keeping unstable furniture away from play areas.

A dining room should be beautiful, but it should also be safe.

Storage in Small Spaces

In a small dining area, storage must earn its footprint.

Choose:

  • A narrow sideboard.

  • A cabinet with drawers rather than deep doors.

  • A piece that can also serve as a console.

  • A bench with hidden storage.

  • Wall shelving, if appropriate.

  • A compact cabinet rather than a large buffet.

Avoid choosing a large sideboard simply because it matches the table.

Storage in Open-Plan Spaces

In an open-plan space, a sideboard does more than store items.

It defines the dining zone.

Place it along the edge of the dining area, where it can:

  • Create a visual boundary.

  • Hold serving pieces.

  • Support a lamp or artwork.

  • Balance the table visually.

  • Provide a backdrop for the dining zone.

Keep enough space between the sideboard and table for circulation.

Style the Top, But Leave Space

A sideboard top is a styling surface, but it should remain functional.

Use a simple three-layer approach:

  • One anchor: a lamp, tall vase or artwork.

  • One medium layer: books, a plant or bowl.

  • One low layer: a tray, candles or small objects.

Leave about one-third of the surface empty.

This keeps room for serving during gatherings.

Chapter Summary

Storage is what keeps the dining table from turning into a dumping ground for mail, school bags and spare chargers. Give those items a proper home close by, and the tabletop stays clear for meals.

Choose the wall before you choose the cabinet. Look at which stretch of wall is free, how far it sits from the table, and whether anything such as a door or a power point gets in the way. Then plan the clearance for drawers and doors as carefully as you did for the table, since a sideboard that can’t open fully is more frustrating than none at all.

Closed cupboards are best for everyday clutter, while open shelves suit items you’d like to show off. If you want a lamp or a plug-in appliance nearby, only plan power and lighting where it is safe and practical. Tall or unstable pieces should be anchored to the wall where appropriate. Finally, keep part of the sideboard top free, so there’s always a spot to rest serving dishes.

Next, we’ll choose the actual products that fit this planned dining zone.

Part 4 — Choosing the Right Products

Part Introduction

This batch turns your planned dining zone into specific product decisions. It covers dining tables, dining chairs and dining benches, along with bar stools, buffets and sideboards. It also tackles a choice many people find tricky: buying a matching dining set, or building a coordinated room from separate pieces that suit one another.

The guiding principle is simple. Products are chosen to fit the room plan, not the other way around. Because you already know your measurements, clearances, seating needs and storage spots, each item can be checked against a clear brief rather than judged on looks alone. A table you love but can’t walk around, or a sideboard that blocks a drawer, simply drops off the list.

Think of your plan as a filter. Anything that passes can then be compared on comfort, durability, style and price, which makes the final decisions far easier and much less stressful.

Chapter 15. Choosing a Dining Table

The Table Is the Anchor Purchase

The dining table is usually the first major product to choose because it determines seating capacity, room circulation, lighting position and storage layout.

A table should be selected against the maximum size calculated in Part 3, not against the largest size that physically fits between walls.

Start With Everyday Capacity

Count the people who eat at the table on a normal day.

Then separate that number from the number you need for occasional gatherings.

For example, a household may need four everyday seats but six or eight seats during family visits.

That difference is often best solved with an extendable table, a bench, folding chairs or another dining zone.

Allow Enough Edge per Person

Allow about 60 cm of table edge per person.

This gives enough space for a plate, glass, cutlery and elbows.

IKEA applies the same practical guide: each seat needs about 60 cm in width, so a four-person table needs at least 120 cm in length and a six-person table needs at least 180 cm.[web:81]

For family-style dining, add extra depth for shared dishes in the centre.

Common Table Sizes

Everyday seats

Rectangular table length

Round table diameter

Typical use

2

90–120 cm

90–110 cm

Apartment dining, breakfast nooks

4

120–150 cm

110–135 cm

Couples and small families

6

150–200 cm

135–150 cm

Most family homes

8

200–240 cm

150–180 cm

Larger rooms and regular entertainers

10+

240 cm or more

180 cm or more

Large formal spaces; extensions often better

These are planning references, not guarantees.

Chair width, table legs, aprons and serving habits can all change the real capacity.

Choose the Shape

Table shape affects conversation, movement and seating flexibility.

Shape

Strengths

Watch out for

Best suited to

Rectangular

Maximum seating flexibility; suits extensions and benches

Corners; needs length

Long rooms, families, entertainers

Round

Conversation; no sharp corners; easier movement

Limited capacity; centre becomes hard to reach

Small or square rooms

Square

Compact and symmetrical

Impractical beyond four seats

Square rooms, couples, breakfast corners

Oval

Softer than a rectangle; fewer sharp corners

Similar footprint to a rectangle; fewer options

Family rooms wanting a gentler look

Rectangular Tables

Rectangular tables are the most practical default for many Australian homes.

They work especially well in long rooms, open-plan areas and households that entertain.

They also suit benches and extension mechanisms.

Position the table along the room’s long axis, leaving clearance at both ends and along both sides.

Round Tables

Round tables encourage conversation because everyone faces the centre.

They also remove sharp corners, which can make a room feel safer and easier to move around.

They work best for two to six people.

Beyond that, the centre becomes difficult to reach and passing dishes becomes awkward.

Square Tables

Square tables suit two or four people.

They work best in square rooms or compact dining nooks.

They lose their advantage once you need more than four seats.

Oval Tables

Oval tables combine rectangular capacity with softer edges.

They are a good compromise for families who want fewer sharp corners without losing seating capacity.

However, their curved ends reduce some usable seating space compared with a straight-edged rectangle of the same length.

Fixed or Extendable

Choose fixed when your everyday and entertaining headcounts are similar.

Choose extendable when you need two table sizes in one piece.

Common extension systems include:

  • Butterfly leaf: folds and stores inside the table.

  • Removable leaf: strong but requires storage space.

  • Drop-leaf: folds down for compact spaces.

  • Gateleg: useful for occasional dining.

  • Folding table: best as a temporary backup.

Always recalculate room clearance using the fully extended dimensions.

IKEA’s Australian range includes extendable tables specifically marketed for changing from everyday meals to larger gatherings, which reflects their value for households whose everyday and hosting needs differ.[web:75][web:78]

Tabletop Materials

Material

Strengths

Watch out for

Best for

Solid timber

Warm, repairable, long-lasting

Moisture, heat, scratches

Households wanting longevity

Veneer

Real-wood look, stable, lighter

Edges and surface repairs

Mid-range dining rooms

Laminate or engineered board

Affordable, easy to clean

Difficult to repair once damaged

Family and rental use

Natural stone

Substantial, premium feel

Weight, sealing, acid sensitivity

Formal rooms

Sintered stone, ceramic, porcelain

Durable, stain-resistant, low maintenance

Edge chips, weight

Busy families

Glass

Visually light, easy to wipe

Fingerprints, crumbs, edge safety

Small or dark rooms

Solid Timber

Solid timber brings warmth and can often be sanded, repaired or refinished.

It suits households that value natural materials and long-term repairability.

It needs protection from heat, standing water and strong sunlight.

Veneer

Veneer uses a thin layer of real timber bonded to a stable core.

It is not automatically low quality.

A well-made veneer table can be stable, attractive and more affordable than solid timber.

Check the edge treatment carefully, because veneer edges are vulnerable to water and impact.

Laminate and Engineered Board

These surfaces are practical for busy households.

They are easy to wipe and resistant to many everyday stains.

Their weakness is repairability.

A deep scratch, chip or swollen edge is difficult to fix.

Stone, Ceramic and Sintered Stone

Natural stone brings visual weight but requires care.

Marble is sensitive to acidic food and drinks, including wine, citrus and tomato-based sauces.

Sintered stone, ceramic and porcelain surfaces are generally more practical for busy families because they are dense, stain-resistant and easy to clean.

Check edge strength, weight and handling requirements before buying.

Glass

Glass makes a room feel lighter and more open.

It suits small apartments and modern interiors.

It shows fingerprints, dust and crumbs.

Check the glass type, thickness, edge treatment and base quality.

Table Bases and Knee Room

The underside of the table matters as much as the top.

Check:

  • Overall table height.

  • Apron height from the floor.

  • Apron depth.

  • Leg position.

  • Crossbars or support beams.

  • Clear distance between legs.

A table may be 75 cm high overall, but a deep apron can reduce usable knee space significantly.

A pedestal base usually improves legroom and chair placement. Corner legs are strong but can restrict end seats.

Check Stability

A table should not rock.

Check:

  • Whether the legs sit evenly.

  • Whether the frame flexes.

  • Whether adjustable feet are included.

  • Whether the base suits the tabletop size.

  • Whether the extension mechanism locks securely.

Australian homes can have uneven floors, so adjustable feet are a useful feature.

Delivery and Assembly

Before ordering, confirm:

  • Assembled dimensions.

  • Boxed dimensions.

  • Weight.

  • Number of boxes.

  • Assembly requirements.

  • Delivery access.

  • Return process.

A table that cannot enter the home is not a table you own.

Chapter Summary

Pick your table size around how the household eats on a normal day, not the one big dinner a year. A handy guide is about 60 cm of table edge per person, so you can work out how many seats the table really needs. Shape comes next: rectangles suit long, narrow rooms, rounds soften a squarer space, and your own habits count too, such as whether people like to chat across the table or sit shoulder to shoulder.

An extendable table is only worth the extra cost if you truly need two sizes, say a small everyday setup that stretches for monthly family lunches. Otherwise, the moving parts can add weight, complexity and more joins to keep clean.

Look closely at the details underneath as well. Check the height of the apron, the type of base and the knee room, since a thick frame or central pedestal can limit where chairs and legs fit. Before you order, confirm both the assembled and the boxed dimensions, so the table can actually reach the room.

Chapter 16. Choosing Dining Chairs

A Chair Is Chosen With the Table

A dining chair should never be chosen in isolation.

Its comfort depends on the table’s height, apron, leg placement and available width.

Before choosing chairs, return to the table’s specifications.

Seat Height and Clearance

Most dining chairs have a seat height between about 45 cm and 48 cm.

Most standard dining tables are around 74–76 cm high.

For comfortable dining:

  • Aim for about 30 cm between the seat and the tabletop.

  • Aim for about 25–30 cm between the seat and the lowest obstruction beneath the tabletop.

The lowest obstruction may be the apron, crossbar, support beam or underside of a thick tabletop.

Measure the Apron

The apron is the frame beneath the tabletop.

It is often the part that limits knee room.

Ask for:

  • Overall table height.

  • Apron height from the floor.

  • Apron depth.

  • Any crossbar.

  • Clear space between legs.

If this information is not available, measure the table in person or choose a retailer that provides full specifications.

Seat Width and Elbow Room

A typical dining chair seat is around 40–50 cm wide.

The overall chair width may be wider, especially if it has arms or a curved back.

When planning seating:

  • Measure the chair’s overall width, not only the seat.

  • Allow enough space between chairs.

  • Check whether chairs fit between table legs.

  • Do not assume a six-seater table can fit six wide chairs.

Seat Depth and Posture

Seat depth affects posture.

A seat that is too deep can force shorter people to sit forward or slide down.

A seat that is too shallow can feel unsupported.

For dining, a moderate seat depth is usually best.

Around 40–45 cm suits most adults.

Backrests

A backrest matters for longer meals.

A good dining backrest should:

  • Support the lower and mid-back.

  • Allow an upright but relaxed posture.

  • Not push the sitter too far from the table.

  • Not feel rigid or restrictive.

A sculptural chair may look striking but offer little practical support.

Cushions

A soft cushion compresses when someone sits down.

This can increase the gap beneath the table, but a very soft cushion can make the tabletop feel too high.

For dining chairs, choose a firmer cushion rather than a deep, sink-in cushion.

Dining is an upright activity. People need to reach plates, glasses and shared dishes without sliding backwards.

Armchairs

Armchairs offer comfort and support.

But they need more width and must clear the apron.

Before choosing armchairs, measure:

  • Arm height.

  • Apron height.

  • Table leg spacing.

  • Chair overall width.

  • Space at the end of the table.

A practical arrangement is armless chairs along the sides and armchairs at the ends.

Timber Chairs

Timber chairs are versatile, durable and easy to clean.

They suit Scandinavian, coastal, contemporary and family homes.

Look for:

  • Solid joinery.

  • Kiln-dried hardwood or quality timber.

  • Smooth finishes.

  • Stable legs.

  • Floor protectors.

A timber chair with a seat pad can offer much of the comfort of an upholstered chair while remaining easy to maintain.

Upholstered Chairs

Upholstered chairs add comfort, softness and sound absorption.

They suit longer meals and formal rooms.

Their drawback is maintenance.

Look for removable covers, performance fabric, tight seams and accessible cleaning codes.

Avoid delicate pale fabrics in a busy family dining room.

Moulded and Plastic Chairs

Moulded chairs are lightweight, easy to clean and practical for families.

They suit casual dining, apartments and homes with children.

Check UV resistance, leg construction and weight rating.

A good seat shell can be undermined by weak legs or poor connectors.

Metal Chairs

Metal chairs suit modern, industrial and minimalist rooms.

They are strong and visually light.

They can feel cold, make noise and scratch floors.

Look for powder-coated finishes, welded joints and protective feet.

Rattan and Woven Chairs

Rattan and cane chairs add texture and a relaxed feel.

They suit coastal homes and casual dining spaces.

They are less suitable for households with pets that scratch or children who treat furniture roughly.

Woven surfaces can catch crumbs and loosen over time.

Upholstery Cleaning Codes

Check the cleaning code before buying upholstered chairs.

Code

Meaning

Practical use

W

Water-based cleaning is safe

Easiest for family households

S

Solvent-based cleaning only

Avoid water; more care required

W/S or WS

Either water-based or solvent-based cleaning is suitable

Flexible, but test first

X

Vacuum or light brushing only

No water or solvent; hardest to maintain

Using the wrong cleaner can cause watermarks, shrinkage, colour loss or texture damage.[web:40][web:41][web:44][web:45]

Floor Protection

Chairs move constantly.

Use suitable glides or felt pads under every leg.

This is especially important on timber, engineered timber, tiles, polished concrete and vinyl plank flooring.

Check the pads regularly because they wear out and collect grit.

Stability and Safety

A dining chair should feel stable when someone sits, leans back slightly and stands up.

Check for:

  • Wobbling legs.

  • Loose joints.

  • Flexing frames.

  • Uneven feet.

  • Sharp edges.

  • Missing hardware.

Do not use a dining chair as a ladder, step stool or climbing frame.

Chapter Summary

Start with the gap between the seat, the table’s apron and the tabletop, because that decides whether a chair actually works. Aim for about 25-30 cm between the seat and the lowest part of the table, so legs slide under without a squeeze. Then measure each chair’s overall width and how far it needs to pull out, since a handsome chair that takes up too much room will crowd the whole setting.

Comfort matters for long meals. Firmer cushions suit dining better than deep, soft ones, which can feel sloppy and make it harder to sit upright. If you like the look of armchairs, check that the arms clear the tabletop and the neighbouring chair before you commit, otherwise they can’t tuck in.

Finally, look after the basics. Fit glides to the chair feet to protect your floors, and check every so often that joints are tight and the chairs stay steady, so wobbles are caught before they become a problem.

Chapter 17. Choosing Dining Benches

A Bench Is a Space-Saving Tool

A dining bench is one of the most efficient seating options in a home.

It has no gaps between sitters, can often seat three people where two chairs would sit, and can slide beneath the table when not in use.

For small dining areas, apartments and family homes, this can make a real difference.

When a Bench Works Best

A bench is especially useful when:

  • The dining area is narrow.

  • The table sits against a wall.

  • Children use the table daily.

  • You need flexible seating for guests.

  • You want a more casual, relaxed feel.

  • You want seating that disappears visually when not in use.

A bench along one side of a rectangular table is one of the most practical layouts for a compact Australian dining space.

When a Bench Falls Short

Benches have trade-offs.

  • They usually offer no back support.

  • People must slide along to let others in or out.

  • Long formal dinners can be less comfortable.

  • They may not suit people with mobility issues.

    A bench is excellent for casual meals and children.

It is less ideal as the only seating option for long, formal dinners.

The Best Compromise

For many homes, the best solution is not all benches or all chairs.

It is both.

Place a bench along the wall side of the table.

Place individual chairs on the open side.

This gives you space savings from the bench and back support from the chairs.

Bench Length and Capacity

A bench does not have fixed seats.

A 150 cm bench may comfortably seat:

  • Two adults with generous space.

  • Three adults at a snugger width.

  • Two adults and two children.

  • Three children easily.

Do not assume that a bench seats the same number as an equivalent run of chairs.

Bench Height

Most dining benches have a seat height of about 45 cm.

This matches most standard dining chairs and works with tables around 74–76 cm high.

Before buying, check:

  • Bench seat height.

  • Table apron height.

  • Whether knees fit comfortably.

  • Whether the bench can slide under the table.

  • Whether it collides with the table base.

Bench Depth

Bench depth affects comfort and table clearance.

A bench that is too deep can push sitters too far from the table.

A practical depth is often around 35–40 cm.

Check the distance from the front edge of the bench to the table edge.

Backless or Backed

Most dining benches are backless.

This keeps them visually light and allows them to slide under the table.

A backed bench offers more support but takes more visual and physical space.

Choose backless for compact spaces and casual use.

Choose backed when comfort matters more than compactness.

Timber, Upholstered or Performance Fabric

A timber bench is practical, durable and easy to clean.

An upholstered bench is softer and more comfortable, but it requires more care.

For family use, consider:

  • A timber bench with a removable cushion.

  • A performance-fabric upholstered bench.

  • A bench with a wipeable surface.

  • A bench with a sturdy, stable base.

Benches and Table Bases

A bench must work with the table base.

Check whether:

  • The bench can slide beneath the tabletop.

  • The table legs interfere with the bench.

  • A trestle base blocks the bench.

  • A pedestal base leaves enough knee room.

  • The bench hits an apron or crossbar.

A pedestal table often works well with a bench because there are no corner legs to obstruct movement.

Safety and Stability

A bench should feel stable when people sit down and move along it.

Check:

  • Leg stability.

  • Weight capacity.

  • Floor protection.

  • Sharp corners.

  • Wobbling joints.

  • Whether it slides on smooth floors.

Use floor glides or felt pads under the legs.

Chapter Summary

Benches are a smart way to save space, and they suit casual, family-focused dining. Because they have no backs or arms, people can shuffle along to make room, and the whole piece slides right under the table when it isn’t needed. They work best along one side of a rectangular table, where they keep the line of seating tidy and free up the walkway on that side.

For the best balance of flexibility and comfort, pair a bench with chairs on the opposite side or at the ends. That way, guests who want back support have it, while children or extra visitors can squeeze onto the bench.

Check the practical details before buying. Compare the bench’s height and depth with the table, and look at the table base, since legs or a pedestal can block the bench from sliding in. Confirm that it clears the tabletop when pushed under. For family use, choose durable, stable materials that can handle spills, scuffs and the occasional bouncing child.

Chapter 18. Choosing Bar Stools and Counter Stools

Island Seating Is a Separate Category

Bar stools and counter stools are not small dining chairs.

They serve a different purpose: short, casual seating at a higher surface.

They are ideal for breakfast, coffee, homework, quick meals and conversation.

They are less ideal for long formal dinners.

Measure Before You Choose

Before choosing stools, measure:

  • Benchtop height.

  • Underside of the overhang.

  • Overhang depth.

  • Available benchtop length.

  • Distance to walls or cabinets.

  • Floor space in front of the island.

The most important measurement is the underside of the counter overhang.

The Height Formula

Leave about 25–30 cm between the top of the stool seat and the underside of the counter or bar.

Use this formula:

Underside height − 25–30 cm = target stool seat height

For example, if the underside of the island overhang is 90 cm, the target seat height is about 60–65 cm.

Home Depot and other guides use the same principle: subtract roughly 25–30 cm from the counter or bar height to find the appropriate stool seat height.[web:55][web:56][web:57]

Counter Stools Versus Bar Stools

Type

Typical seat height

Usually suits

Counter stool

About 61–66 cm

Standard kitchen islands around 86–91 cm high

Bar stool

About 71–76 cm

Raised benchtops around 102–107 cm

Extra-tall stool

About 79–86 cm

Very high bars or spectator-style seating

Most standard Australian kitchen islands fall into the counter-stool category.

Raised breakfast bars and dedicated home-bar benches often require bar stools.

Allow Enough Width per Stool

Allow about 60–66 cm of benchtop edge per stool.

This gives people enough room to sit without shoulders touching.

For a compact arrangement, 55–60 cm per stool can work, but it will feel tighter.

Check Overhang Depth

The overhang is the part of the benchtop that extends beyond the cabinetry.

A shallow overhang may be fine for occasional perching.

A deeper overhang is better for regular seated use.

If the overhang is too shallow, stools may need to sit further back, making the posture awkward.

Backless Stools

Backless stools are light, compact and easy to store under the benchtop.

They suit short meals and minimal spaces.

They offer little back support.

Low-Back Stools

Low-back stools offer a useful middle ground.

They provide some lumbar support while still allowing the stool to tuck beneath many benchtops.

They suit households that use the island regularly.

High-Back Stools

High-back stools offer the most support.

They suit dedicated bar areas and longer sits.

They cannot usually tuck under a benchtop and take more visual space.

Footrests

A footrest is essential for comfort, especially on higher stools.

Check that it:

  • Sits at a useful height.

  • Is strong enough for daily use.

  • Does not interfere with leg movement.

  • Is easy to clean.

  • Does not create a tripping hazard.

Swivel and Adjustable Stools

Swivel stools make it easier to get on and off.

Adjustable stools can suit different surface heights.

Both add convenience but also mechanical complexity.

Check smoothness, stability, weight rating, noise and repairability before buying.

Materials

Choose stool materials based on cleaning, comfort and sunlight exposure.

Material

Best for

Watch out for

Timber

Warmth and versatility

Moisture, scratches, fading

Metal

Modern and industrial spaces

Cold touch, floor scratches, corrosion

Polypropylene

Families and casual spaces

UV stability and leg quality

Upholstery

Comfort and texture

Stains and cleaning codes

Leather or faux leather

Wipeable surfaces

Scratches, peeling, quality variation

Rattan or cane

Coastal and relaxed spaces

Durability and cleaning

Safety

Choose stools with a broad, stable base.

Avoid lightweight stools that tip easily.

Keep stools away from hot cooktops, oven doors and sharp benchtop edges.

Use floor protectors under every leg.

Chapter Summary

Before choosing stools, measure the underside of the benchtop overhang, because that figure decides which height will work. Aim for about 25-30 cm between the seat and the underside, so legs slide in comfortably without knocking the bench. As a general guide, counter stools suit a standard island, while taller bar stools are made for a raised benchtop.

Spacing matters too. Give each stool roughly 60-66 cm of benchtop edge, otherwise neighbours bump elbows and the seats feel crowded. Comfort and safety come next: a footrest stops legs from dangling, and a wide, stable base keeps the stool from wobbling or tipping, which is especially important around children.

Finally, think about what the seat is made from. Wipeable surfaces are easier to keep clean after spills, while strong sunlight can fade or crack some finishes. Pick materials that suit how your household really uses the kitchen.

Chapter 19. Choosing Buffets, Sideboards and Display Cabinets

Storage Prevents Table Clutter

A dining table easily becomes a landing zone for mail, school notes, chargers and everyday items.

A buffet or sideboard gives those items a home away from the table.

It also provides a serving surface and helps define the dining zone in an open-plan space.

What a Buffet or Sideboard Does

A buffet and sideboard are essentially the same low storage cabinet.

A good one:

  • Stores tableware and glassware.

  • Holds linens and serving pieces.

  • Provides a surface for serving food.

  • Anchors the dining zone.

  • Reduces table clutter.

  • Supports a lamp, vase or artwork.

Choose the Wall First

Do not choose a sideboard before choosing its wall.

The best wall:

  • Does not block circulation.

  • Is not crossed by a main walking route.

  • Has enough length for the cabinet.

  • Has enough clearance for drawers and doors.

  • Is visible from the dining table.

  • Does not conflict with door swings.

Measure the Available Wall

Measure the wall length, not just the distance between two obvious points.

Account for:

  • Door frames.

  • Windows.

  • Power points.

  • Skirting boards.

  • Heaters.

  • Air-conditioning vents.

  • Existing furniture.

  • Traffic routes.

A cabinet should not run wall to wall with no breathing space.

Plan Drawer Clearance

Drawers need space to open.

A drawer may extend 40–50 cm or more from the cabinet.

Before placing a sideboard, check:

  • Can drawers open fully?

  • Do they hit a chair when pulled out?

  • Do they block a walking route?

  • Do they conflict with a door swing?

  • Can someone stand in front of the drawer while using it?

Plan Door Clearance

Cabinet doors also need space.

Check whether doors:

  • Open outward.

  • Fold back.

  • Slide.

  • Are glass-fronted.

  • Interfere with nearby furniture.

  • Block a walkway when open.

Closed, Open or Mixed Storage

Storage type

Best for

Trade-off

Closed cabinets and drawers

Family homes, everyday clutter, tableware

Less display space

Open shelving

Ceramics, books, decorative objects

Shows dust and clutter

Glass-front cabinets

Glassware, collectables, formal dining

Needs regular cleaning

Mixed storage

Households wanting display and concealment

Can look busy if overfilled

For most family homes, closed storage is the most practical default.

Open shelving works best when it is edited regularly.

Power and Lighting

A sideboard can support a lamp, charging station, bar fridge or decorative lighting.

If you plan to use electrical items, check:

  • Power outlet location.

  • Cable access.

  • Safety.

  • Ventilation.

  • Whether an electrician is required.

Do not run extension leads across walking routes.

Display Cabinets

A display cabinet protects glassware, ceramics and collectables while keeping them visible.

It suits formal dining rooms and households with items worth displaying.

Its discipline is editing.

A cabinet stuffed edge to edge loses its elegance.

Toppling Safety

Tall cabinets, display units and sideboards can pose a toppling risk, especially around children.

Australian product safety guidance identifies buffets, sideboards, hall tables and display cabinets of 686 mm or more in height among the furniture categories covered by the toppling furniture information standard.

Product Safety Australia advises choosing stable furniture, placing it on a flat surface, and securing it to the wall or floor where appropriate.

If a cabinet comes with anchoring hardware, use it.

If it does not, ask about a suitable anchoring kit for your wall type.

Style the Top, But Leave Space

Use a simple three-layer approach:

  • One anchor: a lamp, tall vase or artwork.

  • One medium layer: books, a plant or bowl.

  • One low layer: a tray, candles or small objects.

Leave about one-third of the surface empty.

This keeps room for serving during gatherings.

Chapter Summary

Pick the wall before you pick the cabinet. Look at which stretch is actually free, how close it sits to the table, and whether a door, window or power point gets in the way. A sideboard that looks perfect online can end up stuck in the wrong spot if the wall wasn’t considered first.

Give drawers and doors the same attention you gave the table. They need room to open fully, and the space in front must still leave a comfortable walkway, even when chairs are pulled out nearby.

Think about what each type of storage is for. Closed cupboards and drawers hide everyday clutter such as placemats, candles and spare cutlery, while open shelves suit pieces you’d like to display. Tall or top-heavy units should be anchored to the wall where appropriate, which keeps them steady around children and pets. Finally, leave part of the top clear, so there’s always a spot to rest serving dishes.

Chapter 20. Choosing a Dining Set or Building a Coordinated Room

A Dining Set Is Convenient

A dining set includes a table and matching chairs, and sometimes a bench.

It is convenient because:

  • The pieces are designed to work together.

  • Sizing is usually coordinated.

  • Purchase is simpler.

  • The room looks immediately cohesive.

  • Delivery and assembly can be streamlined.

IKEA describes dining sets as a fast, easy way to place a table and matching chairs at the centre of a dining area.[web:76]

The Limitation of a Matching Set

A matching set can look like a showroom display.

It can also be inflexible.

If one chair breaks, becomes uncomfortable or no longer suits the household, replacing the entire set may feel wasteful.

A matching set is best when:

  • You want a simple, coordinated look.

  • You are furnishing a room from scratch.

  • You value convenience.

  • You do not plan to change pieces often.

  • The set genuinely fits your room and household.

Building a Coordinated Room

A coordinated room uses separate pieces that relate to one another without matching exactly.

It can include:

  • A timber table.

  • Mixed dining chairs.

  • A bench.

  • Bar stools.

  • A sideboard.

  • A pendant light.

  • A rug.

This approach usually feels more personal and flexible.

The One-Thread Rule

Every successful mix shares at least one unifying element.

Possible threads include:

  • A shared colour.

  • A shared timber tone.

  • A shared metal finish.

  • A shared seat height.

  • A shared shape language.

  • A shared level of formality.

For example, four simple oak chairs and two black upholstered host chairs can work if black appears elsewhere in the room.

The Head-and-Sides Formula

The easiest reliable mix uses two chair types.

  • Simple side chairs along the long sides.

  • Two feature or host chairs at the ends.

  • One shared material, colour or finish.

This creates a focal point without making the room feel chaotic.

Mixing a Bench

A bench can be part of a coordinated room.

A common arrangement is:

  • A bench on one long side.

  • Two or more chairs on the other side.

  • Optional chairs at the ends.

The bench should share at least one element with the chairs, such as timber tone, leg style or seat height.

Mixing Bar Stools

Bar stools belong at an island or high table, not usually at a standard dining table.

But they can still contribute to visual cohesion.

Connect them to the dining chairs through:

  • A shared metal finish.

  • A shared timber tone.

  • A shared seat colour.

  • A similar level of formality.

Repeat Materials and Colours

A material or colour that appears only once can look accidental.

Repeat each major element at least twice.

For example:

  • Black chair legs should echo a black pendant light or sideboard handle.

  • A rattan chair should connect with a rattan pendant, basket or sideboard detail.

  • A rust-coloured host chair should connect with artwork, ceramics or table linen.

Match Visual Weight

Visual weight means how heavy or light a piece appears.

A chunky timber table paired with delicate wire-frame chairs can feel unbalanced.

A slim glass table paired with oversized upholstered chairs can feel crowded.

Aim for balance.

  • Light tables suit lighter chairs.

  • Substantial tables suit more substantial chairs.

  • Small rooms benefit from chairs with visible floor space beneath them.

  • Large rooms can handle higher backs and fuller silhouettes.

Build Gradually

You do not need to buy everything at once.

A sensible order is:

  1. Table.

  2. Everyday seating.

  3. Lighting.

  4. Storage.

  5. Rug.

  6. Styling.

  7. Extra seating.

This allows you to live with the room before completing it.

When to Choose a Set

Choose a dining set when:

  • You want a simple, coordinated look.

  • You are furnishing a room from scratch.

  • You value convenience.

  • The set fits your room and household.

  • You do not plan to change pieces often.

When to Build Separately

Build a coordinated room when:

  • You want more flexibility.

  • You already own good pieces.

  • You want a less formal look.

  • You want to upgrade gradually.

  • You want a room that feels personal rather than matched.

Chapter Summary

A matching dining set is the easy route. Everything arrives already coordinated, so you skip the guesswork and know the pieces belong together. The trade-off is flexibility: if one item no longer suits, replacing it can be tricky, and the room can feel a little like a showroom.

A coordinated room built from separate pieces feels more personal and adapts more readily as your needs change. The risk is a look that seems random, so choose one or two unifying threads, such as a shared timber tone or a repeated colour, and let them tie everything together.

For an easy chair mix, try the head-and-sides approach: use one style at the two ends of the table and a different style along the sides. It looks deliberate without being fussy. Repeat any colour or material at least twice around the room, perhaps in the chairs and again in a rug or lamp, so the eye sees a pattern rather than an accident.

Finally, match visual weight. A chunky timber table paired with spindly chairs and a delicate sideboard can look unbalanced, so aim for pieces that feel similarly substantial.

Part 5 — Finishing the Room

Part Introduction

A dining zone can pass every measurement test and still feel unfinished. The numbers may all work, with enough clearance, comfortable seating and a sideboard in the right spot, yet the space can look oddly bare, as if it is waiting for something.

The table and chairs make the room functional. They are what let people sit, eat and move about with ease. Lighting, rugs, wall treatments and styling are what make it feel intentional. A well-placed pendant sets the mood, a rug gathers the furniture into one group, and a considered wall colour or artwork gives the eye somewhere to rest.

Part 5 covers these finishing layers. It shows how to turn a purely functional eating area into a room people actually want to linger in, whether for a quick weekday breakfast, a long weekend lunch or an evening of conversation after the plates are cleared.

Chapter 21. Lighting the Dining Zone

Lighting Is More Than One Pendant

The most common lighting mistake is treating the dining room as a one-fixture problem.

A pendant alone may look dramatic at night but leave the corners gloomy.

A ceiling light alone may make the room safe to move through but feel flat at dinner.

Comfortable dining rooms use layers of light.

The Three Lighting Layers

Layer

Job

Typical fixtures

Ambient

General visibility and safe movement

Ceiling light, recessed downlights

Task or focal

Lighting the table surface itself

Pendant or pendants over the table

Accent

Warmth, depth and evening atmosphere

Wall sconces, sideboard lamp, display-cabinet lighting

The pendant over the table is the dining room’s signature fixture, but it works best when it does not work alone.

A room with only a pendant can be dramatic at night and gloomy in the corners.

A room with only ambient ceiling light can feel flat at dinner.

Plan Lighting Around the Table

The pendant should be centred over the table, not necessarily over the room.

If the table sits off-centre, the light should follow the table.

Before installing lighting, check:

  • Table position.

  • Ceiling height.

  • Ceiling rose or electrical point location.

  • Whether the light can be repositioned.

  • Whether an electrician is required.

  • Whether the light will interfere with sightlines.

Hard-wired lighting should be installed or moved by a licensed electrician.

Pendant Height

A practical guide is to hang the bottom of the pendant about 75–90 cm above the tabletop.

This keeps the light close enough to flatter the table and far enough to see across it.

Rooms with very high ceilings, or households that want clear sightlines across the table, may justify hanging the light slightly higher.

Treat 90 cm as the upper end of the normal range rather than a strict rule.

Sizing the Fixture

A round fixture should span roughly half to two-thirds of the table’s width.

A linear fixture should span roughly half to two-thirds of the table’s length.

For tables longer than about 180 cm, use two or three smaller pendants rather than one enormous fixture.

This distributes light more evenly and avoids a single oversized visual bulk.

Long Tables and Multiple Pendants

Long tables often work better with a line of smaller pendants.

This approach:

  • Provides more even illumination.

  • Reduces visual bulk.

  • Creates rhythm along the table.

  • Allows better serving flow.

  • Prevents one fixture from dominating the room.

Space pendants evenly along the table’s centreline.

Keep the lowest point of each fixture at a consistent height.

Glare and Bulb Choice

Avoid clear glare at seated eye level.

Choose fixtures with diffusers, shades or covered bulbs.

For dining, warm white light around 2700K is usually more inviting than cool white light.

Cooler temperatures belong more naturally in kitchens, laundries and workspaces.

Dimming

Dimming is one of the highest-value lighting upgrades in a dining room.

It allows the same fixture to move from homework-bright to dinner-intimate.

If rewiring for a dimmer is impractical, consider smart bulbs or fixtures with built-in dimming.

Electrical work should be performed by a licensed electrician.

Accent Lighting

Accent lighting adds warmth and depth.

Options include:

  • A lamp on the sideboard.

  • Wall sconces beside artwork.

  • LED strips inside a display cabinet.

  • A small uplight behind a plant.

  • A table lamp near the entry to the dining zone.

Accent light should support the room, not compete with the main pendant.

Lighting and Open-Plan Zones

In an open-plan home, lighting helps define boundaries.

A pendant over the table signals: “this is the dining zone.”

It separates the dining area from the kitchen and living room without adding walls.

Use consistent finishes across the pendant, chair legs, handles and other metal details.

Chapter Summary

Good dining room lighting works in layers. Ambient light fills the whole room, focal light (usually a pendant) sits over the table, and accent light, such as a lamp on the sideboard or a spotlight on artwork, adds warmth and depth.

For the main fitting, hang the pendant about 75-90 cm above the tabletop, which lights the table well without blocking sightlines across it. Centre it over the table rather than the room, because the table is what people gather around, even if the room itself is off-centre. A long table suits two or three smaller pendants spaced evenly along its length, which lights the whole surface better than one fitting stretched too far.

Choose warm, dimmable light so the mood can shift from bright breakfast to relaxed dinner. Check that nobody seated is looking straight into a bare bulb, since glare spoils a meal quickly.

Finally, anything involving hard-wired fittings or moving a ceiling point should be done by a licensed electrician, not as a DIY job.

Chapter 22. Choosing a Dining Rug

A Rug Defines the Dining Zone

In an open-plan home, a rug does more than soften the floor.

It defines the dining zone.

It creates a visual boundary between the dining area, kitchen and living room.

It also reduces echo and makes chair movement quieter.

The Non-Negotiable Rule: Size

The rug must extend far enough beyond the table that chairs remain mostly on it when pulled out.

A practical target is about 60 cm of rug beyond the table on every side.

In a tight room, around 45 cm can work as a minimum.

If the rug is too small, chairs will catch on its edge every time someone pulls them out.

How to Calculate Rug Size

Measure the table.

Add twice the desired extension to each dimension.

For example, using a 60 cm extension:

  • Table length + 120 cm = rug length.

  • Table width + 120 cm = rug width.

For a 170 cm-long table, that suggests a rug at least 290 cm long.

For an 90 cm-wide table, that suggests a rug at least 210 cm wide.

Shape and Table Shape

Echo the table’s shape where possible.

  • Rectangular rug under a rectangular table.

  • Round rug under a round table.

  • Square rug under a square table.

  • Oval rug under an oval table.

A round rug under a long rectangular table can work, but it is harder to get right.

When in doubt, echo the strongest lines of the room.

Pile Height

Choose a flatweave or low-pile rug for a dining area.

Low-pile rugs:

  • Let chairs slide more easily.

  • Collect fewer crumbs.

  • Are easier to vacuum.

  • Create less resistance when chairs are pulled out.

  • Are more forgiving around food spills.

Deep, plush rugs fight chair movement and collect debris.

Material

Choose a material that matches your cleaning reality.

Material

Strengths

Watch out for

Wool

Durable, natural, good underfoot

Cost and cleaning requirements

Polypropylene

Affordable, stain-resistant, practical

Quality and appearance vary

Jute or sisal

Texture and natural look

Harder to clean and can shed

Cotton

Washable and casual

Can wear faster

Synthetic blends

Practical and family-friendly

Check UV stability and pile quality

For most family homes, a low-pile polypropylene or wool-blend rug is a practical choice.

Pattern and Colour

Very pale rugs show food, dirt and general wear.

Very dark rugs show dust, lint and pet hair.

Mid-tones, textures and subtle patterns are often the most forgiving.

A patterned rug can hide daily use better than a solid cream or white rug.

Rug Pads

Always use a rug pad under a dining rug.

A pad:

  • Prevents creeping.

  • Adds cushioning.

  • Protects the rug from friction.

  • Helps reduce noise.

  • Makes dropped glasses less likely to break.

Choose a pad suited to your floor type and keep it flat and secure.

Safety

Keep rug edges out of main walking routes.

Avoid thick edges where chairs repeatedly cross.

Check that the rug does not create a trip hazard between the kitchen, dining table and living area.

A rug should improve movement, not obstruct it.

Cleaning

Dining rugs encounter crumbs, spills and chair traffic.

Vacuum regularly.

Blot spills promptly.

Follow the manufacturer’s cleaning instructions.

Rotate the rug occasionally if it receives uneven sunlight.

Chapter Summary

A dining rug has one main job: it must stay under the chairs even when people push back to stand up. The simplest way to check is to allow about 60 cm of rug beyond the table on every side, wherever the room permits. If the rug is too small, the chair legs drop off the edge and catch each time someone sits or stands.

Choose a flatweave or low-pile style, because chairs slide across it easily and crumbs and spills are far simpler to clean than from a deep shag. It also helps to echo the table’s shape, with a rectangular rug under a rectangular table and a round one under a round table, so the pieces look like a matched group. Add a rug pad underneath to stop slipping, protect the floor and keep the edges from curling.

Finally, think about colour. Pale solid rugs show every mark, while mid-tones, textures and patterns hide daily wear and still look lovely.

Chapter 23. Wall Art, Mirrors and Table Styling

Walls Need One Focal Point

Dining room walls are usually viewed from a seated position, which changes what works on them. At that distance and height, the eye takes in the wall as a whole rather than picking out tiny details, so scale and grouping matter more than any single frame.

A single large artwork reads as intentional, giving the room a confident focal point. A scatter of small frames spread across the wall, on the other hand, reads as noise. Each piece competes for attention, and none of them gets properly noticed.

Choose one focal wall rather than decorating every wall. Leaving the other walls calm gives the eye somewhere to rest, and it makes the focal wall look even more deliberate.

Choosing the Focal Wall

The focal wall is usually the wall the table faces.

It may also be the wall behind a sideboard or buffet.

Avoid placing the main artwork where it competes with a window, television or busy kitchen view.

Art Size and Height

A piece or grouping above a sideboard should span roughly half to two-thirds of the cabinet’s width.

Centre artwork at approximately standing eye level.

Do not hang art too high simply because the wall is large.

Art should relate to the furniture below it.

Mirrors

Mirrors are especially useful in small or dark dining rooms.

They bounce light and can make a space feel larger.

Place a mirror where it reflects light or an attractive view, not clutter.

Avoid placing a mirror directly opposite a busy kitchen or television.

Gallery Walls

A gallery wall can work if it is treated as one composition.

Keep frames:

  • Close enough to read as a group.

  • Consistent in tone or finish.

  • Balanced in scale.

  • Centred on the furniture below.

  • Edited rather than crowded.

A gallery wall should not become a collection of unrelated small frames.

Table Styling: Keep It Low

A dining table is a working surface first.

Keep centrepieces low enough that people can see across the table.

A useful rule is to keep decorative objects no taller than a wine glass.

This preserves conversation and sightlines.

A Simple Centrepiece Formula

  • One base layer: runner, tablecloth or bare timber.

  • One central anchor: low vase, bowl or candlesticks.

  • One or two secondary objects at most.

Resist filling the table.

The luxury of a well-styled dining table is empty space.

Seasonal Rotation

Treat styling as a rotation rather than an accumulation.

  • Branches in spring.

  • Fruit bowls in summer.

  • Warm ceramics in autumn.

  • Candles and darker tones in winter.

Rotate objects seasonally instead of adding more permanently.

The 80/20 Rule

Style about 20 percent of surfaces and leave 80 percent clear.

The sideboard gets three objects and empty space.

The table gets a centrepiece and clear timber.

The walls get one focal arrangement.

Rooms feel calm because everything has room around it.

Chapter Summary

Pick one focal wall and let it do the talking. Usually this is the wall behind the sideboard or the one the table faces, and dressing it with a paint colour, a large artwork or a mirror gives the room a clear point of interest instead of scattering attention everywhere. Make sure whatever you hang is properly scaled: a tiny frame on a big wall looks lost, so choose one generous piece or a tidy group that spans about two-thirds of the furniture below it.

On the table, keep centrepieces low, so guests can see and talk across it without peering around a tall vase. Rotate your styling with the seasons, perhaps fresh greenery in spring and warmer tones in winter, which keeps the room feeling alive without any major spending.

Finally, leave most surfaces clear. The 80/20 rule is a handy guide: aim for about 80 percent calm, practical space and 20 percent decoration, so the room feels relaxed and easy to live in rather than crowded.

Chapter 24. Colour, Materials and Visual Cohesion

Cohesion Does Not Mean Matching

A dining room doesn’t need matching furniture. What it needs is pieces that relate to one another through colour, material and proportion, so the room feels connected without looking copied from a catalogue.

A room where everything matches can look flat and a little lifeless, because the eye has nothing to discover. At the other extreme, too many unrelated accents can feel chaotic, as if each item was bought for a different house.

The sweet spot sits in between. Choose one or two shared threads, such as a common timber tone or a repeated soft colour, then let everything else vary around them. A pair of chairs in a different style, a rug with a gentle pattern or a lamp in a contrasting finish can all add interest, as long as they feel similar in weight and tone. That balance of connection and variety is what makes a room look collected rather than matched.

The 60-30-10 Framework

A useful starting framework is:

Layer

Approximate share

Where it lives

Dominant

About 60 percent

Walls, floor, curtains

Secondary

About 30 percent

Large furniture, rug, upholstery

Accent

About 10 percent

Lighting, artwork, ceramics, linen

This is a starting framework, not a formula to enforce with a tape measure.

Its purpose is to create hierarchy so the eye knows where to rest.

Warm Neutrals

Warm neutrals suit dining rooms because they flatter food and evening light.

Useful base colours include:

  • Warm white.

  • Cream.

  • Oatmeal.

  • Taupe.

  • Soft brown.

  • Muted green.

  • Terracotta.

Cool greys and stark whites can work, but they usually need warm lighting and warm timber to avoid feeling cold at dinner.

Choose a Dominant Timber Tone

Start with the largest timber surface.

This is usually the floor or the dining table.

Let that tone anchor the room.

Then add one or two supporting tones.

Mix Light and Dark Timber

Contrast reads as intentional.

Pale oak with walnut can work well.

Clashing undertones can read as accidental.

Check undertones in daylight.

  • Pale oak, ash and blonde timber often have cooler or neutral undertones.

  • Walnut, blackbutt and many eucalypts can have warmer undertones.

  • Cherry-toned and yellow-toned timbers can clash if placed together without a buffer.

Repeat Each Tone

A timber colour that appears once can look orphaned.

Repeat it at least twice.

For example:

  • Pale oak table and pale oak sideboard.

  • Walnut chairs and walnut shelving.

  • Black metal chair legs and black pendant frame.

Repetition creates rhythm.

Use Neutrals as Buffers

Neutrals give the eye rest between timber tones.

Useful buffers include:

  • White walls.

  • Cream upholstery.

  • Natural linen.

  • Black metal.

  • Grey rugs.

  • Ceramic vases.

A neutral layer prevents a room from becoming too busy.

Repeat Non-Timber Materials

Repeat every major material in at least two places.

Material

Plays well with

Repeat it in

Pale oak

Walnut, black metal, cream linen

Chair legs, sideboard, flooring

Walnut or dark timber

Pale oak, brass, warm white

Table, chair frames, shelving

Black metal

Any wood, any neutral

Light fixture, chair legs, handles

Linen or bouclé

All woods, aged brass

Seat cushions, curtains, rug

Glass and ceramic

Minimal palettes, stone tops

Cabinet doors, vases, pendant shades

A room can contain many materials and still feel cohesive if each one is repeated.

Match Visual Weight

Visual weight is as important as colour.

A delicate glass table with chunky farmhouse chairs clashes in scale, not colour.

A substantial timber table with wispy metal chairs can feel unbalanced.

Squint at the room or look at a photo.

Ask whether the main pieces appear to belong to the same drawing.

Avoid Too Many Accents

One accent colour repeated in two or three places is stronger than five accents used once each.

For example:

  • Green in plants and ceramics.

  • Black in chair legs and pendant frame.

  • Rust in artwork and cushions.

  • Brass in handles and lighting.

Choose one or two, not all of them.

Let the Room Evolve

Build the room on a neutral base.

Let colour and pattern live in replaceable layers.

  • Seat cushions.

  • Rug.

  • Artwork.

  • Table linen.

  • Ceramics.

  • Small décor.

When your taste changes, redecorating should cost an afternoon, not a renovation.

Chapter Summary

A simple starting point for colour is the 60-30-10 hierarchy. Let about 60 percent of the room be a calm main tone, around 30 percent a supporting shade, and the last 10 percent a bolder accent. It keeps the palette balanced without much effort. Warm neutrals such as cream, soft stone or gentle taupe are a good base for a dining room, since they flatter both food and evening light.

Next, let the largest timber surface, usually the table, anchor everything else. Pick its tone first, then choose other woods and finishes to sit comfortably beside it. Repeat each major material at least twice around the room, perhaps timber in the table and again in a frame or stool, so it looks planned rather than accidental. Where two tones clash, a neutral piece can act as a buffer between them.

Match visual weight, not just colour, so a chunky table isn’t paired with spindly chairs. Finally, keep the permanent pieces quiet and let cushions, art and tableware carry the bolder ideas, because those are cheap to change as your taste evolves.

Part 6 — Buying, Delivery and Installation

Part Introduction

A dining room project doesn’t end at checkout. It ends when the piece is standing correctly in the room, put together properly and positioned with enough clearance around it. Until that moment, the work is only half finished, no matter how carefully the product was chosen.

Many problems appear after the purchase. A box arrives that is heavier than expected, a leg wobbles because a bolt was never tightened, or a sideboard sits a few centimetres too close to the doorway and blocks the swing. These are small issues, but they can spoil the pleasure of a good buy if nobody planned for them.

Part 6 closes the gap between choosing a product and actually living with it. It walks you through delivery day, assembly, placement, safety checks and everyday care, so that the table, chairs and storage you selected keep performing well and stay looking good for years to come.

Chapter 25. Comparing Products and Reading Specifications

Photos Flatter, Specifications Inform

Every furniture photograph is taken under professional lighting, usually in a room far larger than most people own. Those conditions rarely match a real Australian apartment, townhouse or family home, so a picture alone can’t tell you whether a piece will suit your space.

The specification sheet is where the useful facts live. It tells you what the photos can’t: how wide, deep and tall the piece really is, what it’s made from, how much it weighs and how it arrives. A table that looks airy online may turn out to have a thick base, while a chair that seems compact may need far more pull-out space than you expected.

Before you start comparing products, collect the same set of details for each candidate. Note the assembled and boxed dimensions, seat and table heights, materials and finishes, weight, care instructions and the delivery and return terms. Put them side by side in one simple list, and you can judge every option fairly against your room plan rather than being swayed by whichever photo looks best.

Specifications That Matter

Specification

Why it matters

Overall dimensions (L × W × H)

The basic fit test

Assembled dimensions

Whether the product fits the room

Boxed dimensions

Whether the product fits through the front door

Product weight

Delivery, handling, stability and floor protection

Apron or underside height

The real limit for knees and chair arms

Tabletop thickness

Reduces the gap beneath the tabletop

Seat height and width

Fit for the table and household

Arm height

Whether armchairs can tuck under the table

Material and finish

Care routine, durability and repairability

Weight rating

Safe use for the household

Assembly requirements

Who assembles it and how completely

Extension mechanism

Whether the extended table still fits

Spare parts

Long-term ownership and repairs

Warranty and return policy

What happens if something goes wrong

Compare Like With Like

Do not compare a photo of one table with a specification sheet for another.

Create a comparison table with the same fields for every product.

Include:

  • Product name.

  • Price.

  • Assembled dimensions.

  • Boxed dimensions.

  • Weight.

  • Materials.

  • Finish.

  • Seat height.

  • Apron height.

  • Weight rating.

  • Assembly.

  • Delivery.

  • Warranty.

  • Return policy.

A product that looks better but fails the measurements is not the better product.

Read Reviews Like a Professional

Reviews are evidence, but noisy evidence.

Read the two- and three-star reviews first.

They often reveal failure modes such as:

  • Wobbling legs.

  • Poor extension mechanisms.

  • Weak hardware.

  • Finish damage.

  • Fabric wear.

  • Difficult assembly.

  • Missing parts.

  • Poor stability.

Search reviews using your own household keywords.

  • “toddler”.

  • “dog”.

  • “cleaning”.

  • “assembly”.

  • “wobble”.

  • “mechanism”.

  • “delivery”.

  • “return”.

Discount reviews that complain only about delivery drama; those may relate to the courier rather than the product.

Order Samples

Screens distort colour and texture.

For any significant purchase, order physical samples where offered.

View samples in your own room’s light.

Check them against:

  • The floor.

  • The wall colour.

  • The table.

  • The existing sideboard.

  • Natural light.

  • Evening lighting.

A sample costs little compared with replacing six chairs or a large table.

Understand the Return Policy

Before paying, check:

  • Who pays return freight.

  • Whether assembled items can be returned.

  • Whether there is a restocking fee.

  • How long the return window lasts.

  • What happens if the item does not fit.

  • What happens if the item arrives damaged.

  • Whether the seller is an Australian business.

A return policy is not pessimism.

It is how a two-dimensional decision becomes reversible.

Price Signals

Within a category, price usually reflects three things:

  • Material honesty: solid timber versus veneer versus print.

  • Construction: joinery, hardware and finishes on hidden surfaces.

  • Service: assembly, warranty, spare parts and returns.

A cheap table is not automatically a bad decision.

It is a decision to replace rather than repair.

Buy the economical version for a life stage you expect to outgrow.

Buy the durable version for a room you intend to keep.

Chapter Summary

Compare specification sheets, not photographs. A photo shows a mood; the sheet shows the facts. Ask for the apron height, seat height, weight and fully extended dimensions, because these are the details that decide whether a piece truly works in your room. If a seller can’t supply them, treat that as a warning sign in itself.

Reviews are worth reading, but go beyond the glowing five-star comments. The middle ratings, around three stars, often describe how a product actually fails: a wobbling leg, a finish that scratches or a delivery that arrived damaged. For a significant purchase such as a dining table, order fabric or timber samples first, then look at them in your own light at different times of day.

Before paying, understand the return rules, including who covers return freight and whether a restocking fee applies, since bulky furniture can be costly to send back. Finally, read the price as a message about what you’re getting. It reflects the material, the construction and the level of service behind the piece, so a very low figure usually means a compromise somewhere.

Chapter 26. Ordering, Delivery and Receiving Furniture

Prepare Before You Order

Before placing an order, confirm:

  • Assembled dimensions.

  • Boxed dimensions.

  • Number of boxes.

  • Weight of each box.

  • Assembly requirements.

  • Delivery level.

  • Return terms.

  • Damaged-goods process.

  • Seller identity.

Do not rely on the product title or photo alone.

Check the Delivery Route

Walk the entire delivery route before ordering a large item.

Check:

  • Street or driveway.

  • Front gate.

  • Front porch.

  • Front door.

  • Hallway.

  • Stairs.

  • Lift lobby.

  • Lift cabin.

  • Corridor.

  • Final room doorway.

  • Final position in the room.

Measure the narrowest point at every stage.

A 90 cm-wide lift door is not helpful if the corridor turn outside it is only 75 cm wide.

Apartments Need Extra Planning

Apartment delivery often has more constraints than house delivery.

Check:

  • Building access hours.

  • Lift booking requirements.

  • Loading dock rules.

  • Parking restrictions.

  • Body corporate requirements.

  • Stairwell width.

  • Corridor corners.

  • Front door clearance.

  • Balcony access, if relevant.

Some buildings require notice before large deliveries.

Others restrict delivery times or require use of a service lift.

Ask About Delivery Before Paying

Ask:

  • Does delivery include room of choice?

  • Does it include stairs or upstairs access?

  • Does it include assembly?

  • Is packaging removal included?

  • What happens if the item does not fit?

  • Who pays return freight?

  • Are there extra charges for apartments, lifts or remote areas?

  • Can delivery be scheduled?

  • What happens if I am not home?

  • What is the process for damaged or missing parts?

Get answers in writing where possible.

Online purchases from Australian businesses carry the same consumer rights as in-store purchases.

Prepare the Room

Before delivery arrives:

  • Clear the destination area.

  • Remove fragile items.

  • Move the rug if necessary.

  • Protect floors along the route.

  • Measure the final position one more time.

  • Check that overhead lights will not interfere with the table or people standing near it.

If you are placing a table beneath a pendant light, make sure the light is installed at the correct height before the table arrives.

Protect Floors and Walls

Large furniture can damage floors, walls and door frames.

Use:

  • Cardboard sheets.

  • Old blankets.

  • Furniture sliders.

  • Corner protectors.

  • Floor runners.

  • Painter’s tape for temporary protection.

Do not drag heavy furniture across timber or tile floors.

Lift it where possible.

Inspect Before Signing

Inspect every box and visible surface before signing for delivery.

Look for:

  • Crushed corners.

  • Water damage.

  • Scratched surfaces.

  • Missing hardware.

  • Broken legs.

  • Damaged upholstery.

  • Missing parts.

Take photos immediately if there is any damage.

It is much easier to resolve an issue when it is documented on delivery day.

If Something Arrives Damaged

If an item arrives damaged:

  1. Do not dispose of the packaging.

  2. Take clear photos.

  3. Note the damage on the delivery document if possible.

  4. Contact the retailer promptly.

  5. Keep all emails, receipts and photos.

  6. Ask for the next steps in writing.

    A damage claim is easier to resolve when evidence is collected immediately.

Chapter Summary

Before you order, compare two sets of numbers: the furniture’s assembled size and the size of the boxes it arrives in. A table that suits the room perfectly may still be too bulky to get through the entrance. Measure every point along the delivery route, including the front door, hallways, stairwells, tight corners and any lift, so there are no surprises on the day.

Ask the seller what delivery actually includes before you pay. Find out whether the driver will carry items upstairs, bring them into the room, remove packaging or assemble anything, and check what the rules are for lifts and returns. A cheap delivery fee can hide extra charges later.

On the day, clear a path, move fragile objects aside and lay protection over your floors. Inspect each item before you sign for it. If you notice a scratch, dent or missing part, photograph it straight away and note it on the paperwork. Keep every receipt, email and delivery document, since they make any later claim far easier to settle.

Chapter 27. Assembly, Placement and Final Checks

Assembly Is Part of the Purchase

Flat-packed furniture is designed to be assembled correctly, not quickly. The engineers behind it plan every hole, dowel and bolt to go together in a particular order, so treating it like a race is the surest way to end up with trouble.

Most assembly problems come from rushing, skipping steps or using the wrong tools. A part gets fixed on the wrong way round, a bolt is fully tightened too early and stops the next panel from lining up, or a screwdriver is swapped for a drill that strips the thread. Each of these mistakes is small at the time, but can mean unpicking half the build later, or leaving a wobble that never quite goes away.

Slow down instead. Lay out the parts, check them against the list, keep the right tools within reach and follow the sequence exactly as written. Leave final tightening until the whole piece is together. A calm, careful hour usually beats a rushed one that needs fixing.

Three habits prevent most problems:

  1. Read the entire instruction manual before starting.

  2. Lay out all parts and hardware before assembling.

  3. Follow the sequence exactly.

Use the Right Tools

Use the supplied tools where possible.

Do not substitute a screwdriver for an Allen key unless the manufacturer says it is safe.

Use a drill only where the instructions specifically allow it.

Overtightening can strip screws, crack boards or damage engineered materials.

Assemble Large Frames Carefully

For larger frames, leave screws slightly loose until the piece stands square.

Then tighten them in order.

This prevents a table or chair from being assembled out of alignment.

A badly assembled table can wobble for its entire life.

Check Hardware

Before assembly, count:

  • Screws.

  • Bolts.

  • Dowels.

  • Brackets.

  • Feet.

  • Washers.

  • Tools.

  • Instructions.

If anything is missing, contact the retailer before starting.

Do not substitute random hardware.

Place Large Furniture With Two People

Do not move a large table, sideboard or display cabinet alone.

Use two people, furniture sliders, protective blankets and a clear path.

Lift rather than drag whenever possible.

Heavy furniture can cause back injuries, floor damage and damaged door frames.

Position Before Styling

Once the piece is assembled, place it in its final position before adding décor.

Then repeat the clearance test:

  • Pull out every chair.

  • Walk every route.

  • Open every drawer.

  • Open every door.

  • Check that the table does not block a pathway.

Only then add the rug, centrepiece, artwork and accessories.

Check Level and Stability

A table should not rock.

Check:

  • Whether the legs sit evenly.

  • Whether the frame flexes.

  • Whether adjustable feet are needed.

  • Whether the base feels proportionate to the top.

  • Whether the extension mechanism locks securely.

Australian homes can have uneven floors, especially older houses.

Adjustable feet can be a small but valuable feature.

Keep Furniture Away From Heat and Sun

Do not place timber furniture immediately beside a heater, fireplace or air-conditioning outlet.

Avoid constant direct afternoon sun.

Heat, dryness and sunlight can age finishes and stress timber joints.

Use blinds, curtains or external shading where possible.

Final Placement Checklist

  • The product fits the room.

  • The delivery route was clear.

  • All hardware is installed.

  • The product is level.

  • Chairs can be pulled out.

  • Doors and drawers open fully.

  • Walkways remain clear.

  • The product is stable.

  • The product is protected from heat and harsh sun.

  • Floor protectors are installed.

Chapter Summary

Read the manual all the way through before you pick up a single screw. It shows the order of assembly, lists every part and often warns about steps that are hard to undo. Check the parts against the list, use the tools it recommends and follow the sequence as written. Skipping ahead or forcing a joint is how wobbly legs and cracked panels happen.

Large pieces such as tables and sideboards should be moved and placed by two people, which protects both your back and the furniture. Position everything first, then style it. Once the table, chairs and storage are in their final spots, repeat your clearance tests: pull out a chair, open a drawer, swing a door and walk past with a tray, so any problem shows up before the room is dressed.

Finally, look after the timber. Keep it away from direct heat sources such as heaters, avoid very dry air and shield it from harsh afternoon sun, which can fade the finish or cause warping and cracks over time.

Chapter 28. Installation Checkpoints by Product Category

Use This as a Handover Checklist

This chapter turns the earlier advice into a practical installation checklist, so you can check each step instead of trying to remember everything at once. It’s designed to be used at three key moments: on delivery day, during assembly and after final placement.

On delivery day, the checklist helps you confirm the route is clear, inspect every carton and item before signing, and photograph any damage while the driver is still there. During assembly, it keeps you on track by reminding you to read the manual, check the parts list and follow the sequence with the right tools. Once the furniture is in position, it guides your final tests, such as checking that the table sits level, chairs pull out freely and drawers open fully.

Work through it in order, tick off each item and keep your notes and photos together. That way, if anything does go wrong, you will already have the evidence you need.

Dining Tables

  • The table fits the room with clearance on every side.

  • The tabletop is level.

  • The legs sit evenly on the floor.

  • The frame does not wobble.

  • Adjustable feet are installed if needed.

  • The extension mechanism opens smoothly.

  • The extension locks securely.

  • The extended table still leaves adequate clearance.

  • Floor protectors are installed under every leg.

  • The table is clear of heaters, vents and harsh direct sun.

Dining Chairs

  • Seat height matches the table and apron.

  • There is 25–30 cm between seat and lowest obstruction.

  • Chairs tuck under the table.

  • Chairs can be pulled out without hitting walls.

  • Armchairs clear the apron.

  • Chair legs are stable.

  • Joints do not flex.

  • Floor glides or felt pads are installed.

  • Chairs are stable when someone leans back gently.

  • Chairs are not used as ladders or climbing frames.

Dining Benches

  • Bench seat height matches the table.

  • The bench fits beneath the table.

  • The table base does not block it.

  • The bench does not block a walkway.

  • The bench feels stable when people move along it.

  • Weight capacity is appropriate.

  • Floor protectors are installed.

  • The material suits the household.

  • The bench works with at least one other seating type.

Bar Stools and Counter Stools

  • Stool seat height matches the island or bar.

  • There is 25–30 cm between seat and underside.

  • The overhang is deep enough for knees.

  • Each stool has about 60–66 cm of benchtop edge.

  • Stools can be pulled out without blocking a walkway.

  • Footrests are at a useful height.

  • The base is broad and stable.

  • Swivel mechanisms move smoothly.

  • Weight ratings are appropriate.

  • Floor protectors are installed.

Buffets, Sideboards and Display Cabinets

  • The cabinet fits the wall with breathing space.

  • The cabinet does not block circulation.

  • Drawers open fully.

  • Doors open without hitting furniture.

  • The cabinet is level.

  • The cabinet is stable.

  • Tall pieces are anchored where appropriate.

  • Power access is safe and practical.

  • Cables do not cross walking routes.

  • The top has enough clear space for serving.

Lighting

  • The pendant is centred over the table.

  • The bottom of the fixture sits about 75–90 cm above the tabletop.

  • The light does not interfere with sightlines.

  • Bulbs are warm white rather than harsh cool white.

  • Glare is controlled.

  • Dimming is available where possible.

  • Hard-wired work has been completed by a licensed electrician.

  • All fittings are secure.

Final Room Walk-Through

Before declaring the project complete, walk through the room as if it were a busy dinner night.

Ask:

  • Can someone carry a hot dish from the kitchen?

  • Can a guest stand and leave the table easily?

  • Can two people pass in the main walking lane?

  • Do all chairs pull out cleanly?

  • Do all drawers and doors open?

  • Does the rug stay flat?

  • Does the room feel balanced?

  • Is there enough empty space for daily life?

If every answer is yes, the dining zone is ready to use.

Chapter Summary

Once everything is in the room, run a short checklist for each type of product before you start styling.

Start with the table. Make sure it sits level, doesn’t rock when you lean on it, and that any extension leaf slides out and locks in smoothly. Fit protective pads under the feet if the floor is easily marked.

Next, the chairs. Sit in each one and confirm the seat height leaves enough gap beneath the table’s apron for your legs. Check that the glides are fitted, so the chairs move easily without scratching the floor.

For a bench, push it fully under the table to confirm it clears the base and the tabletop, then sit on it and give it a gentle shake to test its stability.

Stools need a similar check. Make sure the seat height suits the benchtop, the footrest is within easy reach and the base stays steady when someone climbs on or off.

With storage, open every drawer and swing every door to see that nothing collides with a chair or a wall. Tall units should be anchored to the wall.

Finish with a final walk-through of the whole zone. Only when everything passes is it time to add the rug, lighting and styling.

Part 7 — Living With the Room

Part Introduction

A dining room isn’t finished on delivery day. Its real value is earned over years of everyday life: family meals, visiting guests, homework spread across the table, pets weaving between chair legs, regular cleaning and the occasional small repair. A piece that looks wonderful when it arrives still has to cope with all of that.

Part 7 is about the long game. It helps you protect the furniture you’ve chosen, with simple habits for cleaning, protecting surfaces, tightening joints and keeping timber and fabric in good condition. It also prepares you for the moments when something does go wrong, such as a wobbly leg, a stubborn stain, a scratch or a faulty part. Instead of panicking, you’ll know what to check, what you can fix yourself and when to contact the seller or a professional.
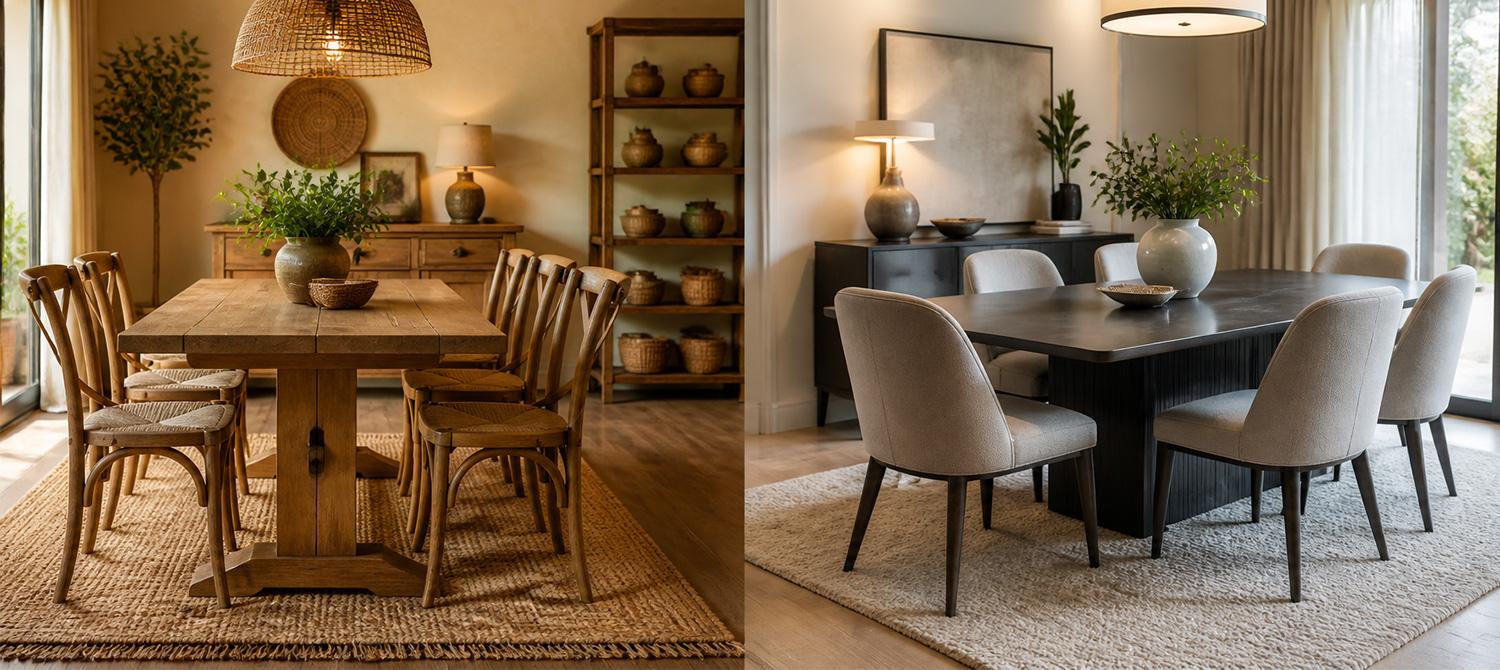
With a little ongoing care and a calm approach to problems, the pieces you’ve worked so hard to plan and choose can stay useful and good-looking for many years.

Chapter 29. Caring for Dining Furniture in the Australian Climate

Timber Responds to Its Environment

Even after it has been cut, shaped and finished into furniture, timber keeps responding to the air around it. When the weather is humid, it absorbs moisture and swells slightly. When the air turns dry, it releases that moisture and shrinks back. Over a year, this steady give and take can cause small movements at the joints, tiny gaps along the boards and subtle changes to how the surface finish looks.

This is normal, and it doesn’t mean your table is faulty. It is simply how a natural material behaves, and a solid timber top will often be a little livelier than an engineered one.

It does mean that placement and care matter, particularly in Australia, where the climate ranges from humid coastal summers to dry inland heat. Keep timber away from air-conditioning vents, heaters and windows that bake in afternoon sun, and try to hold the room at a fairly steady temperature. Wipe up spills promptly, and if a joint loosens after a big seasonal change, a gentle tightening is often all it needs.

Keep Conditions Stable

The Australian Institute for the Conservation of Cultural Material notes that low relative humidity can cause wood to dry and shrink, while high humidity can introduce dampness and cause expansion. Stable conditions are better than frequent swings.

For general timber care, a stable environment around roughly 40–60% relative humidity is commonly recommended, with gradual rather than sudden changes.

Most homes cannot precisely control humidity.

That is fine.

The practical goal is to avoid placing timber in the most extreme spots in the home.

Avoid the Worst Locations

Do not place a timber dining table:

  • Directly beside a heater.

  • In front of an air-conditioning vent.

  • Against an external wall that becomes hot or damp.

  • In constant direct afternoon sun.

  • Near a fireplace.

  • In a damp, poorly ventilated corner.

  • Directly beneath a leaking roof or condensation-prone window.

These locations expose the table to repeated heat, dryness, moisture or temperature change.

If the room has no alternative, use blinds, curtains, ventilation and protective finishes to reduce the impact.

Protect the Surface Daily

Small habits prevent most long-term damage.

  • Use coasters under glasses and mugs.

  • Use placemats or a runner for hot dishes.

  • Wipe spills promptly.

  • Avoid leaving wet cloths on the surface.

  • Use trivets for hot pots and pans.

  • Keep sharp objects away from the surface.

  • Dust with a soft, dry cloth.

A table does not need to be treated like a museum piece.

It needs consistent, sensible care.

Clean According to the Finish

The correct cleaning method depends on the finish.

Finish

Daily care

Spills

Avoid

Oiled timber

Soft dry cloth

Blot immediately, then wipe and dry

Harsh detergents, standing water

Lacquered timber

Soft dry or slightly damp cloth

Wipe promptly

Abrasive cleaners, excessive water

Veneer

Soft dry cloth

Wipe promptly

Water pooling near edges

Laminate

Damp microfibre cloth

Wipe clean

Abrasive pads, sharp objects

Marble

Soft cloth, pH-neutral cleaner

Blot immediately

Wine, citrus, vinegar, tomato

Sintered stone or ceramic

Damp cloth

Wipe clean

Heavy impacts at edges

Glass

Microfibre cloth

Wipe clean

Abrasive cleaners, hard impacts

Always follow the manufacturer’s instructions for the specific product.

An oiled table may need periodic re-oiling.

A lacquered table generally should not be oiled.

Sunlight and Fading

Australian sunlight is strong enough to fade fabrics, finishes and timber over time.

If your table receives direct sun:

  • Use blinds or curtains during the brightest part of the day.

  • Rotate table runners, placemats and centrepieces occasionally.

  • Avoid leaving objects in one place for months.

  • Consider a UV-protective film on nearby windows if fading is severe.

Fading is often gradual, which makes it easy to miss until the difference becomes obvious.

Heat and Cold

Do not place hot cookware directly on the surface.

Use trivets, boards or heat-resistant mats.

This applies to timber, veneer, laminate, stone and synthetic surfaces.

Even a surface described as heat-resistant can be damaged by sudden extreme heat.

Avoid placing the table directly against a heater or fireplace.

Repeated heat can dry timber and stress joints.

Humidity and Ventilation

In humid regions or during wet weather, ventilation matters.

Avoid pushing a timber table tightly against a damp external wall.

Leave a small gap to allow air movement.

In dry inland conditions or during winter heating, timber may dry out.

Avoid placing it directly beside a heat source.

The aim is not perfect humidity control.

The aim is avoiding repeated extremes.

Upholstery Care

Check the cleaning code before applying any product to upholstery.

Code

Meaning

Practical use

W

Water-based cleaning is safe

Easiest for family households

S

Solvent-based cleaning only

Avoid water; more care required

W/S or WS

Either water-based or solvent-based cleaning is suitable

Flexible, but test first

X

Vacuum or light brushing only

No water or solvent; hardest to maintain

Using the wrong cleaner can cause watermarks, shrinkage, colour loss or texture damage.

Blot spills rather than rubbing them.

Test any cleaning product on a hidden area first.

Tighten Hardware Regularly

Tables loosen with use.

Chairs are pulled out, people lean on the table, children climb, and the structure absorbs small movements every day.

Once a month, check:

  • Table leg bolts.

  • Extension mechanism screws.

  • Pedestal connections.

  • Crossbars.

  • Chair-to-table contact points.

  • Floor glides.

Tighten only as needed.

Do not overtighten, especially in particleboard or engineered construction.

Repair Small Problems Early

A small scratch is easier to manage than a deep gouge.

  • Blot spills immediately.

  • Sand and refinish solid timber where appropriate.

  • Use manufacturer-approved repair products.

  • Replace missing floor glides.

  • Address wobbles before they worsen.

  • Repair veneer edges before moisture gets in.

A table that is maintained early usually stays usable for many more years.

When a Table Is Worth Repairing

Repair makes sense when:

  • The structure is sound.

  • The material is solid timber or high-quality veneer.

  • The damage is cosmetic.

  • The table has sentimental or design value.

  • The repair costs less than replacement.

Replacement may make more sense when:

  • The structure is failing.

  • The surface is badly swollen.

  • The table no longer fits the household.

  • The damage is extensive.

  • The product was low-cost and cannot be economically repaired.

Buy for a Reasonable Lifespan

Australian Consumer Law expects goods to be safe, durable, free from defects and suitable for their normal purpose.

There is no fixed lifespan for every product, but durability is assessed in the context of the price paid, the type of goods and any claims made by the seller.

In practical terms, a more expensive solid-timber table should be expected to last longer than a low-cost basic table.

But a budget table can still meet consumer guarantees if it performs acceptably for its price, intended use and stated quality.

Buy the durable option when you expect to keep the table for many years.

Buy the economical option when you expect your needs to change.

Chapter Summary

Timber keeps reacting to humidity and temperature for as long as it’s in your home, so where the table stands matters. Keep it away from heaters, air-conditioning vents, fireplaces, damp walls and harsh direct sun, all of which can dry, swell or fade the surface unevenly.

Everyday habits do most of the protecting. Coasters, trivets and placemats guard against heat rings, moisture marks and scratches, and they cost far less than refinishing a tabletop. When it comes to cleaning, follow the finish rather than the material label. An oiled timber top, a lacquered one and a laminate surface each need different products, and the wrong cleaner can strip or cloud the finish. Check the care sheet for the finish before you wipe.

Make a monthly habit of tightening the hardware, since screws and bolts loosen gradually as timber moves, and fix small problems early, before a minor wobble becomes a damaged joint.

If something does fail, remember that Australian consumer guarantees focus on acceptable quality, safety, durability and fitness for purpose. Normal seasonal movement is expected, but a defect that shouldn’t appear within a reasonable lifespan may be covered.

Chapter 30. Maintenance Calendar

Maintenance Should Be Small and Frequent

Dining rooms age well on a simple rhythm of small habits. You don’t need a dramatic annual clean or a long list of chores. What works is frequent, low-effort care that fits easily into daily life, such as wiping the table after meals, giving chairs a quick wobble test and tightening a loose screw when you notice it.

The goal is to stop small problems before they grow. A tiny water ring, a slightly loose joint or a worn glide takes seconds to fix when it first appears, but left alone it can turn into a stained tabletop, a damaged chair or a scratched floor. A few minutes of attention now saves far more time and money later, and keeps the room looking its best for years.

After Every Meal

  • Clear crumbs from the table.

  • Wipe spills promptly.

  • Remove wet cloths or damp placemats.

  • Check for hot dishes placed directly on the surface.

  • Put rubbish and packaging where it belongs.

Weekly

  • Damp-wipe the table according to its finish.

  • Wipe chair frames and seats.

  • Vacuum the rug and the floor beneath it.

  • Check for crumbs under the table.

  • Check for visible scratches or marks.

Monthly

  • Tighten chair bolts and table hardware.

  • Check extension mechanism screws.

  • Inspect pedestal connections.

  • Check floor glides and felt pads.

  • Rotate or wash removable covers.

  • Check for wobbles or movement.

Seasonally

  • Re-oil or re-wax finishes where the manufacturer calls for it.

  • Deep-clean upholstery according to its cleaning code.

  • Rotate rugs or cushions exposed to uneven sunlight.

  • Check ventilation around external walls.

  • Inspect for swelling, shrinking or finish wear.

Yearly

  • Check felt pads on every chair leg.

  • Inspect for wobbles, splits or finish wear.

  • Check extension mechanisms.

  • Inspect floor protection.

  • Replace worn hardware.

  • Address small repairs before they grow.

Maintenance Calendar

Cadence

Tasks

After every meal

Crumb-clear the table; wipe spills promptly

Weekly

Damp-wipe table and chairs; vacuum rug and under it

Monthly

Tighten chair bolts and table hardware; rotate or wash covers

Seasonally

Re-oil or re-wax where required; deep-clean upholstery

Yearly

Check felt pads, wobbles, splits and finish wear

Habits That Extend Furniture Life

  • Use place mats and coasters as heat and moisture insurance.

  • Lift chairs rather than dragging them.

  • Use felt pads under every leg.

  • Keep the rug pad in place.

  • Blot stains rather than rubbing them.

  • Check cleaning codes before applying products.

  • Keep furniture away from heat sources and harsh direct sun.

Chapter Summary

Good maintenance is small and frequent rather than rare and dramatic. A few minutes of regular care keeps furniture looking good far longer than one big rescue effort every few years.

A simple rhythm works well. Wipe the table after meals, before crumbs and spills have time to settle into the surface. Tighten the hardware once a month, since screws and bolts loosen gradually as timber moves. Then give everything a proper deep clean with the change of each season, including the corners, chair joints and the underside of the table where dust collects.

For each of these jobs, follow the manufacturer’s instructions for your specific finish. An oiled top, a lacquered one and a laminate surface all call for different products, and the wrong cleaner can leave a cloudy or damaged patch.

Finally, build the room on a neutral base of timber, soft tones and quiet shapes. When the big pieces stay calm, redecorating becomes easy and affordable, because a fresh look only needs new cushions, a different rug or a change of art.

Chapter 31. Troubleshooting Common Problems

Wobbling Tables

A wobbling table is annoying and can worsen over time.

Check:

  • Whether the floor is uneven.

  • Whether the legs are loose.

  • Whether adjustable feet are needed.

  • Whether the frame has flexed.

  • Whether the extension mechanism is secure.

Tighten hardware only as needed.

Use adjustable feet if the floor is uneven.

Do not force a table flat by overtightening screws.

Scratched Floors

Floor scratches often come from hard chair legs or missing glides.

Check:

  • Whether every chair leg has a glide.

  • Whether glides have worn out.

  • Whether grit is trapped under the pads.

  • Whether chairs are being dragged.

  • Whether the floor type needs a different protector.

Replace worn pads promptly.

Lift chairs rather than dragging them.

Chairs That Do Not Fit

A chair may look right but fail because of the table’s apron or leg placement.

Check:

  • Seat height.

  • Apron height.

  • Table leg spacing.

  • Chair overall width.

  • Arm height.

  • Pull-out space.

If the chair cannot tuck under the table, it may need to be replaced or used elsewhere.

Do not assume that all chairs fit all tables.

Stools That Are Too High or Too Low

A stool that is too high causes knees to press into the benchtop.

A stool that is too low makes the sitter reach upward.

Check:

  • Underside height of the overhang.

  • Target stool seat height.

  • Stool cushion compression.

  • Footrest height.

  • Overhang depth.

The practical rule is to leave about 25–30 cm between the seat and the underside of the counter or bar.

Drawers That Catch

Drawers can catch because of swelling, misalignment or worn runners.

Check:

  • Whether the cabinet is level.

  • Whether humidity has caused swelling.

  • Whether runners are worn.

  • Whether screws are loose.

  • Whether the drawer is overloaded.

Do not force a swollen drawer.

Address humidity and alignment first.

Upholstery Stains

Check the cleaning code before applying anything.

  • W: water-based cleaning is safe.

  • S: solvent-based cleaning only.

  • W/S or WS: either method may be suitable.

  • X: vacuum or light brushing only.

Blot spills rather than rubbing them.

Test any product on a hidden area first.

Fading Surfaces

Fading is often caused by uneven sunlight.

Check:

  • Which areas receive direct sun.

  • Whether blinds or curtains are needed.

  • Whether objects have been left in one place too long.

  • Whether finishes are UV-stable.

  • Whether cushions or runners need rotating.

Rotate items occasionally to even out exposure.

Extension Mechanisms That Stick

Extension mechanisms can stick because of swelling, misalignment or loose hardware.

Check:

  • Whether the table is level.

  • Whether screws are loose.

  • Whether humidity has caused swelling.

  • Whether runners are clean.

  • Whether the leaf is aligned.

Do not force a mechanism.

Follow the manufacturer’s instructions.

When to Repair and When to Replace

Repair makes sense when:

  • The structure is sound.

  • The damage is cosmetic.

  • The material can be repaired.

  • The repair costs less than replacement.

  • The table has design or sentimental value.

Replacement makes sense when:

  • The structure is failing.

  • The surface is badly swollen.

  • The damage is extensive.

  • The product no longer fits the household.

  • The repair is not economical.
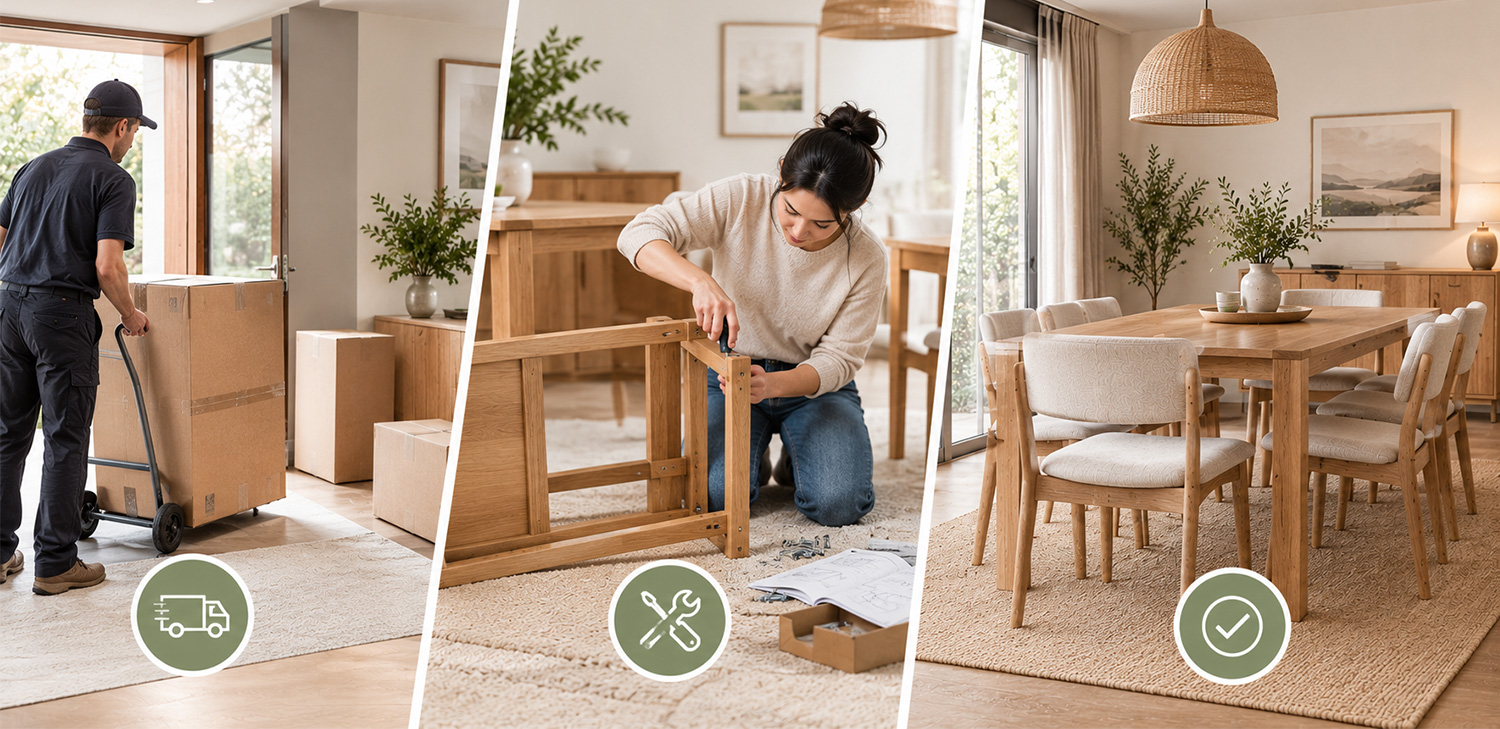
Chapter Summary

Most common furniture problems have a simple cause, so start with the basics before assuming anything is seriously wrong. A wobbling table is often just sitting on an uneven floor or has a loose bolt. Check four things first: whether the piece is level, whether the hardware is tight, whether recent humidity has swollen the timber, and whether floor protectors are fitted and intact.

If a drawer or extension mechanism sticks, don’t force it. Pulling hard can crack runners or split joints. Instead, look for the cause, which is often swelling after humid weather, and let the timber settle or ease the part gently. A dry candle or wax stick rubbed along a runner can help.

For upholstered chairs, check the cleaning code on the label before you treat a stain, since the wrong product can leave a ring or damage the fabric.

Whatever the fault, repair small problems early. A loose screw takes a minute to fix, while a wobble left alone can loosen the joint for good. Replace a piece only when repair is no longer economical, such as when the cost approaches the price of a new item or the structure itself has failed.

Chapter 32. After-Sales, Repairs and Dispute Preparation

Know Your Rights Before You Need Them

In Australia, goods bought from a business generally come with automatic consumer guarantees under Australian Consumer Law. You don’t have to apply for them or pay extra. They exist the moment you make the purchase, and they cover things like acceptable quality, safety, durability and whether the item matches its description.

These guarantees are separate from any voluntary warranty offered by the seller. A warranty is an optional extra promise, and it sits on top of your legal rights rather than replacing them. Even if a warranty has run out, or its fine print excludes your particular problem, your consumer guarantee rights may still apply.

They also can’t simply be switched off by a “no refunds” sign or a store policy. A shop can set its own rules for change-of-mind returns, but it cannot take away your right to a repair, replacement or refund when a product has a genuine fault. If a seller pushes back, calmly point to your consumer guarantees, keep your receipts and photos as evidence, and contact your state or territory consumer protection agency if the problem isn’t resolved.

In practical terms, goods should be:

  • Of acceptable quality.

  • Safe.

  • Durable.

  • Free from defects.

  • Fit for their intended purpose.

  • As described.

A warranty is an additional promise made by the seller or manufacturer.

It does not replace consumer guarantee rights.

Major and Minor Problems

The remedy depends on whether the problem is major or minor.

A problem may be major when:

  • The product cannot be fixed.

  • It cannot be fixed within a reasonable time.

  • It is unsafe.

  • It is significantly different from the description.

  • It has a serious defect.

  • It cannot be used for its intended purpose.

For a major problem, consumers may generally choose a replacement or refund.

For a minor problem, the business may first be entitled to repair or replace the product.

Even then, the business must provide a remedy within a reasonable time.

Gather Evidence

Before contacting the retailer, gather:

  • Order confirmation.

  • Tax invoice.

  • Product listing.

  • Specification sheet.

  • Delivery confirmation.

  • Photos of the item.

  • Photos or videos of the problem.

  • Assembly instructions.

  • Warranty documents.

  • Emails with the retailer.

Clear evidence makes a claim much easier.

Contact the Seller in Writing

A written complaint creates a record.

Include:

  • Order number.

  • Purchase date.

  • Product name.

  • A clear description of the problem.

  • Photos or videos.

  • The outcome you are seeking.

  • A reasonable deadline for response.

Keep the tone calm and factual.

Avoid vague statements such as “it is broken”.
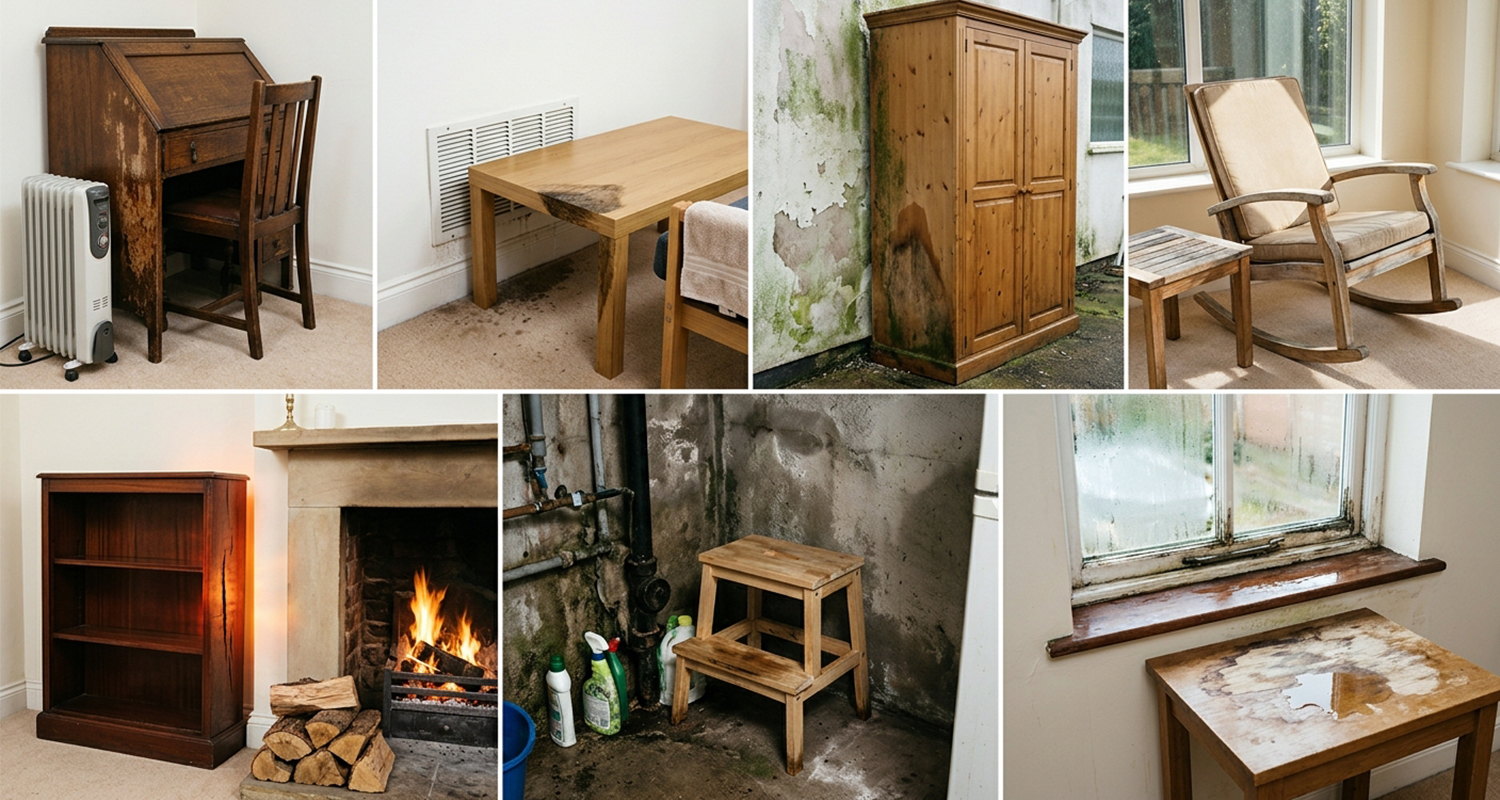
Explain what happened, when it happened and why it does not meet the expected quality or description.

A Simple Complaint Structure

  1. State what you bought and when.

  2. Describe the problem clearly.

  3. Explain what you have already tried.

  4. Attach photos, videos or receipts.

  5. State whether the issue is major or minor.

  6. State the remedy you are seeking.

  7. Ask for a response by a reasonable date.

Example Complaint

“I purchased a dining table on [date], order number [number]. The table has developed a wobble after normal use. I have checked the floor and tightened the visible hardware, but the issue remains. As the table is not stable for normal dining use, I am requesting a repair or replacement under Australian Consumer Law. I have attached photos and my tax invoice.”

Repair, Replacement or Refund

For a major problem, consumers may generally choose a replacement or refund.

For a minor problem, the seller may first be entitled to repair or replace the product.

A warranty may offer additional coverage, but it does not replace consumer guarantee rights.

Do not accept “it is out of warranty” as the end of the conversation if the product has failed prematurely or does not meet consumer guarantees.

Escalate Calmly

If the seller does not respond or does not offer a reasonable remedy:

  1. Keep all records.

  2. Restate your request in writing.

  3. Set a reasonable deadline.

  4. Refer to the relevant consumer guarantee.

  5. Contact the appropriate consumer protection agency if needed.

  6. Avoid disposing of the product until the claim is resolved.

  7. A documented, calm complaint is more effective than an angry phone call.

Online Purchases

When you buy from an Australian business operating online, your usual Australian Consumer Law rights apply, including rights to a repair, replacement or refund when a consumer guarantee is not met.

Before buying online, check:

  • The seller’s identity.

  • Australian business details.

  • Contact information.

  • Delivery terms.

  • Return process.

  • Warranty information.

  • Product specifications.

  • Total price.

  • Payment security.

If buying from an overseas business, enforcement can be more difficult.

Product Safety

Furniture safety is part of acceptable quality.

From 4 May 2025, Australia’s mandatory information standard for toppling furniture requires suppliers to provide safety warnings online and in-store, attach permanent warning labels to relevant furniture, and include safety information in instruction manuals.

If a product is unstable, stop using it.

Follow the manufacturer’s anchoring advice and use appropriate fixings for the wall type.

Chapter Summary

Under Australian Consumer Law, consumer guarantees are automatic rights, while a warranty is only an extra promise from the seller or manufacturer. Furniture should be safe, durable, fit for its purpose and match the description you were given. If it doesn’t, the remedy depends on how serious the fault is. A minor fault is usually fixed by repair, while a major one can entitle you to a replacement or refund.

If something goes wrong, start by gathering evidence. Take clear photos of the problem, and collect your receipt, order confirmation and any delivery documents. Then contact the seller in writing, so there is a record of what was said. Describe the fault, explain why it breaches the guarantees, and state the outcome you want, whether that is a repair, replacement or refund.

Give the seller a reasonable chance to respond. If they don’t offer a fair remedy, escalate calmly, first by following up in writing and then by contacting your state or territory consumer protection agency.

Safety matters throughout. Follow the warnings supplied with each piece, and anchor tall or unstable furniture to the wall wherever required, especially in homes with children.

Part 8 — Practical Support System

Part Introduction

A good furniture retailer does more than sell products. It helps homeowners make better decisions before they buy, receive their furniture safely, set it up correctly and sort out any problems calmly. The sale is only one moment in a much longer relationship between the brand and the household.

Part 8 turns the planning principles from this guide into a practical support system. It shows how measuring tools, clear specification sheets, delivery guidance, care instructions and a fair, easy-to-follow problem process can be built into a retailer’s everyday service, rather than left for customers to work out alone.

This system is designed for an Australian furniture brand such as LivaraHome. Because it rests on the same steps a careful shopper would follow, it works for both sides. Customers feel confident choosing and living with their pieces, while the brand earns trust, fewer returns and the kind of reputation that brings people back for their next room.

Chapter 33. Before-You-Buy Support Workflow

Support Starts Before Checkout

Most furniture problems can be prevented before payment. Measuring the room, checking delivery access, reading the full specifications and asking about returns all take little effort, yet they stop the common surprises: a table that won’t fit, a chair that clashes with the apron, or a piece that never makes it through the door.

The most common issues are:

  • The product does not fit the room.

  • The product cannot enter the home.

  • The colour or material looks different in person.

  • The customer does not understand assembly requirements.

  • The customer does not understand care requirements.

  • The customer does not understand delivery inclusions.

  • The customer does not understand return terms.

A before-you-buy workflow prevents these issues before they become complaints.

Room Measurement Review

Help the customer check whether the product will fit.

Ask for:

  • Room length.

  • Room width.

  • Ceiling height.

  • Door widths.

  • Window positions.

  • Existing furniture dimensions.

  • Traffic routes.

  • Preferred table position.

Then compare those measurements with the product’s assembled dimensions.

A product should not be recommended simply because it fits between walls.

It should fit the way people move through the room.

Product Suitability Check

Help the customer choose a product that suits their household.

Ask:

  • How many people eat together on a normal day?

  • How often do they host guests?

  • Do children use the table?

  • Do pets share the space?

  • Will the table be used for work or study?

  • Do they prefer fixed or extendable furniture?

  • Do they need easy-clean materials?

Use the answers to recommend a sensible category, not just a specific product.

For example, a family with young children may need a durable, easy-clean surface and stable seating.

Delivery Access Check

Before confirming an order, check the delivery route.

Ask for:

  • Street access.

  • Front gate width.

  • Front porch size.

  • Front door width.

  • Hallway width.

  • Stair width.

  • Lift door width.

  • Lift cabin dimensions.

  • Corridor corners.

  • Final room access.

Compare the product’s boxed dimensions with the narrowest point on the route.

A table that cannot enter the home is not a table the customer owns.

Material and Care Advice

Help the customer choose a material that matches their cleaning reality.

Explain:

  • Solid timber needs protection from heat, water and sun.

  • Veneer cannot usually be sanded back repeatedly.

  • Laminate is easy to clean but difficult to repair.

  • Marble is sensitive to acidic food and drinks.

  • Sintered stone, ceramic and porcelain are practical for busy families.

  • Upholstery cleaning depends on the fabric code.

Do not oversell a material as maintenance-free.

Explain the care routine honestly.

Sample Requests

Offer physical samples where possible.

Samples help customers check:

  • Timber tone.

  • Fabric colour.

  • Texture.

  • Finish.

  • How the material looks in their own light.

  • How the material relates to existing furniture.

Screens are unreliable for colour and texture.

A sample reduces uncertainty before a large purchase.

Specification Clarification

Make full specifications easy to find.

Include:

  • Assembled dimensions.

  • Boxed dimensions.

  • Weight.

  • Materials.

  • Finish.

  • Seat height.

  • Apron height.

  • Weight rating.

  • Assembly requirements.

  • Cleaning instructions.

  • Warranty terms.

  • Delivery terms.

  • Return policy.

If a customer asks for a specification, provide it clearly.

Do not make them buy blind.

Before-You-Buy Support Workflow

  • Customer shares room dimensions and photos.

  • Retailer checks room fit and clearance.

  • Retailer asks about household needs.

  • Retailer recommends suitable categories.

  • Retailer confirms material and care expectations.

  • Retailer checks delivery access.

  • Retailer offers samples where available.

  • Retailer provides full specifications.

  • Retailer confirms warranty and return terms.

  • Customer makes an informed purchase.

Customer Service Scripts

Use these questions before recommending a product.

  • “What are the room’s length, width and ceiling height?”

  • “Which walls have doors or windows?”

  • “How many people eat at the table on a normal day?”

  • “How often do you host guests?”

  • “Do you have children or pets?”

  • “Will the table be used for work or study?”

  • “What is the narrowest door or corridor on the delivery route?”

  • “Would you like a timber or fabric sample before ordering?”

Chapter Summary

Good support begins well before checkout. When a customer first shows interest, the brand’s job is to understand the room they are buying for, not just the product they have clicked on. That means asking about the room measurements, who lives in the home and how the space is used, and whether the delivery route can handle the size of the boxes.

From there, recommendations should follow the customer’s room plan rather than simply whatever looks best in a photo. A slimmer table for a narrow townhouse or a bench for a family that eats casually will serve the customer better than the most popular item in the range.

Honesty matters too. Be upfront about how each material behaves, what care it needs and where it has limits, such as timber reacting to humidity or pale fabric showing marks. Offer fabric and timber samples, and publish full specifications so the customer can compare fairly.

The aim is simple: help people avoid surprises about fit, access and maintenance, so the furniture they receive is the furniture they expected.

Chapter 34. Delivery and Installation Support Workflow

Delivery Day Is Part of the Customer Experience

A large furniture purchase doesn’t end at checkout. It ends when the product is standing correctly in the room, assembled properly and positioned with enough space around it for people to move comfortably. Until then, the job is only half done, however carefully the item was chosen.

A good delivery workflow makes that finish line much easier to reach. Confirming access routes beforehand, reminding customers to clear a path, inspecting items on arrival and guiding assembly step by step all help catch problems while they are still small. Fewer pieces arrive damaged or in the wrong place, and fewer customers are left confused about what to do next.

The payoff goes to both sides. Customers enjoy their furniture without a stressful first day, while the retailer sees fewer complaints, fewer disputes and fewer costly returns.

Pre-Delivery Checklist

  • Confirm delivery address and access.

  • Check lift, stairs, corridors and parking.

  • Confirm delivery window.

  • Confirm whether assembly is included.

  • Confirm whether packaging removal is included.

  • Confirm contact details.

  • Send the customer a preparation checklist.

For apartments, confirm building access rules and lift booking requirements.

Customer Preparation Checklist

  • Clear the destination area.

  • Remove fragile items.

  • Move the rug if necessary.

  • Protect floors along the route.

  • Measure the final position one more time.

  • Check that overhead lights will not interfere with the table or people standing near it.

  • Ensure someone is home to receive the delivery.

If the customer is placing a table beneath a pendant light, the light should be installed at the correct height before the table arrives.

Delivery Day Checklist

  • Confirm the number of boxes.

  • Check external packaging for damage.

  • Photograph any damage before opening boxes.

  • Inspect visible surfaces after unpacking.

  • Check that all hardware and instructions are included.

  • Assemble according to the product sequence.

  • Position the product in its final location.

  • Repeat clearance tests.

  • Remove packaging only after the customer is satisfied.

Do not dispose of packaging until the customer has confirmed the item is acceptable.

Assembly Support

Offer assembly support where appropriate.

For complex, heavy or valuable items, professional assembly can prevent problems.

Assembly support should include:

  • Clear instructions.

  • Correct tools.

  • Hardware checklist.

  • Safe lifting guidance.

  • Level and stability check.

  • Floor protector installation.

A badly assembled table can wobble for its entire life.

Placement Support

Help the customer place the product correctly.

Check:

  • Clearance around the table.

  • Chair pull-out space.

  • Walking routes.

  • Door swings.

  • Drawer extension space.

  • Distance from heaters and vents.

  • Distance from harsh direct sun.

A product should not block a doorway, walkway or appliance.

Damage Reporting

If an item arrives damaged:

  1. Do not dispose of the packaging.

  2. Take clear photos.

  3. Note the damage on the delivery document if possible.

  4. Contact the retailer promptly.

  5. Keep all emails, receipts and photos.

  6. Ask for the next steps in writing.

A damage claim is easier to resolve when evidence is collected immediately.

Installation Support Workflow

  1. Confirm delivery details before dispatch.

  2. Send the customer a preparation checklist.

  3. Confirm access on delivery day.

  4. Inspect packaging and product.

  5. Assemble according to instructions.

  6. Position the product.

  7. Repeat clearance tests.

  8. Photograph any damage.

  9. Remove packaging only after acceptance.

Customer Service Scripts

  • “Before delivery, please measure the narrowest door, hallway and lift on the route.”

  • “Please clear the destination area and protect floors along the delivery path.”

  • “Please inspect the packaging before signing for delivery.”

  • “If there is any damage, please photograph it before disposing of the packaging.”

  • “Would you like assembly support for this item?”

  • “After placement, please pull out every chair and check the walkways.”

Chapter Summary

Good support carries on through delivery day, and preparation is what keeps it smooth. Before the truck arrives, the brand should remind the customer to check access, including lifts, stairs, corridors and tight corners, and to clear a path to the room. Telling people this in advance prevents the failed deliveries and last-minute surprises that frustrate everyone.

When the furniture arrives, the customer should inspect the packaging and the products before signing. A dented carton, a scratch or a missing part is far easier to deal with if it’s noticed on the spot. Photograph any damage straight away, and keep the packaging until the issue is fully resolved, since it can be needed as evidence.

Assembly should follow the product instructions exactly, in the order given and with the recommended tools. Once the pieces are built, position them first and style afterwards. Then repeat the clearance tests: pull out the chairs, open the drawers, swing the doors and walk past with a tray. Any problem shows up before the room is dressed, when it’s still easy to fix.

Chapter 35. After-Sales and Troubleshooting Workflow

After-Sales Support Builds Trust

A customer’s experience after purchase matters as much as the purchase itself. Once payment goes through, the shopper becomes someone who must live with the product every day, and that is when a brand’s promises are truly tested. Smooth delivery, clear care instructions and a fair, friendly response to any problem all shape how people remember the brand long after the sale. A table that arrives on time and holds up well builds quiet confidence, while a wobbly leg fixed quickly and politely builds even more. Good support therefore earns repeat customers and trusted recommendations.

A good after-sales workflow helps homeowners:

  • Identify the issue.

  • Understand whether it is a defect or a usage issue.

  • Find the right remedy.

  • Access spare parts.

  • Understand warranty and consumer guarantee rights.

  • Escalate calmly if needed.

Common Issue Triage

Issue

First check

Likely remedy

Wobbling table

Floor, legs, hardware, adjustable feet

Tighten hardware or use adjustable feet

Scratched floor

Chair glides, floor type, dragging

Replace glides and lift chairs

Chair does not fit

Apron height, seat height, width, arms

Replace chair or use elsewhere

Stool too high or low

Underside height, seat height, cushion compression

Choose a different seat height

Drawer catches

Level, swelling, runners, screws

Address humidity, alignment or hardware

Upholstery stain

Cleaning code, spill type

Blot and clean according to code

Fading

Sun exposure, finish, object placement

Use shading and rotate items

Extension sticks

Level, screws, swelling, runner alignment

Check hardware and humidity

Spare Parts Requests

Make spare parts easy to request.

Ask for:

  • Order number.

  • Product name.

  • Purchase date.

  • Part name or number.

  • Photos of the part.

  • A description of the issue.

Common spare parts include:

  • Screws.

  • Bolts.

  • Dowels.

  • Feet.

  • Glides.

  • Hinges.

  • Runners.

  • Extension parts.

  • Cushions.

  • Covers.

A retailer that supplies spare parts reduces unnecessary replacements.

Warranty and Consumer Guarantee Guidance

Explain the difference clearly.

  • A consumer guarantee is an automatic right under Australian Consumer Law.

  • A warranty is an additional promise made by the seller or manufacturer.

  • A warranty does not replace consumer guarantee rights.

Goods should be safe, durable, free from defects and fit for their intended purpose.

For a major problem, consumers may generally choose a replacement or refund.

For a minor problem, the business may first be entitled to repair or replace the product.

Repair Versus Replacement

Repair makes sense when:

  • The structure is sound.

  • The damage is cosmetic.

  • The material can be repaired.

  • The repair costs less than replacement.

  • The customer wants to keep the piece.

Replacement makes sense when:

  • The structure is failing.

  • The damage is extensive.

  • The product is unsafe.

  • The repair is not economical.

  • The product does not meet consumer guarantees.

Complaint Escalation

If the first response does not resolve the issue:

  • Keep all records.

  • Restate the request in writing.

  • Set a reasonable deadline.

  • Refer to the relevant consumer guarantee.

  • Contact the appropriate consumer protection agency if needed.

  • Avoid disposing of the product until the claim is resolved.

    A documented, calm complaint is more effective than an angry phone call.

Customer Service Scripts

  • “Can you send photos of the issue and your order number?”

  • “Have you checked whether the floor is level?”

  • “Have you tightened the visible hardware?”

  • “Can you confirm the apron height and chair seat height?”

  • “Can you confirm the underside height of the island overhang?”

  • “Please retain the packaging until we have resolved the issue.”

  • “Under Australian Consumer Law, you may be entitled to a repair, replacement or refund depending on the fault.”

After-Sales Workflow

  1. Customer contacts support.

  2. Support asks for order number and photos.

  3. Support identifies the issue.

  4. Support checks whether it is a product fault or usage issue.

  5. Retailer offers a remedy.

  6. If needed, retailer arranges spare parts, repair or replacement.

  7. Customer is informed of the next steps in writing.

  8. Issue is recorded for quality improvement.

Chapter Summary

Good after-sales support starts with quick, clear triage. When a customer reports a problem, the first job is to understand what has actually gone wrong: is it a wobble, a stain, a missing part or a genuine defect? Checking the most likely cause before offering a remedy saves time on both sides, because many issues turn out to be a loose bolt, an uneven floor or a cleaning product that didn’t suit the finish.

Make spare parts easy to request. A customer who is missing a screw or a glide shouldn’t have to fight for it, and a simple form with a photo upload keeps things fast.

Be transparent about the difference between consumer guarantees and warranties. Explain that the guarantees are automatic legal rights, while the warranty is an extra promise, so customers never feel their rights have been quietly reduced.

Then match the remedy to the fault: a repair for something minor, a replacement or refund where the problem is major. If a case needs to go higher, escalate calmly, keep written records of every step and stay courteous throughout.

Finally, treat every issue as feedback. Patterns in complaints show where a product, a description or a delivery process needs improving, and fixing those at the source means fewer problems for the next customer.

Appendices A–L

Appendix A. Dining Room Measurement Sheet

Appendix A.

Dining Room Measurement Sheet

Print or copy this page before shopping. Measure every wall, opening and fixed feature. Do not rely on memory or a floor plan alone.

The Room

Measurement

Value

Room length (longest wall)


Room width


Ceiling height


Usable dining-zone length


Usable dining-zone width


Wall-to-wall distance across the table direction


Doors, Windows and Fixed Features

Item

Position / notes

Front door: width, swing direction


Internal door 1: width, swing direction


Internal door 2: width, swing direction


Sliding door: width, travel path


Balcony or alfresco door


Windows: walls and direction


Power outlets


Light switches


Heaters


Air-conditioning vents


Built-in cabinetry


Kitchen island or bench


Pass-through or servery


Skirting boards or architraves


Traffic Routes

Route

Who uses it and how often

Kitchen to dining table


Dining table to bathroom or hallway


Entry to living area


Living area to balcony or outdoor area


Sideboard to dining table


Any route crossing the dining zone


Delivery Path

Checkpoint

Measurement / clear?

Street or driveway access


Front gate or pathway


Front porch


Narrowest front door opening


Hallway width


Stair width and landing


Lift door width


Lift cabin width, depth and height


Corridor corner or turn


Final room doorway


Product boxed dimensions


Product assembled dimensions

Appendix B. Clearance and Sizing Cheat Sheet

Appendix B.

Clearance and Sizing Cheat Sheet

These figures are practical planning references, not building regulations. Always verify the specific product and your own measurements.

What

Reference

Where to use it

Table edge per person

About 60 cm

Calculate seating capacity

Basic clearance around a table

About 90 cm

Pull out chairs and walk past

Passage behind seated guests

About 107–122 cm

Serve food or walk behind a seated person

Tight-space minimum

About 76 cm

Only as a last resort

Maximum table formula

Room dimension − (2 × clearance)

Calculate maximum table size

Standard dining table height

About 74–76 cm

Match dining chairs

Standard seat height

About 45–48 cm

Match dining table

Seat-to-underside gap

About 25–30 cm

Check knee clearance

Seat-to-tabletop gap

About 30 cm

Check forearm comfort

Pendant bottom above tabletop

About 75–90 cm

Hang dining lighting

Round fixture width

About 1/2–2/3 of table width

Size a round pendant

Linear fixture length

About 1/2–2/3 of table length

Size a linear pendant

Rug extension beyond table

About 60 cm standard; 45 cm tight minimum

Size a dining rug

Buffet or sideboard height

About 75–90 cm

Choose storage height

Appendix C. Dining Table Selection Worksheet

Appendix C.

Dining Table Selection Worksheet

Complete one worksheet for each table you are considering.

Question

Your answer

How many people eat together on a normal day?


How many guests do you need to seat occasionally?


What is the maximum table length your room allows?


What is the maximum table width your room allows?


Preferred shape: rectangular, round, square or oval?


Fixed, extendable, drop-leaf or folding?


Preferred tabletop material?


Preferred finish?


Preferred base type: four legs, pedestal, trestle or sled?


Does the apron allow enough knee room?


Does the table work with your chairs?


Does the extended table still leave adequate clearance?


Can the product enter through the delivery route?


What is the total cost including delivery and assembly?

Appendix D. Dining Chair and Bench Fit Worksheet

Appendix D.

Dining Chair and Bench Fit Worksheet

Complete one worksheet for each chair or bench you are considering.

Measurement

Table / chair A

Chair B

Table overall height


Table apron height from floor


Lowest obstruction beneath tabletop


Chair seat height


Seat-to-lowest-obstruction gap


Chair seat width


Chair overall width


Chair seat depth


Chair overall depth


Arm height, if applicable


Can arms clear the apron?


Can the chair tuck under the table?


Pull-out space required


Floor type


Required glides or felt pads


Appendix E. Bar Stool Measurement Worksheet

Appendix E.

Bar Stool Measurement Worksheet

Complete one worksheet for each island, bar or high table where stools will be used.

Measurement

Value

Island or bar height


Underside height of overhang


Overhang depth


Target stool seat height


Number of stools required


Available benchtop length


Width allowed per stool


Backrest required?


Footrest required?


Swivel required?


Adjustable height required?


Weight rating required


Floor type


Delivery route clear?


Height Matching Guide

Surface height

Typical stool seat height

Common name

About 86–91 cm

About 61–66 cm

Counter stool

About 102–107 cm

About 71–76 cm

Bar stool

About 112–119 cm

About 79–86 cm

Extra-tall stool

Appendix F. Buffet and Sideboard Planning Worksheet

Appendix F.

Buffet and Sideboard Planning Worksheet

Complete one worksheet for each buffet, sideboard or display cabinet you are considering.

Question

Your answer

Which wall will the cabinet stand against?


What is the available wall length?


What is the distance from the dining table?


What is the maximum cabinet width?


What is the maximum depth?


What is the maximum height?


Do drawers have enough extension space?


Do doors open without hitting furniture?


Does the cabinet block a walkway?


Is power access required?


Is cable management required?


Will the top be used for serving food?


Does the cabinet need anchoring?


What will be stored inside?

Appendix G. Product Comparison Template

Appendix G.

Product Comparison Template

Use one column for each product you are comparing.

Specification

Product 1

Product 2

Product 3

Product name


Price


Assembled dimensions


Boxed dimensions


Weight


Materials


Finish


Seat height


Apron height


Weight rating


Assembly requirements


Extension mechanism


Cleaning instructions


Warranty


Delivery terms


Return policy


Spare parts availability


Fit verdict


Appendix H. Quote and Purchase Comparison Template

Appendix H.

Quote and Purchase Comparison Template

Use this template to compare the real cost of ownership, not just the advertised price.

Item

Option 1

Option 2

Product price


Delivery cost


Assembly cost


Packaging removal


Return freight


Restocking fee


Rug pad or floor protectors


Extension leaves or spare parts


Expected maintenance


Warranty coverage


Expected lifespan


Total estimated cost


Consumer guarantee notes


Final verdict


Appendix I. Delivery and Installation Checklist

Appendix I.

Delivery and Installation Checklist

Before Delivery

  • Room measured wall by wall.

  • Doors, windows, heaters and built-ins marked.

  • Traffic routes identified.

  • Maximum table size calculated.

  • Delivery route measured.

  • Boxed dimensions checked.

  • Destination area cleared.

  • Floors protected.

  • Fragile items removed.

  • Assembly requirements confirmed.

On Delivery Day

  • Confirm number of boxes.

  • Inspect external packaging.

  • Photograph any damage.

  • Check hardware and instructions.

  • Unpack carefully.

  • Inspect visible surfaces.

  • Assemble according to sequence.

  • Install floor protectors.

  • Position the product.

  • Pull out every chair.

  • Open every drawer and door.

  • Check walkways.

  • Remove packaging only after acceptance.

Final Checks

  • The product fits the room.

  • The product is level.

  • The product is stable.

  • Chairs can be pulled out.

  • Doors and drawers open fully.

  • Walkways remain clear.

  • The product is protected from heat and harsh sun.

  • Any damage has been documented.

Appendix J. Maintenance Calendar

Appendix J.

Maintenance Calendar

Cadence

Tasks

After every meal

Clear crumbs; wipe spills promptly; remove damp cloths

Weekly

Damp-wipe table and chairs; vacuum rug and floor beneath it

Monthly

Tighten chair bolts and table hardware; check glides and covers

Seasonally

Re-oil or re-wax where required; deep-clean upholstery; rotate rugs

Yearly

Check felt pads, wobbles, splits, finish wear and extension mechanisms

Appendix K. Customer Service Scripts

Appendix K.

Customer Service Scripts

Before Purchase

  • “What are the room’s length, width and ceiling height?”

  • “Which walls have doors or windows?”

  • “How many people eat at the table on a normal day?”

  • “How often do you host guests?”

  • “Do you have children or pets?”

  • “Will the table be used for work or study?”

  • “What is the narrowest door or corridor on the delivery route?”

  • “Would you like a timber or fabric sample before ordering?”

Delivery and Installation

  • “Before delivery, please measure the narrowest door, hallway and lift on the route.”

  • “Please clear the destination area and protect floors along the delivery path.”

  • “Please inspect the packaging before signing for delivery.”

  • “If there is any damage, please photograph it before disposing of the packaging.”

  • “Would you like assembly support for this item?”

  • “After placement, please pull out every chair and check the walkways.”

After-Sales and Troubleshooting

  • “Can you send photos of the issue and your order number?”

  • “Have you checked whether the floor is level?”

  • “Have you tightened the visible hardware?”

  • “Can you confirm the apron height and chair seat height?”

  • “Can you confirm the underside height of the island overhang?”

  • “Please retain the packaging until we have resolved the issue.”

  • “Under Australian Consumer Law, you may be entitled to a repair, replacement or refund depending on the fault.”

Appendix L.

Official Reference Links

Use these official sources for current consumer rights, product safety and care information.

· ACCC — Consumer rights and guarantees: https://www.accc.gov.au/consumers/buying-products-and-services/consumer-rights-and-guarantees

· ACCC — Warranties: https://www.accc.gov.au/consumers/buying-products-and-services/warranties

· ACCC — Buying online: https://www.accc.gov.au/consumers/buying-products-and-services/buying-online

· ACCC — Repair, replace, refund, cancel: https://www.accc.gov.au/consumers/problem-with-a-product-or-service-you-bought/repair-replace-refund-cancel

· Product Safety Australia — Toppling furniture and televisions guide: https://www.productsafety.gov.au/consumers/be-safe-around-the-home/use-products-inside-the-home-safely/toppling-furniture-and-televisions-guide

· Product Safety Australia — Toppling furniture mandatory standard: https://www.productsafety.gov.au/business/search-mandatory-standards/toppling-furniture-mandatory-standard

· Australian Institute for the Conservation of Cultural Material — Wood and furniture care: https://aiccm.org.au/carer-guide/wood-and-furniture/

· Furntech — Chairs and AS/NZS 4610 information: https://www.furntech.org.au/

Important Note

These appendices are provided for general planning and inspiration. Measurements are practical references, not building standards. Always verify dimensions, materials, care requirements, installation instructions, delivery terms and consumer rights against the specific products and sellers you are considering. Consult qualified professionals for electrical, structural, gas, plumbing or major built-in work.

Found this useful?

Browse more free guides in our library or explore the latest articles.

Browse Library → Latest Articles